Introduction
Workbench dog holes are supposed to be standard. In practice, they are anything but: 19 mm on one bench, 20 mm on another, 3/4 inch on an older bench, and a hole that has worn slightly oval after years of use. Meanwhile bench dogs, holdfasts, and accessories come in their own sizes, and the dog that fits your friend’s bench wobbles in yours or will not go in at all.
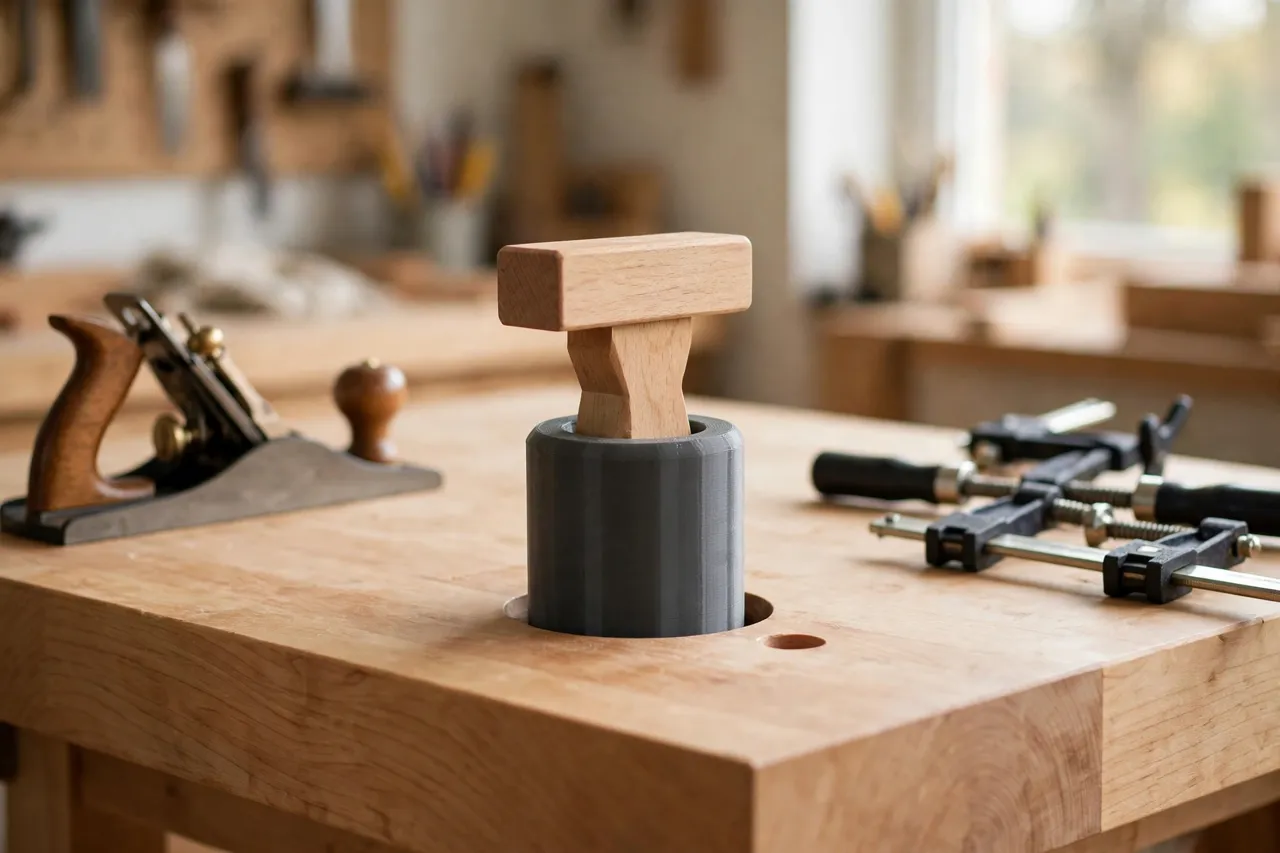
A 3D printed dog hole adapter sleeve solves the mismatch. It is a tube that lines a dog hole, reducing its diameter to match the accessory you own — or, in the other direction, a collar that lets an undersized dog sit true in a larger hole. It turns a bench with odd or worn holes into a bench that works with every accessory in the shop.
These sleeves are light-duty alignment aids. They locate dogs and accessories; they do not carry clamping force by themselves. When you clamp work hard against a bench dog, the force goes through the dog into the bench top, and the sleeve simply keeps the dog upright and centered. If a sleeve cracks or crushes under heavy clamping, that is a sign to use a properly sized dog, not a thicker sleeve.
What You Need
Dog holes are easy to measure but easy to get wrong, because a worn hole is not the size it started out as. Measure the hole as it is today.
Materials and tools
- A home 3D printer with a build area of roughly 100 mm in at least one direction
- PETG filament for a tougher sleeve, or PLA for a test fit
- The bench dogs, holdfasts, or accessories you want to fit, plus calipers
- A tape measure, a pencil, sandpaper or a file, and a mallet used gently
- A straightedge or square for checking that dogs sit upright
PETG is the better keeper: bench sleeves get knocked, leaned on, and left in workshops that swing from cold to warm.
Suggested print settings
- Layer height: 0.20 mm for a good balance of speed and fit; 0.16 mm if bores come out rough.
- Walls: 4 perimeters minimum, so the sleeve resists the sideways pressure of a clamped dog.
- Infill: 40 to 50 percent, grid or gyroid, for a sleeve that does not crush when a dog is levered against it.
- Top and bottom layers: 4 or more, for a flat flange that sits flush on the bench top.
- Orientation: Print with the sleeve axis vertical, so the bore prints roundest.
- Supports: Usually none for a simple sleeve; a flanged sleeve may need a brim for bed adhesion.
Print one test sleeve and check it in the real hole with the real dog before printing a full set for the bench.
Design Considerations
Dog hole sleeves come in a few useful forms. Match the form to your mismatch.
1. The reducing sleeve
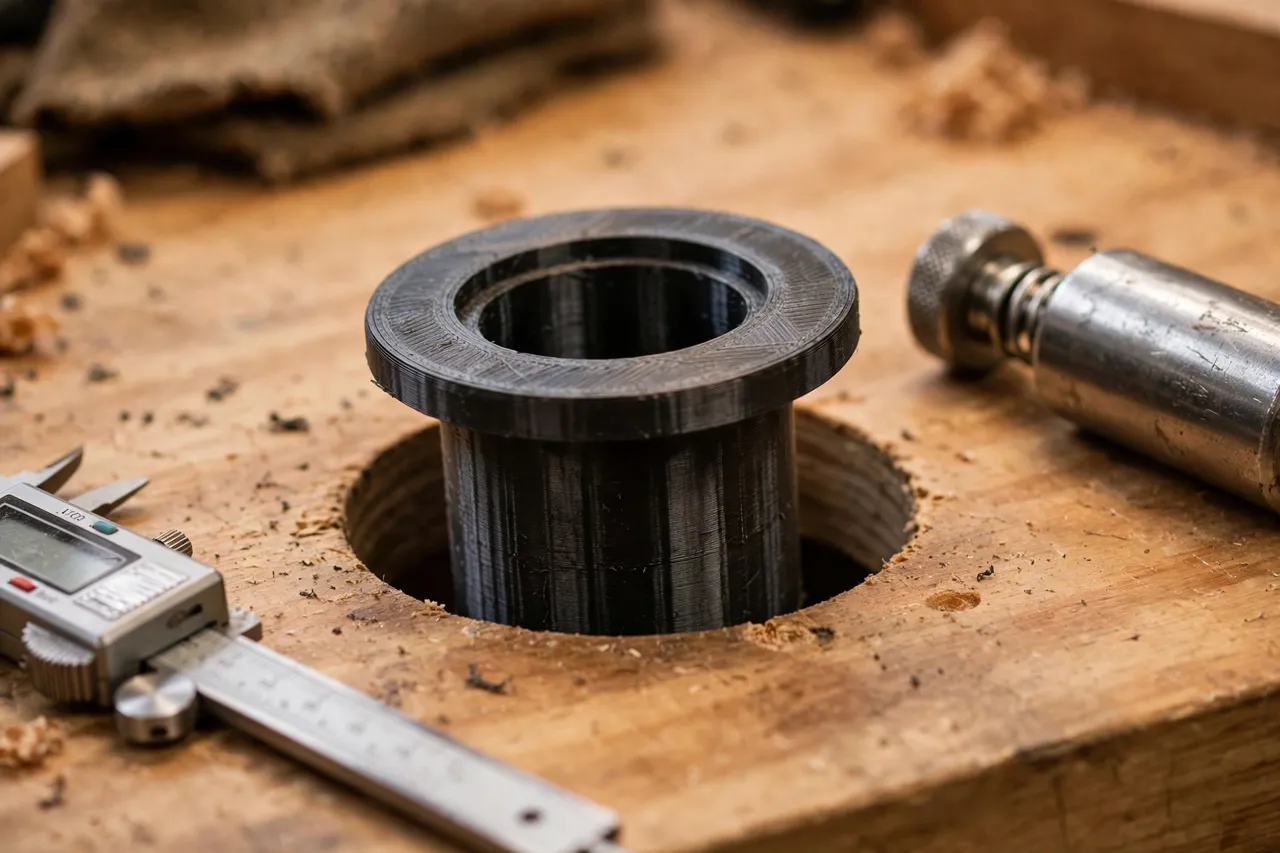
The most common adapter is a tube that lines an oversized hole and reduces it to the dog’s diameter. Measure the hole’s actual diameter — in several directions, since worn holes go oval — and the dog’s diameter, and model the sleeve wall to fill the difference. Give the inner bore about 0.2 to 0.3 mm of clearance so the dog slides in and out freely; a dog that sticks in its sleeve is worse than a dog that wobbles. Add a flange at the top so the sleeve cannot drop through the hole, and keep the sleeve length close to the bench top thickness so it is supported along its full length.
2. The collar for undersized dogs
When the dog is smaller than the hole, a collar around the dog’s shank brings it up to size. This is the reducing sleeve in reverse: the collar grips the dog and presents the hole’s diameter to the bench. Keep the collar short enough that the dog’s working height is unchanged, and add a small lip so the collar cannot slide down the dog’s shank during use.
3. The square-to-round adapter
Some benches have square dog holes and round dogs, or the reverse. A sleeve with a square outside and a round bore — or a round outside and a square bore — translates between the two. This design needs careful measurement of both shapes, and generous wall thickness at the corners, where the part is weakest. Keep the corners slightly rounded in the model to avoid stress concentrations.
4. The wear liner
A hole that has worn oval or chipped at the rim can be lined with a slightly oversized sleeve that restores a true round bore. For this, measure the hole’s largest diameter and model the sleeve to a snug press fit, with a flange to cover the chipped rim. A wear liner is a repair, not a miracle: if the bench top is cracked around the hole, the top needs proper repair first.
Step-by-Step: Printing and Assembly
- Measure every hole you plan to sleeve, in several directions, and measure each dog or accessory.
- Decide which sleeve type each hole needs — reducing sleeve, collar, square-to-round, or wear liner.
- Model the sleeve with realistic clearance for the dog and a flange to stop it dropping through.
- Print a test sleeve and check it in the real hole with the real dog, dry, before printing more.
- Clean it up. Sand the flange flat, clear the bore, and check the dog slides in and out freely.
- Adjust if needed. Too tight? Open the bore by 0.2 mm. Too loose? Shrink it and reprint.
- Print the full set in PETG, one sleeve per hole, plus a spare for the most-used size.
Mark sleeves by hole size with a paint pen if your bench has mixed hole sizes.
Step-by-Step: Using the Sleeves on the Bench
- Clean the dog holes. Brush out dust and chips so the sleeve seats fully and the flange sits flush.
- Press the sleeve into the hole by hand. It should go in with firm pressure, not a hammer blow — if it needs force, it is oversized.
- Check the flange sits flat on the bench top, with no rocking.
- Insert the dog and check it slides freely and stands upright, not tilted.
- Clamp a test board against the dog and check the dog stays upright and the board does not creep.
- Check the dog’s working height is unchanged, or adjust your technique if the flange has raised it slightly.
- Repeat for the other holes, keeping the same sleeve design across a row so dogs are interchangeable along the bench.
Remove sleeves when you need the full hole size again — that is the point of an adapter, not a permanent modification.
Tips for Better Results
- Measure worn holes honestly. A hole that started at 20 mm and now measures 21 mm in one direction needs a sleeve sized to 21 mm, not to the original drawing.
- Keep bores smooth. Sand the inside of the sleeve so dogs slide freely and do not pick up plastic shavings.
- Use flanges generously. A wide flange spreads load, covers chipped rims, and stops the sleeve dropping through.
- Print spares. Sleeves are small and cheap; a spare set in a drawer saves a reprint mid-project.
- Match sleeves across a row. Dogs should be interchangeable along a row of holes, or clamping setups become a puzzle.
Common Mistakes to Avoid
- Designing from the bench plan instead of the bench. Plans say 20 mm; ten years of use says otherwise. Measure the bench in front of you.
- Making the bore too tight. A dog that sticks is a dog you will curse. Clearance of 0.2 to 0.3 mm is not sloppy — it is working clearance.
- Forgetting the flange. A sleeve without a flange drops through the hole at the worst moment, usually mid-clamp.
- Sleeving a cracked bench top. If the top is cracked around the hole, a sleeve hides the damage while it gets worse. Repair the top first.
- Using sleeves as structural parts. A sleeve locates a dog; it does not replace a dog. If a sleeve crushes under clamping, use a properly sized dog.
Care, Storage, and When to Choose an Alternative
Brush out sleeves when you clean the bench, and check them for cracks around the flange and bore. A cracked sleeve is a quick reprint from a proven file. Store spare sleeves in a drawer or hung on a peg, labeled by size.
Sometimes the right answer is a new dog, not a sleeve. If you use one accessory all day, every day, buy it in your bench’s actual hole size — a dedicated dog is stronger and simpler than a sleeved one. Sleeves earn their place when you own several accessories in different sizes, when holes have worn unevenly, or when you borrow accessories between benches. For the wider bench setup, our guide “3D Printed Bench Dog Hole Drilling Template: Evenly Spaced Dog Holes, First Try” covers drilling new holes correctly, and “3D Printed Holdfast Pads for Workbenches: Protect Work Under Holdfasts” protects the work those dogs hold.
FAQ
Will a sleeve weaken the holding power of a bench dog?
No, if the sleeve fits well. Clamping force goes through the dog into the bench top; the sleeve only keeps the dog upright and centered. A loose or crushed sleeve is the only case where holding suffers, and that means the sleeve is the wrong size.
Can I use a sleeve with a holdfast?
Yes, with care. Holdfasts wedge by springing against the hole walls, so the sleeve must be a snug fit in the hole and strong enough not to crush. Use PETG with generous walls and infill, and test the holdfast’s grip before relying on it.
My dog still tilts in the sleeve. What is wrong?
Usually the sleeve is too short for the bench top thickness, so the dog pivots inside it. Make the sleeve as long as the top is thick, and check the bore is not oversized. A dog that tilts in a full-length, well-sized sleeve may itself be bent.
Can I sleeve a square dog hole for a round dog?
Yes, with the square-to-round adapter design. Measure both shapes carefully, keep the walls thick at the corners, and test the fit before printing a full set.
Conclusion
A bench with mismatched or worn dog holes does not need rebuilding, and a drawer of odd-sized dogs does not need replacing. A set of printed sleeves, measured to the holes and dogs you actually own, makes every accessory work on every hole — quietly, cheaply, and without modifying the bench itself. Measure honestly, keep the bore free, flange the top, and test with a real clamping job.
Sleeve the holes, and the bench you already have becomes the bench every accessory fits.