Introduction
If there is one tool that vanishes more often than any other, it is the tape measure. It lives in a pocket, then a toolbox, then a drawer, then on top of a project pile — and when you need it, you spend five minutes hunting for a tool you use on nearly every job. Most workshops own three or four tape measures precisely because the first two are always missing.
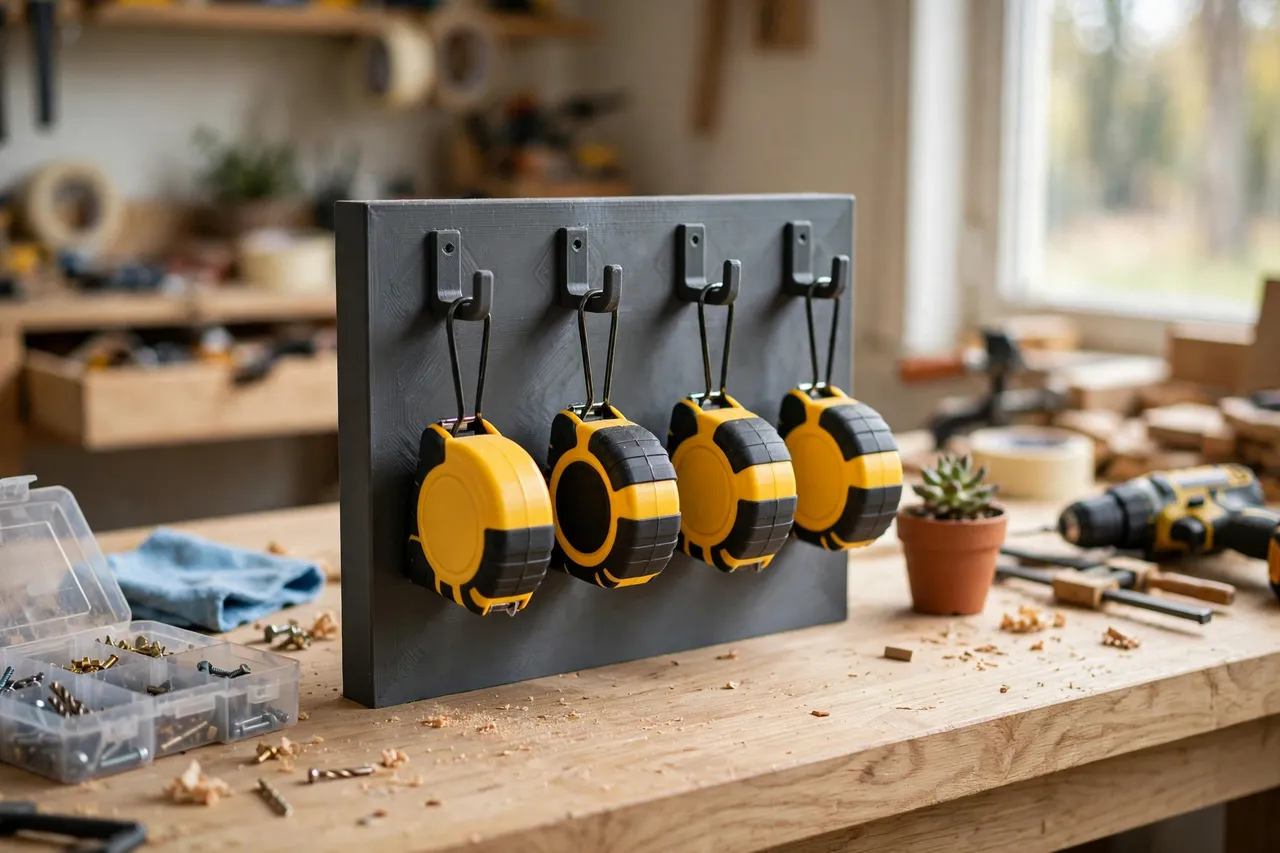
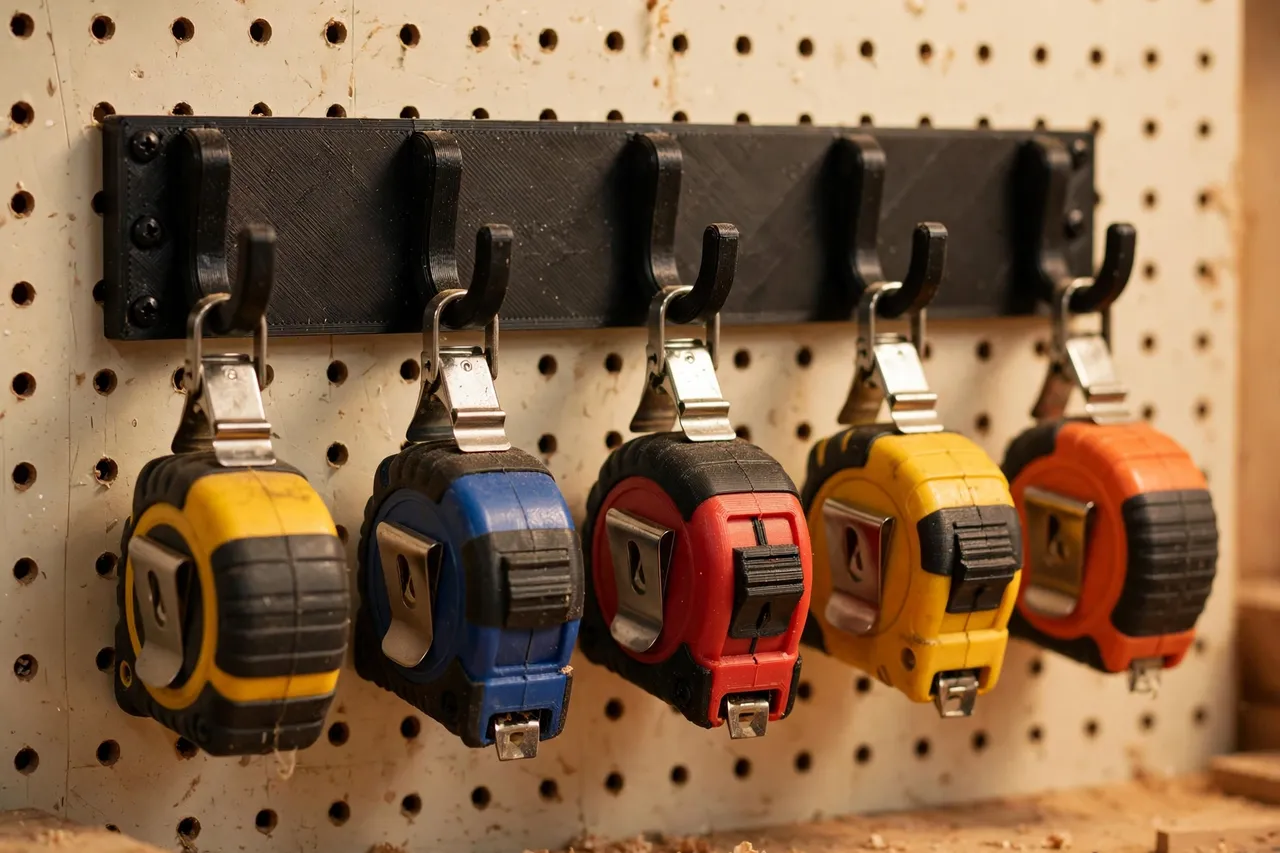
A 3D printed tape measure rack ends the hunt by giving every measure one hook, hung by its belt clip in a row near the bench. You see them all at once, grab one on the way to a job, and hang it back in the same spot when you return. Because you print it, you can space the hooks for your actual measures — chunky 8-meter cases, slim pocket measures, and a long surveyor’s tape all hang differently, and a generic hook row rarely fits them all.
This guide covers a light-duty wall or bench rack for ordinary tape measures. It is storage only: it does not extend, lock, or calibrate a measure, and it carries no load beyond a few cased measures. The same hung-in-a-row idea works for other clipped tools, as in “3D Printed Pliers Rack: Pliers Hung in a Row” and “3D Printed Scissor Rack: Scissors Hung and Ready.”
What You Need
Tape measures are light and compact, so this is an easy print — but hook and clip fit matters, since belt clips vary by brand.
Materials and tools
- A home 3D printer with a build area of roughly 180 mm in at least one direction
- PLA filament for an indoor rack, or PETG for a warm garage
- Every tape measure you want to store, for measuring case size and belt-clip width
- A tape measure or calipers and a pencil
- A wall screw and wall plug if you plan to hang the rack
- Sandpaper or a small file for cleanup
PLA is fine for tape measures, which are light. Choose PETG if the rack will live in a hot garage or get daily hard use.
Suggested print settings
- Layer height: 0.20 mm, or 0.24 mm for a faster print on chunky hooks.
- Walls: 3 to 4 perimeters, especially on hooks that carry a measure’s weight.
- Infill: 25 to 40 percent, grid or gyroid.
- Top and bottom layers: 4 or more, for a flat back plate.
- Orientation: Print the back plate flat, with hooks upright where possible.
- Supports: Keep hook curves gentle so the rack prints support-free.
Print one test hook and try it with your widest and narrowest belt clips before printing the whole rack.
Design Considerations
A tape measure rack is really a belt-clip rack, and belt clips are the variable part.
1. Hooks sized to belt clips
Most tape measures have a metal belt clip on the back of the case, and that clip is what the rack hooks. Measure the clip width and the gap between the clip and the case for each measure you own — they vary more than the cases themselves. The rack hook should be wide enough for the widest clip, with a gap that lets the clip slide on easily but not so loose that the measure falls off when bumped. A hook with a slight upward curl at the end holds the clip securely while still releasing with a simple lift. If a measure has no belt clip, give it a small cradle or a loop hook instead rather than forcing it onto a clip hook.
2. Spacing for cases
Tape measure cases are chunky, so spacing matters more than for slim tools. Give each measure at least 50 to 60 mm of horizontal room, more for wide 8-meter cases, so cases do not knock when you take one down. If you own a very large measure, give it an end position with extra clearance. Group measures by length if you like — short pocket measures together, long measures together — so you can grab the right length without reading every case.
3. Wall or bench, near the action
A wall rack by the door of the workshop, or beside your main bench, is ideal: you grab a measure on the way to a job and return it on the way back. That doorway position is what breaks the pocket-to-drawer cycle, because the rack is on the path you already walk. A bench rack suits a single workstation where measures never leave the bench. Either way, place the rack where measuring happens, not in a storage corner.
4. A spare hook, always
Tape measures multiply. Leave at least one spare hook in the design, because the next measure you buy — and you will buy one — needs a home on day one, or it starts the drawer pile all over again. A spare hook costs nothing in print time and saves the whole system.
Step-by-Step: Printing and Assembly
- Gather every tape measure you own. Check pockets, toolboxes, aprons, and the car, so the rack fits the real collection.
- Measure each one: case width and thickness, belt-clip width, and the gap between clip and case.
- Choose wall or bench and sketch the layout with spacing that keeps cases apart.
- Model the rack: a back plate with mounting holes for a wall version, hooks sized to your clips, and a spare hook.
- Print a test hook and check it with your widest and narrowest clips.
- Adjust if needed. A hook that is too tight will not accept a clip; one that is too loose drops measures. Adjust and retest.
- Print the full rack and clean it up. Sand hook ends smooth so they do not scratch cases or snag clips.
- Mount or place the rack level and solid, in its doorway or bench position, then load measures by their clips.
A test hook takes minutes and is the difference between a rack that holds and a rack that drops.
Step-by-Step: Using It
- Hang each measure by its belt clip on its own hook. One measure per hook, cases hanging free.
- Grab by the case, lift up and off the hook. Do not yank sideways, which bends hooks over time.
- Return the measure right after the job, not at the end of the day. The doorway rack works because the return trip passes it — use that habit.
- Keep the working measure on the rack, not in your pocket overnight. Pockets are where measures go missing. The rack is home; the pocket is transit.
- Check clips occasionally. A bent belt clip will not hang securely. Straighten or replace a damaged clip rather than blaming the rack.
- Retire dead measures promptly. A measure with a broken lock, a kinked blade, or a unreadable scale should leave the rack, freeing its hook for a working replacement.
After a month of doorway returns, you will notice something odd: you always know where the tape measure is. That alone justifies the print.
Tips for Better Results
- Keep a pencil with the rack. Measuring without a pencil to mark with is half a job, and a pencil cup beside the rack completes the station.
- Label hooks by length. A 3-meter, a 5-meter, and an 8-meter measure look alike from across the room; labels save a closer look.
- Add a small hook for a spare pencil or a marking knife. The measuring station is a natural home for the tools that go with measuring.
- Do not overload a hook. One measure per hook hangs securely; two measures on one hook tangle clips and fall.
- Test on scrap first. When measuring for a cut, mark and test on an offcut before cutting the finished piece — a measure that reads right still needs a careful mark.
Common Mistakes to Avoid
- Sizing hooks from one measure only. Belt clips vary by brand. Measure them all, and size for the widest.
- Crowding cases. Cases that knock together scuff and make removal awkward. Space generously.
- Mounting the rack where you never walk past it. A rack in a back corner will not break the pocket habit. Put it on your path.
- Hanging measures by their blades or lanyards. Belt clips are the designed hanging point. Blades and lanyards slip, tangle, and damage the measure.
- Letting dead measures clog the rack. A broken measure on a hook is a working measure without a home. Retire it.
Care, Storage, and When to Choose an Alternative
Dust the rack occasionally, check hooks for cracks, and reprint a hook section if one shows wear. Keep PLA racks out of direct heat. If you carry measures to job sites daily, a belt holster or a tool-belt loop remains the right mobile solution — the rack is home base, not a replacement for carrying a measure on the job.
For a home workshop where measures live in one place and get used on nearly every project, a printed clip rack by the bench or doorway is a small print with a large daily payoff — and it sits naturally alongside the wider organization in “3D Printed Pencil Cup Rack: Cups for Pencils and Markers.”
FAQ
Will one rack fit different brands of tape measures?
Yes, if you size hooks for the widest belt clip and space cases generously. Most clips are similar, but measuring your own set avoids surprises.
Should measures hang by the clip or sit in a cradle?
By the clip is simplest and fastest, and it is how measures are designed to hang. A cradle suits a measure with no clip, but clip hooks are the default.
Is PLA strong enough for a tape measure rack?
Yes, for ordinary cased measures, with 3 to 4 walls and sensible hooks. PETG is the better choice for a hot garage.
What if I buy a new measure later?
Leave a spare hook in the design and keep the model file. Adding a hook or a small extension rack is a quick job.
Conclusion
The tape measure hunt is a solved problem once every measure has a hook on your path. Print a rack sized to your clips, hang it by the bench or doorway, and make returning the measure part of coming back from a job.
It is a tiny project with a daily return: the measure is always where you left it, because you always leave it in the same place.