Introduction
Safety glasses only protect you when they are on your face, and they only get on your face when they are easy to find. In most workshops they are anywhere but: buried under sandpaper on the bench, dangling off a nail by one arm, or sitting lens-down on a shelf slowly collecting scratches exactly where you need to see through.
Scratched, dusty glasses get skipped. That is the quiet pattern every woodworker recognizes — the quick cut that “only takes a second,” done with the glasses still lost somewhere in the shop. The problem is rarely attitude; it is storage. A thing with no home ends up anywhere, and anywhere is never where you are standing.
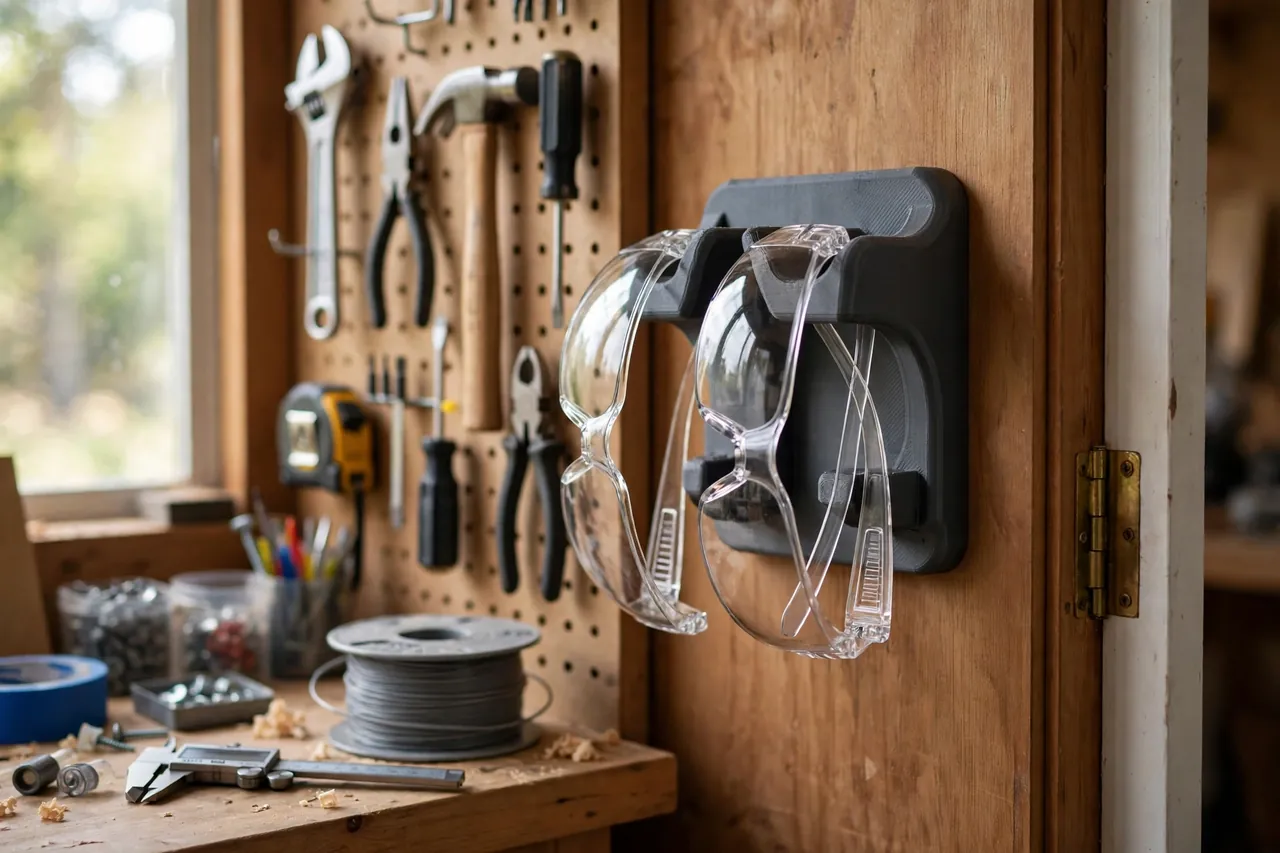
A 3D printed safety glasses holder gives eye protection a fixed, visible home. Mount one by the door and one at the bench, and a clean pair waits at eye level exactly where you enter and where you work. The glasses rest lens-up in a smooth cradle, off the surfaces that scratch them.
This guide covers designing, printing, and mounting a holder that suits your glasses. It is a simple storage cradle — it holds finished eyewear at rest — and its whole job is making the safe habit the easy habit.
What You Need
The holder is a small cradle with a mounting back, sized to print quickly and in multiples.
Materials and tools
- A home 3D printer with a build area of roughly 150 mm in at least one direction
- PLA filament is ideal here for crisp detail, or PETG for a holder in a rough garage spot
- Your actual safety glasses, including any spare or over-glasses pair, for measuring
- Calipers or a ruler for frame width and folded thickness
- A small file or sandpaper for smoothing the cradle channel
- Wall screws, pegboard hooks, or strong adhesive pads, depending on mounting
- Optional soft self-adhesive felt strip for the cradle floor
Glasses holders live indoors and carry grams, so PLA is a perfectly good keeper and prints the smoothest cradle. PETG earns its place only if the holder will be knocked about near a busy doorway.
Suggested print settings
- Layer height: 0.20 mm, or 0.16 mm if the cradle curve shows steps.
- Walls: At least 3 perimeters — the cradle arms take daily small flexes.
- Infill: 20 percent, grid or gyroid; this is a light holder, not a loaded part.
- Top and bottom layers: 4 or more, so the cradle floor is smooth against the frame.
- Orientation: Print the holder on its back, cradle opening upward, for a clean channel.
- Supports: A gently sloped cradle needs none; avoid steep overhangs in the design.
Print one test holder first and check your largest pair of glasses in it before printing a row of them.

Design Considerations
You can model the holder in any basic CAD program. It is a short channel with side cheeks and a mounting back — the details that matter are clearance and lens clearance.
1. A cradle that never touches the lens
The golden rule: the holder contacts the frame, never the lens. Design a channel that supports the glasses by the bridge and the folded arms, with the lenses facing up and clear of every surface. A shallow U-channel around 55 to 65 mm wide suits most frames, but measure yours — over-glasses styles are notably wider and thicker when folded.
2. Slip fit with a gentle hold
Aim for about 0.5 to 1 mm of clearance around the folded frame. The glasses should drop in and lift out with one hand, without rattling loosely. Slightly raised side cheeks — 20 to 30 mm tall — stop a bumped holder from shedding its pair onto the floor, while a wide open front keeps the grab effortless.
3. Room for the arms and strap
Folded arms add thickness behind the frame, and some glasses wear a retention strap. Leave a slot or extra depth at the back of the cradle so arms fold naturally and a strap can drape without pushing the glasses out of the channel. Test with the strap fitted if you use one.
4. Mounting where habits form
Design the back for the spot you chose: screw holes for a stud or door frame, hook slots for pegboard, or a flat pad for adhesive mounting on smooth surfaces. One holder by the entry and one at the main bench covers most workshops. Visitors and spare pairs deserve a holder too — a guest pair that lives by the door gets worn; a guest pair in a drawer does not.
Step-by-Step: Printing and Assembly
- Measure your glasses folded — frame width, folded thickness, and the widest pair you own.
- Model the cradle as a lens-clear channel with side cheeks and your chosen mounting back.
- Print a test holder and seat every pair you own in it, checking lens clearance all round.
- Adjust if needed. A tight channel gets 0.5 mm more width; a rattly fit gets a felt strip instead.
- Print the keepers — at least two, one for the door and one for the bench.
- Smooth the channel. Ease any layer-line ridges that could rub a frame, and add felt if you like.
- Mount at eye level where you naturally pause — beside the door switch or above the bench edge.
A row of three holders — yours, spares, and a guest pair — prints in an evening and covers a small workshop completely.
Step-by-Step: Using the Holder
- Park glasses on entry and exit. The holder by the door is where they come off and go on.
- Set them in lens-up, frame resting in the channel, arms folded the way you tested.
- Keep one pair per holder. Stacking two pairs in one cradle guarantees scratches on both.
- Wipe before parking. A quick shake and a soft cloth keeps bench dust out of the channel.
- Check the channel weekly. Grit in the cradle floor is sandpaper for frames; brush it out.
- Replace tired glasses promptly. A cloudy, scratched pair in the holder quietly teaches skipping; fresh pairs are cheap.
- Give spares their own spot. Spare and guest pairs in their own holders stay clean and findable.
The system works because it removes decisions: glasses live in exactly two places — on your face, or in a holder.
Tips for Better Results
- Print holders in bright orange. A vivid holder is findable at a glance and quietly reminds you the pair exists.
- Mount the door holder at eye height, not down by the tools — visibility is the entire point.
- Add a second cradle for sunglasses-style tinted pairs if you work outdoors, so both live together.
- Label guest holders with a paint pen so visitors know the pair is for them.
- Keep a microfiber cloth in a holder’s side slot if your design allows, so cleaning takes seconds.
Common Mistakes to Avoid
- A channel that rubs the lens. Any lens contact in storage undoes the point; widen the cradle and re-check.
- One holder for the whole shop. A single distant holder loses to convenience; door plus bench is the minimum system.
- Stacking pairs together. Two pairs in one cradle scratch each other on every removal.
- Mounting too low or behind clutter. A hidden holder is the same as no holder within a week.
- Sizing from a photo. Frames vary hugely; measure the glasses you actually wear, including over-glasses pairs.
Care, Storage, and When to Choose an Alternative
Brush the cradle out regularly, wash the holder with warm soapy water if it gets grimy, and check mounting screws once in a while — a holder that wobbles gets ignored. Glasses themselves should be rinsed and dried with a soft cloth rather than a shop rag, and stored in the holder rather than on any flat surface the workshop offers.
If your glasses came with a good hard case and you genuinely use it every time, that system already works. Commercial wall dispensers also exist for shops hosting many visitors. The printed holder wins on fit and placement: it matches your frames, mounts anywhere, and multiplies cheaply. It also sits happily beside the wider wall system in our related guide, “Pegboard Tool Holders: 3D Print a Complete Organizer Set for Screwdrivers, Pliers and Wrenches,” so protection and tools share one tidy wall.

FAQ
Will the plastic scratch my lenses?
Not if the design follows the one rule that matters: the cradle touches the frame only, with the lens clear of all surfaces. Smooth the channel, add a felt strip if you like, and keep grit brushed out of the cradle floor.
How many holders do I actually need?
Two is the working minimum — one where you enter the workshop, one where you do most cutting and sanding. Add one per spare or guest pair. They print fast, so err on the side of more homes rather than fewer.
Can the holder take glasses with a strap or a cord?
Yes, with a deeper channel or a relief slot at the back for the folded arms and strap. Model and test with the strap fitted, since a strap pushing against a shallow back is the usual cause of glasses creeping out.
What about prescription safety glasses?
The same holder works — measure the folded frame exactly as you would any pair. Given their cost, prescription pairs especially deserve a lens-clear cradle instead of a bench corner.
Conclusion
Eye protection fails at the storage step, not the wearing step. A printed holder at the door and the bench makes a clean, unscratched pair the easiest thing to grab in the whole workshop.
Measure your frames, print a pair of holders, and mount them where your eyes already look. The habit takes a week to form and then runs itself.
For the rest of the same wall, you may also enjoy our related guide, “French Cleat Tool Holders: 3D Print a Full Set of Cleat Mounts for a Flexible Tool Wall,” which lets holders like this one move anywhere your layout changes.