Introduction
Levels are precision tools that usually live like lumber. They lean in a corner slowly sliding down the wall, lie under a bench collecting knocks, or hang off a single nail by one end hole. Every bang risks the one thing a level cannot afford to lose: its accuracy. And when you need the long level, it is somehow always behind the ladder.
Single-point hanging is its own quiet problem. A level dangling from one end swings, knocks the wall and anything near it, and puts constant one-sided stress on a tool whose whole job is being straight. Corner-leaning is worse — the slow slide and clatter onto concrete eventually happens to every level stored that way.
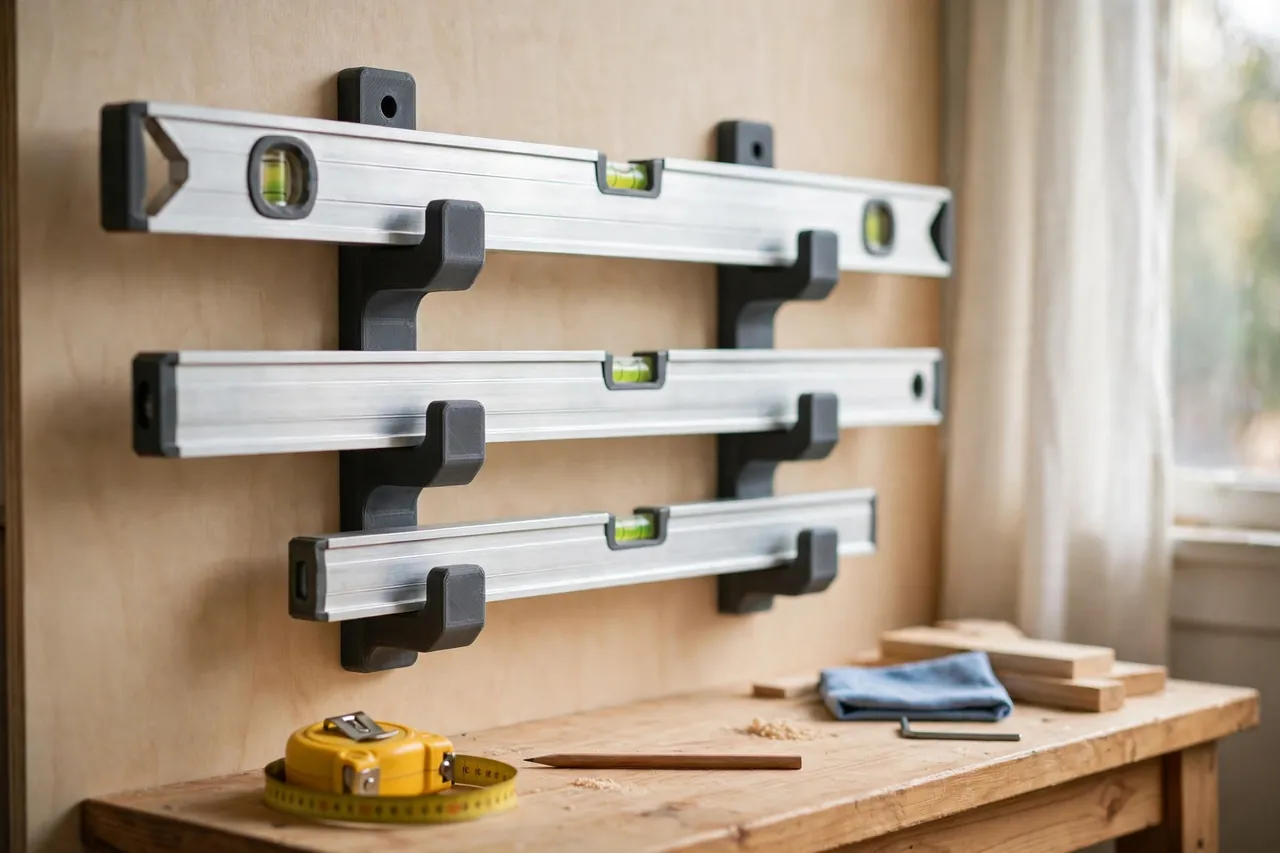
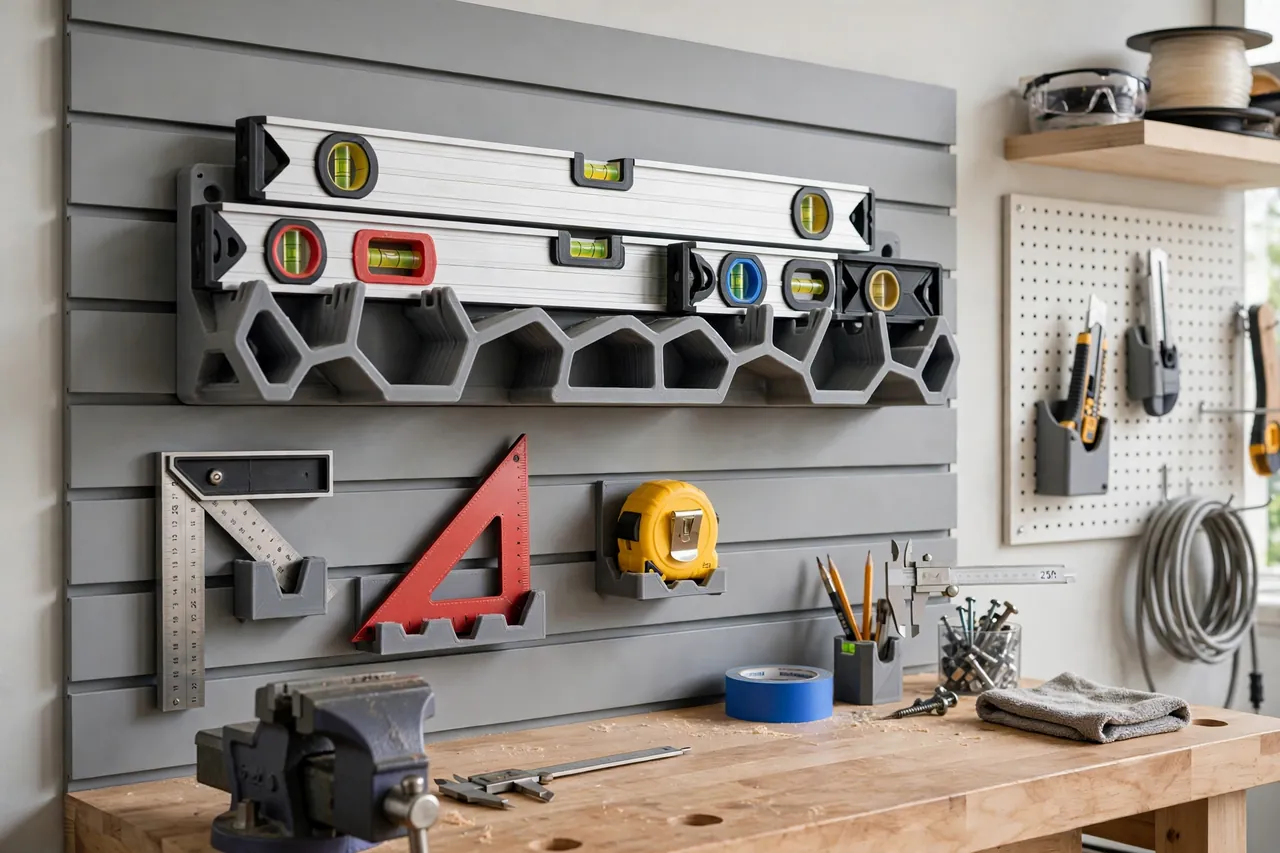
A 3D printed level rack stores each level flat against the wall on two matched brackets. The level rests horizontally, supported at two points, edges protected in shallow channels, with its full length visible. Your 600, 1200, and 1800 mm levels line up like library books — grab one, use it, park it back in five seconds.
This guide covers designing, printing, and mounting bracket pairs sized to your levels. These are storage brackets holding tools at rest on a wall — a modest job, honestly framed — and doing it properly is what keeps a level trustworthy for years.
What You Need
The rack is a set of identical bracket pairs with padded channels, printed in multiples to match your levels.
Materials and tools
- A home 3D printer with a build area of roughly 150 mm in at least one direction
- PETG filament for brackets with a little flex and knock resistance, or PLA for a calm indoor wall
- Your actual levels, every length you plan to store, for frame measurements
- Calipers or a tape measure for level frame width and thickness
- A small file or sandpaper, plus optional self-adhesive felt for channel padding
- Wall screws into studs or proper fixings, a drill, and a long level itself for marking the line
- A stud finder if your wall construction calls for one
PETG is the better keeper for brackets: they get clipped by passing tools and flexed by hurried parking, and PETG takes both. PLA prints a fine test pair and serves on a wall where nothing else travels past.
Suggested print settings
- Layer height: 0.20 mm is plenty for wall brackets.
- Walls: At least 4 perimeters — the channel cheeks take the knocks.
- Infill: 35 to 45 percent, grid or gyroid; brackets work in pairs and should feel unyielding.
- Top and bottom layers: 4 or more, for a flat mounting face that sits flush.
- Orientation: Print brackets upright as they will mount, channel opening upward.
- Supports: A simple open channel needs none; avoid enclosed shapes in the design.
Print one test bracket first, seat your heaviest level in it, and check the channel fit before printing pairs.

Design Considerations
You can model these brackets in any basic CAD program. Each bracket is a wall plate with a shallow channel; the pair spacing and channel fit carry the design.
1. A channel fitted to the frame
Levels differ: box-section frames, I-beam frames, wide and narrow faces. Measure the frame of each level you will store — typically the channel needs the level’s thickness plus about 0.5 to 1 mm of clearance, wide enough to accept the frame without forcing and snug enough that the level cannot rattle. A channel depth of roughly half the frame’s width holds the level securely while keeping removal a simple lift.
2. Two brackets, widely spaced
Support each level at two points, spaced at about half to two-thirds of its length apart — for a 1200 mm level, brackets around 700 to 800 mm apart. Wide spacing keeps the level flat, stops the ends drooping or levering, and shares the parking knocks between two brackets. Very long levels can take a third bracket in the middle; short torpedo levels need only a close pair.
3. Protect the measuring edges
A level’s accuracy lives on its milled faces. Line the channel floor with a strip of self-adhesive felt, or design a shallow recess that accepts a felt or cork pad, so the frame rests on something softer than bare printed plastic. Round every channel lip: the level slides in at a slight angle in daily use, and a sharp lip is what shaves and dings frames over time.
4. Honest wall fixing
A rack of levels is not heavy, but it is long, levered, and grabbed daily. Each bracket gets at least two screws, and brackets go into studs or proper wall fixings — printed plastic is the bracket, never the anchor. Keep the framing straight: these brackets store measuring tools at rest; they are not steps, handles, or shelf supports, and should never be asked to carry a person or a loaded board.
Step-by-Step: Printing and Assembly
- Measure every level — frame thickness and width for each, and note the heaviest one.
- Model the bracket with its channel, felt recess, and two mounting holes.
- Print a test bracket and seat the heaviest level; it should rest snugly, lift out cleanly, and show no bracket flex.
- Adjust if needed. A binding channel gains 0.3 to 0.5 mm; a rattling fit gets felt rather than a narrower reprint.
- Print the pairs in PETG — one pair per level, plus a spare pair for the level you will inevitably buy.
- Line the channels with felt, pressed firmly into the recesses.
- Mark a level line on the wall — using your longest level, fittingly — and fix each pair at matching heights.
Mount the longest level’s pair first and hang it; its line becomes the visual reference for the rows above or below it.
Step-by-Step: Using the Rack
- Park levels horizontally, resting in both brackets, measuring faces against the felt, never balanced on one bracket alone.
- Store longest at the bottom if you stack rows, so lifting a heavy level never happens over your head height.
- Keep one level per pair. Two levels wedged into one pair of brackets ding each other’s frames.
- Return the level after the job, wiped of dust and mortar spots, so grit never grinds in the channel.
- Check new levels for fit before assuming the pair suits them; a different frame profile may want its own bracket width.
- Verify accuracy occasionally. A stored level flipped end-for-end against its own reading tells you whether the wall has been kind to it.
Within weeks the wall becomes a measuring station: levels in a row, visible, straight, and each one trusted because you know exactly how it has been treated.
Tips for Better Results
- Space rows generously. Levels in parallel rows need enough vertical gap to lift out without clipping the row above.
- Color-code bracket pairs if different family members own different levels — or simply by length for fast grabs.
- Mount near the door if levels travel to other rooms often; the best rack is the one on the route out.
- Add end-stop cheeks on one bracket of each pair, so a level parked slightly askew still registers against a stop.
- Use the spare pair for the straightedge or long ruler that otherwise leans in the same corner.
Common Mistakes to Avoid
- One bracket per level. Single-point storage recreates the swinging nail problem in printed form; pairs are the design.
- Brackets spaced too close. A long level on a close pair can lever itself out when knocked; spread the support wide.
- Channels sized from a catalogue listing. Frame profiles vary by brand and era; measure the levels on your wall.
- Fixing into weak wall material alone. A falling level damages itself and whatever it lands on; use studs or real fixings.
- Bare sharp channel lips. Unrounded edges slowly shave the very faces the level measures with.
Care, Storage, and When to Choose an Alternative
Brush dust out of the channels monthly, replace felt pads when they compress flat, and check bracket screws seasonally. If a bracket cheek ever cracks, reprint the single bracket — pairs do not both need replacing. Keep the rack’s wall dry and ordinary; levels themselves dislike being stored anywhere steamy or where temperature swings are extreme.
If you own one short level, a single stout hook honestly suffices. Commercial metal level racks exist for trade sites and take harder knocks. The printed pair wins at home because it matches your levels’ frame profiles exactly and multiplies for pennies. For the rails your other hand tools live on, see our related guide, “3D Printed Wrench and Pliers Rail: Wall-Mounted Hand Tool Storage You Can Customize,” which uses the same fitted-channel thinking.
FAQ
How far apart should the two brackets be?
Around half to two-thirds of the level’s length. Enough spread that the level cannot seesaw or lever out, while the overhanging ends stay short. When in doubt, wider is kinder than narrower.
Will plastic brackets hold a heavy 1800 mm level?
Paired brackets in PETG at the suggested settings handle home levels comfortably, provided the screws go into studs or proper fixings. The plastic carries a resting tool’s weight in a cradled channel — a light, static load it is well suited to.
Can one rack store different frame styles?
Only if the channels fit them. A box-frame and an I-beam level rarely share a channel happily. Print pairs matched to each profile; brackets are small and cheap, and a proper fit is what protects the faces.
Should levels be stored flat on a shelf instead?
Flat on a clean shelf is acceptable, but shelves invite stacking and burying. The wall rack keeps levels separated, visible, and off every work surface — which is why most find their way onto the wall eventually.
Conclusion
A level’s accuracy is a habit of storage as much as a fact of manufacture. Two fitted brackets, felt-lined and widely spaced, keep long levels flat, protected, and instantly findable — and a level treated that way keeps telling the truth.
Measure your frames, print a test bracket, and give your longest level the first pair. The leaning corner can retire.
Its natural wall-mates are covered in our related guide, “3D Printed Square Rack: A Home for Speed Squares and Combination Squares,” and for a fully rearrangeable tool wall, you may also enjoy “French Cleat Tool Holders: 3D Print a Full Set of Cleat Mounts for a Flexible Tool Wall,” which lets racks like this one move as your layout evolves.