Introduction
Squares are the tools you reach for fifty times a project — and the tools most often found under offcuts, in the wrong drawer, or hanging off the bench edge by their fence. A speed square is chunky enough to survive the chaos. A combination square, with its sliding ruler and small cast head, is not: it comes back with a burred edge or a head knocked out of true.
Flat storage causes its own trouble. Squares stacked in a drawer slide against each other every time the drawer opens, edges kissing edges, and the thin ruler of a combination square picks up the little bends that turn a precision instrument into an approximation. Then every “square” cut inherits the error.
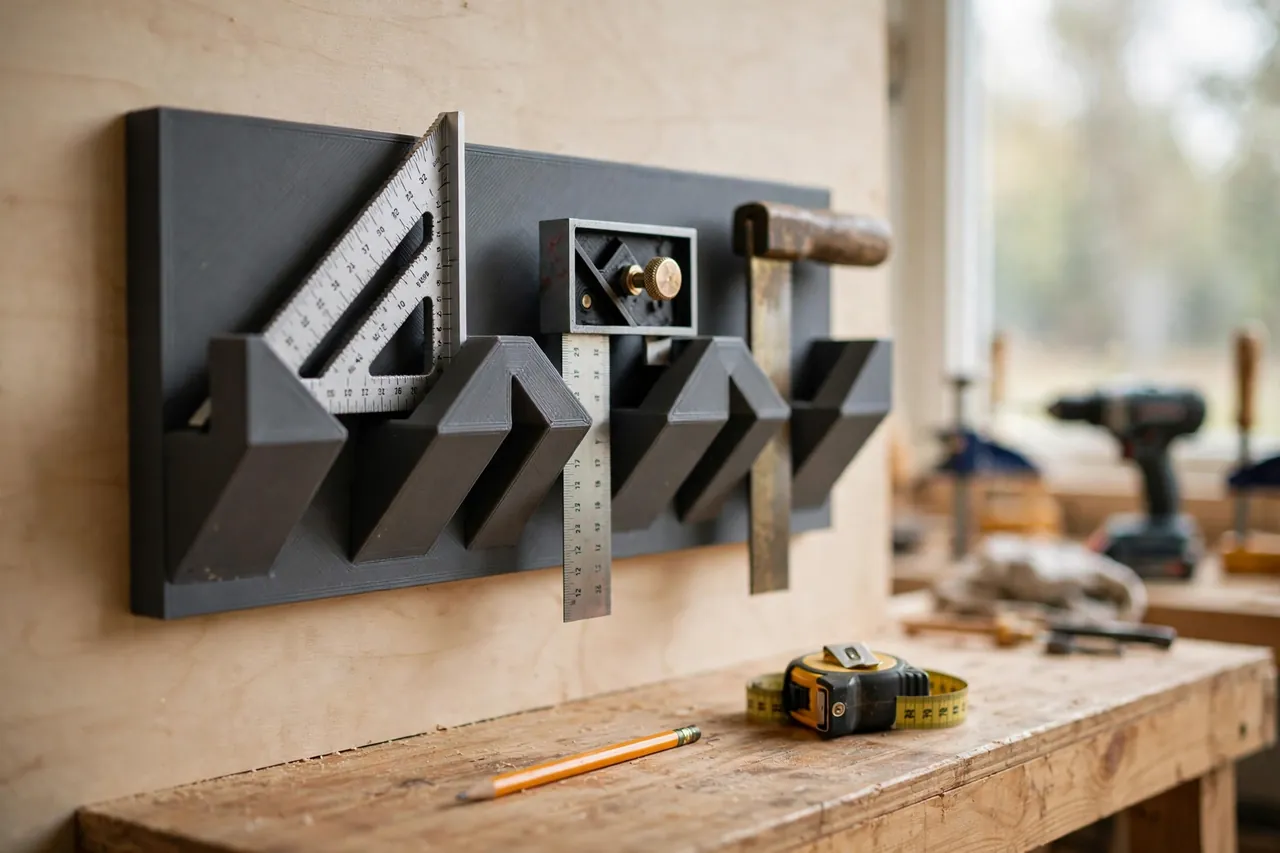
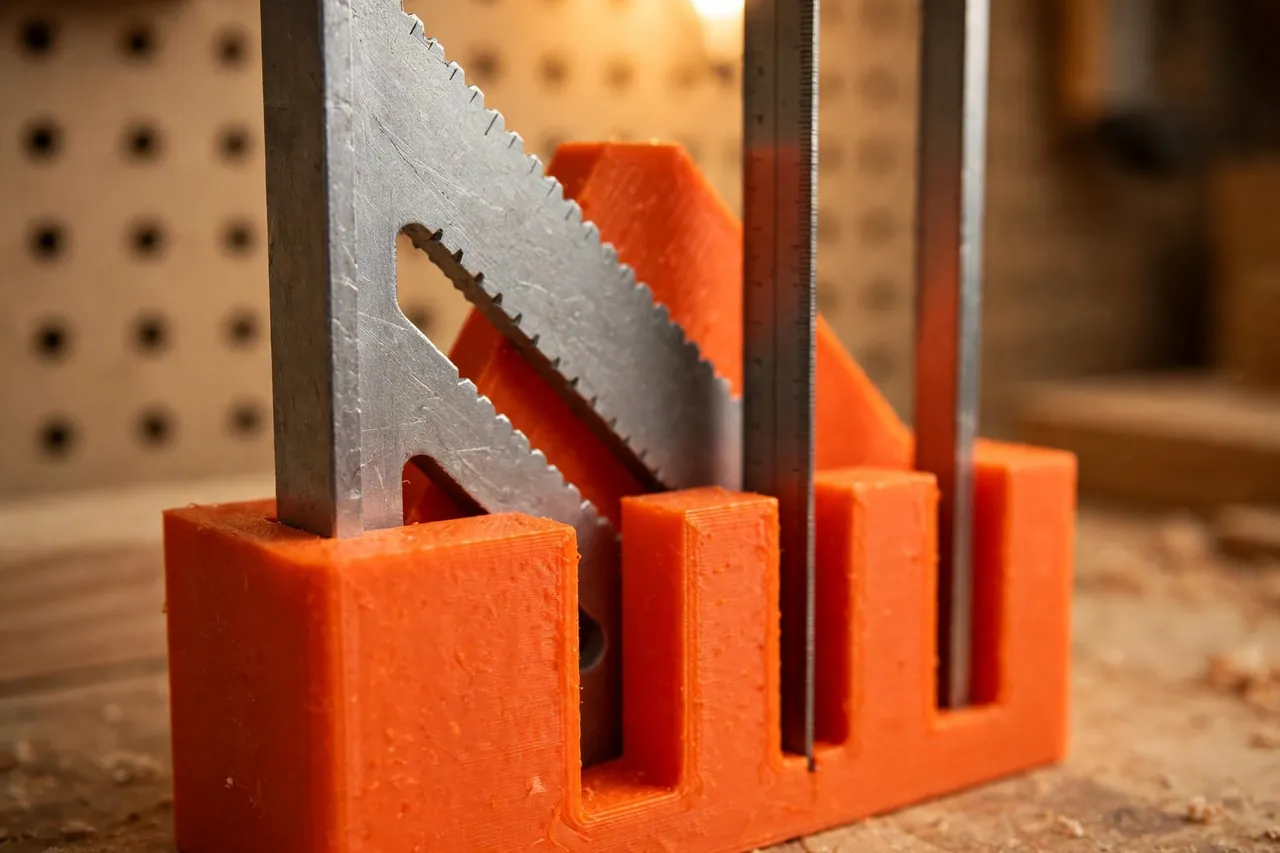
A 3D printed square rack gives each square its own slot on the wall or at the bench back. Speed squares rest on their thick fence, combination squares hang by their heads with rulers clear, try squares sit upright — each visible, each separated, each grabbed one-handed.
This guide covers designing, printing, and arranging a rack for the squares you own. It is a simple slotted storage holder, and its modest job — keeping precision edges separated and safe — is exactly what keeps a square worth trusting.
What You Need
The rack is a back plate with a row of angled slots and cradles shaped for different square families.
Materials and tools
- A home 3D printer with a build area of roughly 170 mm in at least one direction
- PETG filament for slots that flex a fraction instead of chipping, or PLA for a gentle bench-top rack
- Your actual squares — speed, combination, try, and framing squares you plan to park
- Calipers or a ruler for blade thickness, fence dimensions, and head sizes
- A small file or sandpaper for easing slot edges
- Wall screws into studs or sound fixings, or pegboard hooks, depending on placement
- Optional self-adhesive felt for lining the slots that hold thin rulers
PETG is the better all-round choice for a wall rack that gets daily grabs. PLA prints a crisp test rack and is fine at a bench back that nothing else leans against.
Suggested print settings
- Layer height: 0.20 mm is plenty; slot precision comes from your measurements, not fine layers.
- Walls: At least 3 to 4 perimeters — slot walls take constant small side loads.
- Infill: 25 to 35 percent, grid or gyroid.
- Top and bottom layers: 4 or more, for a flat mounting face and smooth slot floors.
- Orientation: Print the rack flat on its back, slots opening upward and forward.
- Supports: Angled open slots need none if their floors slope gently.
Print a single-slot test piece for your thinnest ruler and your thickest speed square before committing to the full rack.
Design Considerations
You can model the rack in any basic CAD program. The craft lies in giving three quite different tool shapes one coherent home.
1. Slots for speed squares: rest on the fence
A speed square is a thick triangular plate with a fence along one edge, commonly around 5 mm for the plate and 20 to 25 mm for the fence. Give it a wide, shallow cradle or a pair of pegs that carry the fence, plate angled back against the rack, so it parks with its hypotenuse edge up and readable. Measure your square — large 300 mm versions need a deeper cradle than the pocket 180 mm size.
2. Hangers for combination squares: support the head
A combination square should hang by its head, ruler pointing down and hanging free — never resting on the ruler’s end or leaning by the blade. Model a notch or pocket the head slides into, with about 0.5 mm of clearance, and clear depth below for the full ruler length. The thin blade, often about 2 mm thick, must touch nothing along its length, so its edges stay nick-free.
3. Uprights for try and small squares
Try squares and small engineer’s squares suit short upright slots sized to the blade thickness plus about 0.4 to 0.6 mm. The wooden or brass-faced stock of a try square rests on the slot floor; the blade stands clear. Keep these slots at the rack’s ends, where shorter tools do not get visually lost behind the big speed square.
4. Spacing and honest duty
Leave at least 15 to 20 mm between neighbors so fingers can lift one square without dragging the next. Mark each slot’s resident with a paint pen once the layout settles. And keep the framing plain: the rack stores measuring tools at rest on a wall or bench back. It is not a clamp, a stop, or a cutting guide, and printed slots should never be asked to hold a square against saw or router forces.
Step-by-Step: Printing and Assembly
- Measure every square — plate and fence sizes, head dimensions, blade thicknesses and lengths.
- Sketch the row layout on paper first: who parks where, longest hangers checked for clear drop below.
- Model the rack with its mix of cradle, head notch, and upright slots.
- Print test slots for the thickest and thinnest residents; both should park and lift one-handed.
- Adjust if needed. Binding slots gain 0.3 mm; a loose head notch gets a felt pad, not guesswork.
- Print the keeper in PETG with the settled layout.
- Clean it up and mount it into studs or sound fixings, then park every square and check nothing touches a neighbor.
If your collection outgrows one rack, print a second for the less-used squares rather than doubling tools into shared slots.
Step-by-Step: Using the Rack
- Park each square in its own slot, every time, with the same orientation you test-fitted.
- Hang combination squares by the head and confirm the ruler hangs free before you let go.
- Wipe grit off blades before parking; a dirty slot floor slowly laps at precision edges.
- Take from the rack, return to the rack. A square left on the bench “for the next cut” is the one that gets buried.
- Check truth occasionally. Draw a line, flip the square, draw again — a rack-kept square should show the two lines as one.
- Give newcomers a slot of their own. A new square parked in a borrowed slot starts the stacking habit again.
- Keep pencils beside the rack, not in it; a small cup below turns the spot into a complete marking station.
After a few projects the wall reads at a glance: every square visible, every edge protected, nothing to dig for when a cut needs checking.
Tips for Better Results
- Angle the speed square cradle back slightly so the square settles in with gravity instead of needing a careful placement.
- Line thin-blade slots with felt — combination square rulers reward the softest parking you can give them.
- Print the rack in a bright color if your tool wall is dark; measuring tools are grabbed mid-thought and should be findable without a search.
- Order the row by use, most frequent square nearest your dominant hand’s natural reach.
- Mark the slot, not the tool, with a paint pen, so the system survives replacing any single square.
Common Mistakes to Avoid
- Resting a combination square on its ruler tip. The blade end bends and burrs; the head carries the tool, always.
- One universal slot size. Speed square fences and 2 mm blades cannot share a slot design; measure each family.
- Crowding the row. Fingers need room, or every removal becomes a two-tool fumble that dings edges.
- Mounting where long rulers hit the bench. Check the full drop below head notches before fixing the rack’s height.
- Using a stored square as a saw guide from its slot neighbor’s position — park tools are for layout; cutting guides are a different, sturdier class of tool.
Care, Storage, and When to Choose an Alternative
Brush slots out weekly — the dust that gathers in them is mildly abrasive — and refresh felt liners when they thin. Check mounting screws seasonally and reprint any slot that cracks, since the rack is small enough that a single-slot repair piece can be glued or screwed alongside. Squares themselves appreciate a wipe with a dry cloth before parking, especially after working dusty sheet material.
If you own one speed square and nothing else, a single stout hook is honestly enough, and machined metal racks exist for trade environments. The printed rack earns its place when a family of squares — each with different parking needs — deserves one fitted home. It belongs on the same wall as our related guide, “3D Printed Level Rack: Wall Brackets That Keep Long Levels Straight,” and the two together form a complete measuring station.

FAQ
Can a framing square go on this rack too?
A framing square is large and thin; give it its own wide pair of pegs or a dedicated flat slot at the rack’s end, sized from the actual tool. It parks happily on the same wall — just not squeezed into the slots meant for smaller squares.
How do I stop the speed square sliding out of its cradle?
Deepen the cradle slightly, angle it back a few degrees, or add a small lip at the cradle’s front edge. The square should need a deliberate lift, not a nudge, to leave.
Is a bench-back rack better than a wall rack?
Both work; the bench back wins if most of your squaring happens at one bench, the wall wins for a shared layout area. Choose by where your hands already look for the tool.
What about squares with wooden stocks that swell in damp weather?
Size try-square slots from the stock in its normal indoor state and keep the rack in a dry spot. A fraction more clearance — toward the 0.6 mm end — covers seasonal movement without leaving the blade sloppy.
Conclusion
Squares quietly lose their truth in drawers and piles, one small knock at a time. A printed rack with a fitted slot for each family keeps edges separated, rulers hanging free, and every square visible at the moment a cut needs checking.
Measure your collection, print test slots for the extremes, and give the whole family one wall home. Layout gets faster simply because the right square is always where your hand expects it.
While you are organizing the measuring wall, you may also enjoy our related guide, “Stair Gauges for Your Framing Square: 3D Print a Pair for Repeatable Stair and Rafter Layouts,” and for the assembly checks your squares perform, see “Assembly Squares: 3D Print Large Clamping Squares for Square Cabinets and Boxes Every Time,” which puts that stored accuracy straight to work.