Introduction
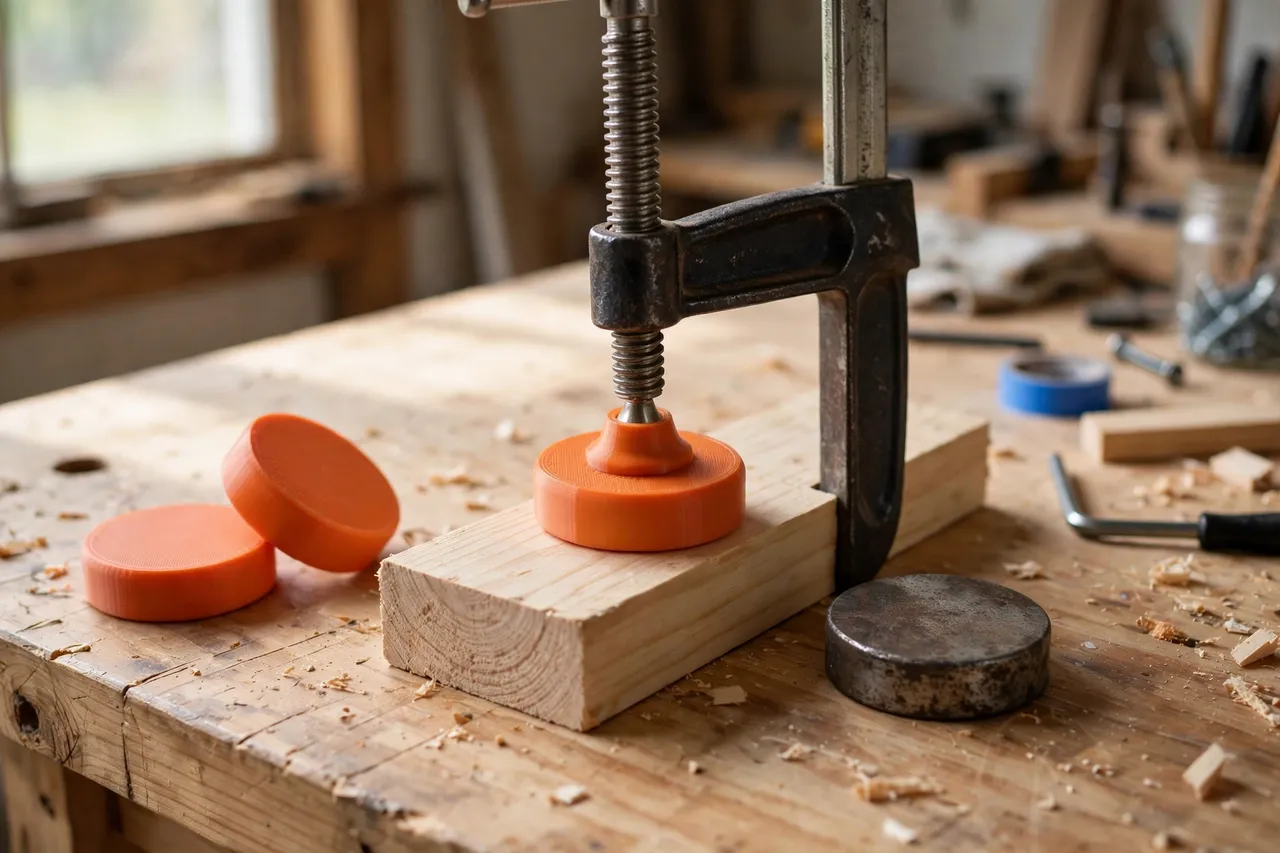
Every workshop has a C-clamp or two with a missing swivel pad. The little disc at the end of the screw fell off years ago, and now the bare screw tip digs into everything it touches — denting softwood, slipping on metal, and marring finishes you meant to protect.
Replacement pads exist, but they come in fiddly sizes, and a pad that almost fits is not much better than none. A printed pad, sized to your actual clamp, solves it in one evening: a small disc with a socket that captures the screw tip, a face that grips without gouging, and a spare or two for the next clamp that loses its pad.
Be honest about what these pads are. They are light-duty contact parts that protect surfaces and improve grip. They do not increase the clamp’s holding power, and they are not a substitute for a proper manufactured pad when you are clamping hard, clamping overhead, or holding anything whose failure could hurt someone. For everyday bench work, though, a printed pad turns a damaged clamp back into a useful one.
What You Need
Swivel pads are tiny prints — you can batch a whole set in one short session.
Materials and tools
- A home 3D printer with even a small build area
- TPU filament for a grippy, non-marring face, or PETG for a firmer pad
- The C-clamp itself, so you can measure the screw tip
- Calipers, a pencil, and sandpaper or a small file
- A scrap board for testing grip and checking for marks
TPU is the star here: its rubbery face grips and forgives, much like the original pad’s job. PETG makes a harder pad that suits metal work but can still mark softwood if overtightened.
Suggested print settings
- Layer height: 0.16 to 0.20 mm for a clean socket.
- Walls: 4 perimeters around the socket — this area takes the clamping force.
- Infill: 50 percent or more for PETG; 30 to 40 percent for TPU so it stays slightly springy.
- Top and bottom layers: 4 or more.
- Orientation: Print face-down for the flattest contact surface.
- Supports: None for a simple socket design.
Print one pad first, fit it, and only then print the batch.
Design Considerations
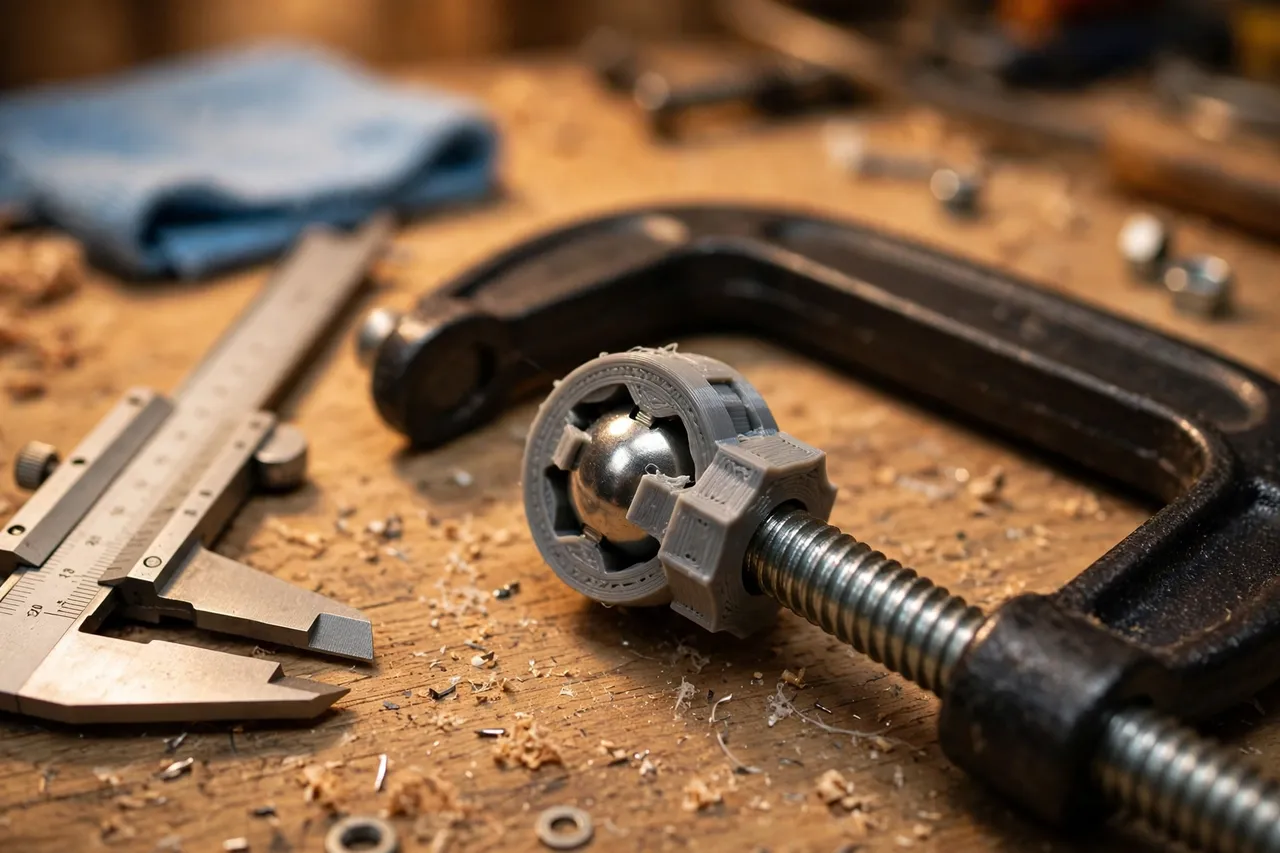
A swivel pad has to do two things at once: stay on the screw and swivel freely. Get the socket right and the rest follows.
1. The socket
Most C-clamp screws end in a small ball or a flattened tip. Measure the ball diameter and the neck behind it. The socket should be a hollow sphere slightly larger than the ball — about 0.3 mm of clearance — with an opening narrower than the ball so it snaps on and stays. For a flat-tipped screw, use a shallow cup with a retaining lip instead. Measure your clamp; styles vary more than you would expect.
2. The face
The working face is where grip and protection meet. A flat face with a fine crosshatch or concentric-ring texture grips well without biting into wood. For delicate finishes, print a smooth face in TPU. Diameter matters too: a pad slightly wider than the original spreads pressure better, but an oversized pad can bridge over uneven work and rock. Match the original size, then go up by a few millimeters at most.
3. Thickness and swivel
Keep the pad thin — 6 to 10 mm overall — so it does not eat up the clamp’s throat depth. The socket must let the pad tilt a few degrees in every direction, which is what lets it sit flat on work that is not perfectly square to the screw. Test this by hand: the pad should wobble freely on the screw but never fall off.
4. One design, many clamps
C-clamps come in many sizes, but the screw tips often cluster around a few diameters. Print a small test set of sockets in different sizes, label them, and keep the winners as your reference set. Color-coding by size saves the next round of measuring.
Step-by-Step
- Measure the screw tip — ball diameter, neck diameter, and the original pad’s diameter if you still have it.
- Model the pad: socket to match the tip, textured or smooth face, and a small rim for grip.
- Print one test pad and snap it onto the screw. It should click on with firm thumb pressure.
- Check the swivel. Tilt the pad in all directions; it should move freely without popping off.
- Test on scrap. Clamp a softwood offcut and check for dents after tightening to normal working pressure.
- Adjust if needed. Too tight a socket? Open it by 0.2 mm. Slipping face? Add texture or switch to TPU.
- Print the batch — one for each worn clamp, plus spares.
- Fit and store spares in a small labeled bag or bin near your clamps.
Tips for Better Results
- Print spares before you need them. Pads are small; a lost pad mid-project is a needless delay.
- Use TPU for finished wood and PETG for rough metal work — match the pad to the job.
- Clean the screw tip before fitting; rust and burrs stop a pad seating properly.
- Check pad wear regularly. A pad that has gone smooth or cracked is a two-minute reprint.
- Keep a reference pad for each clamp size, so future reprints need no measuring.
If you find yourself adapting pads across clamp styles, the ideas in “3D Printed Clamp Pad Adapters: Pads That Fit Any Clamp” extend this same approach — one pad family, sized to fit whatever clamp you pick up.
Common Mistakes to Avoid
- Guessing the ball size. A socket 1 mm too small will not snap on; 1 mm too large falls off under load.
- Printing the socket solid. Without the hollow capture, the pad is just a disc that slides off.
- Making the pad too thick. Extra thickness steals throat depth and makes the clamp awkward on shallow work.
- Overtightening on softwood. Even a good pad dents pine if you lean on the handle — tighten only as much as the job needs.
- Forgetting the pad is light-duty. For heavy clamping, overhead work, or anything safety-critical, use a manufactured steel pad and clamp.
Care, Storage, and Alternatives
Wipe pads clean of glue and dust, and store spares with the clamps they fit — a small zip bag taped inside a clamp drawer works well. TPU pads last a long time but can harden with age; PETG pads can crack if dropped on concrete. Either way, reprinting is cheap and quick.
Manufactured replacement pads are the right call for professional daily use or for clamps that see maximum force. For the home shop, where the complaint is usually one missing pad on an otherwise fine clamp, a printed replacement gets the tool back to work the same evening.
FAQ
Will a printed pad stay on when I loosen the clamp?
Yes, if the socket is sized correctly — the opening is narrower than the ball, so the pad snaps on and needs a deliberate pull to remove. If it falls off on its own, the socket is too large and needs shrinking.
Is TPU really better than PETG for pads?
For protecting wood and gripping, yes — TPU’s rubbery face grips without marking. PETG is firmer and better for metal or rough work where grip matters less than durability. Many workshops keep both.
Can one pad design fit all my C-clamps?
Only if their screw tips share a size. Measure each clamp; you will often find two or three tip sizes across a set, and printing a small family of pads covers all of them.
The pad tilts and only touches on one edge. Is that normal?
A little tilt is exactly what a swivel pad is for — it lets the face sit flat on work that is not square to the screw. If it tilts so far that it slips off, the socket is too loose or the face is too small for the work.
Conclusion
A C-clamp without its pad is a clamp you reach past. A printed replacement — measured to your screw, textured to your work, and printed in an evening — puts that clamp back in rotation and stops the dents and slips that a bare screw tip causes.
Measure one clamp, print one test pad, and then batch the rest. Your clamps, and your workpieces, will both be better for it. And if your bench also needs steadying under long pipe clamps, “3D Printed Pipe Clamp Feet and Pads: Feet That Keep Pipe Clamps Steady” covers the same keep-it-steady idea at a larger scale.