Introduction
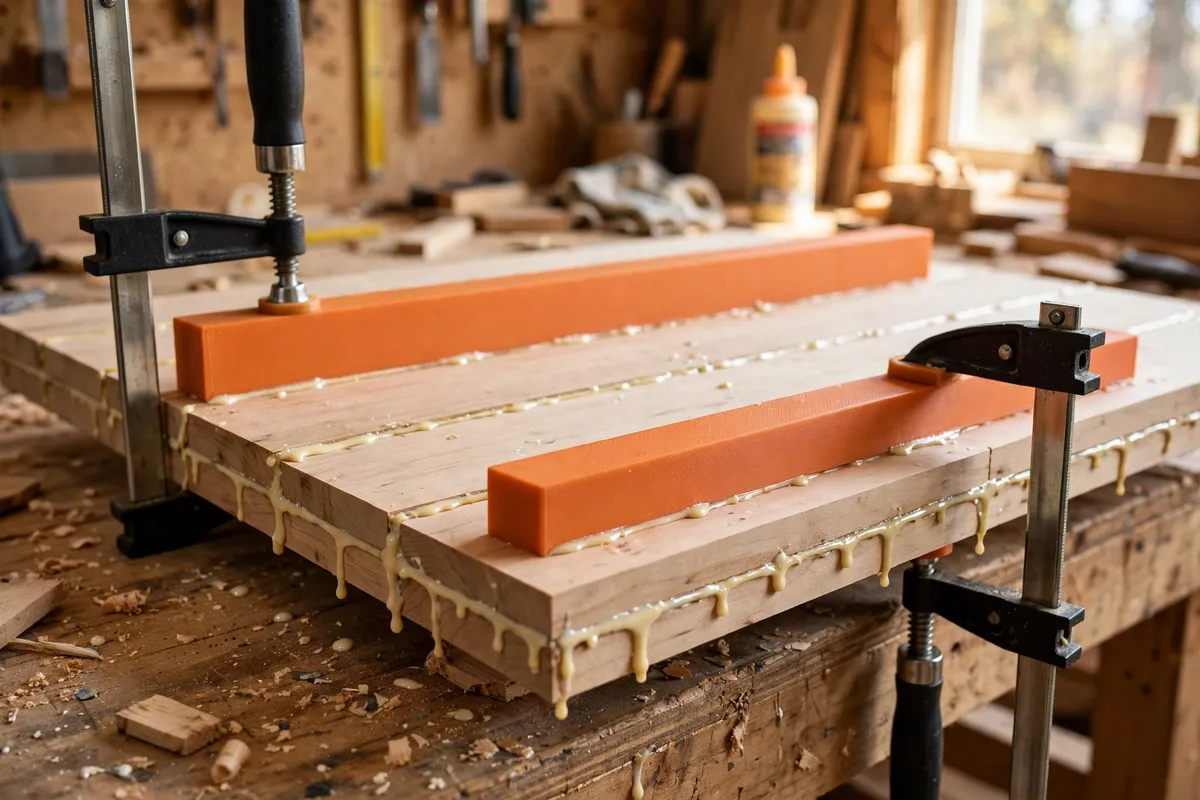
Every panel glue-up has the same enemy: boards that bow, cup, or creep out of line while the glue is still wet. You can own a rack of good clamps and still end up with a tabletop that rocks on the bench because two boards dried a millimeter proud of their neighbors. Cauls are the traditional answer — straight bars clamped across the panel that hold every board in one flat plane while the glue sets.
Wooden cauls work, but they have to be made, they soak up glue, and a pair long enough for a dining tabletop takes up real lumber. 3D printed glue up cauls solve the storage and consistency problems at once: every caul comes off the printer the same gentle camber, the same length, with clamp slots already formed, and a tape-covered face that dried glue simply pops off. Print them in matched pairs and a frustrating glue-up becomes a calm, repeatable routine.
This guide covers designing, printing, and using printed cauls for tabletops, cabinet doors, shelves, and any other flat panel you glue up at home.
What You Need
Cauls are simple parts, but they work under clamp load, so print them stoutly and choose a filament that will not creep under pressure on a warm day.
Materials and tools
- A home 3D printer with a build length of at least 250 mm, or a design you can print in joined sections
- PETG filament for stiffness and low creep; ASA is also a good choice
- Clear packing tape or blue painter’s tape to face the cauls as a glue release
- Bar clamps, pipe clamps, or F-clamps long enough to span your panel plus the cauls
- Wax paper or a silicone mat to protect your bench from squeeze-out
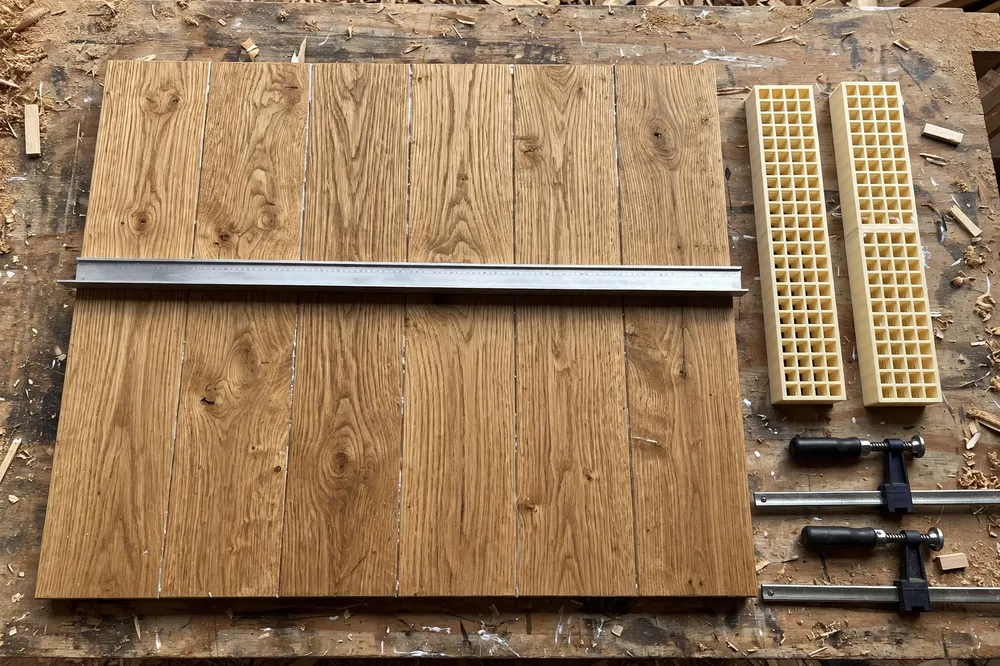
- A metal straightedge or a known-flat board to check your finished panel
- Your panel boards, wood glue, a glue spreader, and a damp cloth for squeeze-out
- A tape measure and pencil for marking caul positions
Avoid plain PLA for cauls you will leave clamped overnight in a warm workshop: it can creep slowly under sustained clamp pressure and lose the very flatness it was printed to give.
Suggested print settings
- Layer height: 0.24 to 0.28 mm — cauls are utility parts and fine layers only slow you down.
- Walls: 5 to 6 perimeters. The long faces of the caul carry the bending load.
- Infill: 40 to 50 percent gyroid or grid for a stiff, light bar.
- Top and bottom layers: 5 or more, so the cambered face stays smooth and true.
- Orientation: Print the caul lying on its side, so layer lines run along the length of the bar and bending stress crosses the layers rather than pulling them apart.
- Supports: None if you keep the clamp slots as open notches rather than closed holes.
Design Considerations
A caul looks like a plain bar, but three details decide whether it flattens your panel or just decorates the clamps: the camber, the face, and the way the clamps engage it.
1. A whisper of camber, not a banana
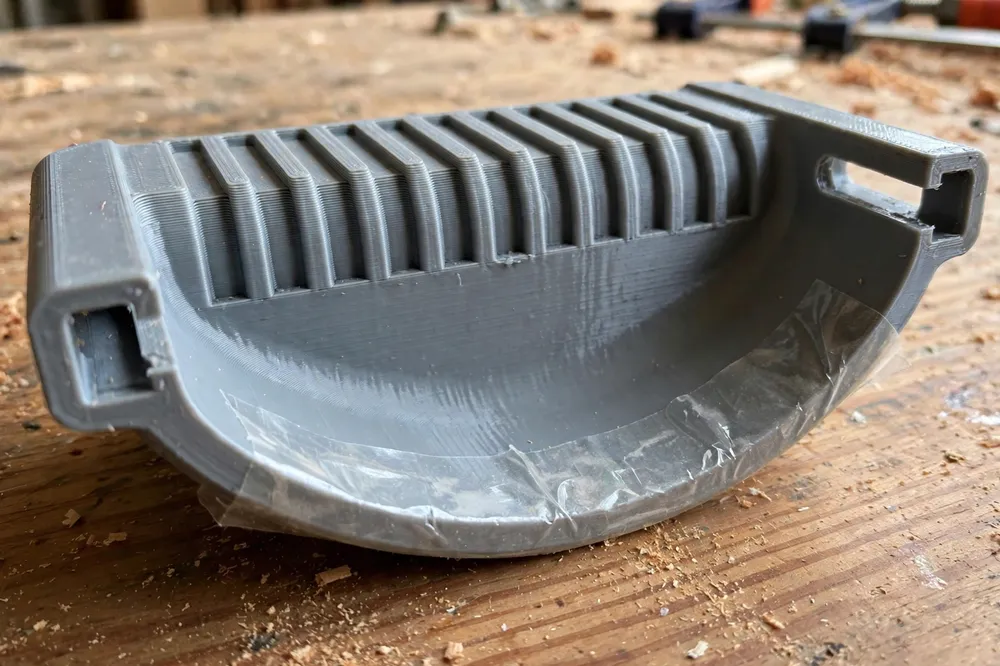
A perfectly straight caul clamped only at its ends can flex slightly in the middle, pressing hardest at the edges of the panel and least at the center — exactly backwards. Traditional cauls solve this with a gentle camber: the bottom face is curved so it sits a fraction higher at the ends than at the middle. When you tighten the clamps, the caul flattens progressively and presses the center of the panel first, then spreads pressure evenly outward.
For printed cauls, a camber of about 1 to 1.5 mm over a 600 mm length is plenty. Model the bottom face as a very shallow arc rather than guessing with sandpaper afterward. On shorter cauls for cabinet doors, scale the camber down to about 0.5 mm. More is not better: an over-cambered caul will dish a thin panel.
2. A glue-release face
Wet glue will find your cauls, and dried wood glue bonds to bare plastic well enough to tear chunks out of a panel edge when you pry the caul off. Give every caul a sacrificial face: a strip of clear packing tape along the cambered underside, burnished down smooth. Dried glue pops off tape with a fingernail, and when the tape gets ragged you peel it off and lay a fresh strip in a minute.
Model a shallow recess or at least a smooth flat land on the underside so the tape sits flush and cannot wrinkle into the glue line.
3. Clamp slots that forgive alignment
Closed holes force you to thread clamps through the caul, which is slow and fiddly mid-glue-up when the clock is running. Open slots — notches cut into the top edge or ends of the caul — let you drop the caul over a clamp bar already in place, nudge it sideways, and tighten. Size the slots a few millimeters wider than your clamp bars, and round the slot mouths so the caul slides on without catching.
If you use several clamp styles, print one pair of cauls slotted for your bar clamps and another for your F-clamps, and mark them with a paint pen so pairs never get mixed.
4. Lengths for the panels you actually glue
Cauls must extend past the panel edges by at least the width of your clamp jaws on both sides. A useful home set is three lengths: about 450 mm for cabinet doors and small shelves, 650 mm for side tables and wide drawers, and 900 mm for tabletops. Print the long set in two halves with a simple tongue-and-groove or bolted splice if your printer bed is smaller — a spliced caul, clamped along a straight bench edge while the joint sets, stays true enough for glue-up work.
Add stiffness ribs along the top face of long cauls. A shallow T or I profile uses little extra filament and noticeably resists bowing under clamp load.
Step-by-Step: Printing Your Cauls
- Measure your typical panels and choose your caul lengths — panel width plus at least 100 mm of overhang.
- Model the bar with a cambered underside, a tape land, ribbed top, and open clamp slots sized to your clamps.
- Print a single test caul at full settings and check it: sight along the underside for the camber, flex it by hand across your knee, and confirm your clamp bars drop into the slots.
- Print the matched pairs. Cauls are used in pairs across a panel, so print at least two of each length, four for wide tabletops.
- Face every caul with a strip of packing tape on the underside, trimmed flush at the edges.
- Store them flat, hanging on a wall hook or standing in a corner, never under a pile of offcuts where they can take a set.
Step-by-Step: Using Cauls in a Glue-Up
- Dry-fit the whole panel first, cauls included. Arrange boards for grain, mark the order, and lay the cauls across to confirm lengths and clamp reach while there is no glue and no hurry.
- Protect the bench with wax paper or a silicone mat under the glue lines.
- Apply glue and assemble the panel on your main clamps, snugging them just enough to hold everything.
- Place the first pair of cauls about 100 mm from one end of the panel, one above and one below, tape faces against the wood, and clamp them snugly across the panel width.
- Add the remaining pairs — one near the other end, and one in the middle for panels longer than about 800 mm.
- Tighten in stages, alternating between the panel clamps and the caul clamps, watching the seams close evenly. The cauls should flatten visibly as their camber pulls out.
- Check with a straightedge across several points while you can still adjust. Sight for gaps of light under the edge.
- Clean squeeze-out at the leather-hard stage with a scraper, and leave the panel clamped for the glue maker’s full cure time before removing the cauls and tape-facing them fresh for next time.
If you have built our project “DIY Corner Clamp: 3D Print a Right-Angle Clamp for Frames, Drawers and Cabinet Repairs,” you already know how much a purpose-made clamping aid calms a glue-up down; cauls bring the same calm to flat panels.
Tips for Better Results
- Use cauls in pairs, top and bottom. A single caul on top can bow a thin panel downward between the main clamps.
- Pad the panel edges. A strip of tape or a thin cork slip where clamp jaws bite prevents dents in soft woods — the printed pads in “3D Printed F-Clamp Pads and Soft Jaws: Protect Workpieces While You Clamp” pair well with cauls for exactly this.
- Mark caul positions on the panel edge during the dry fit so placement is instant once glue is spread.
- Keep a spare tape-faced set ready. Mid-glue-up is the wrong time to discover a face is gummed up.
- Work one panel size at a time. A matched set of cauls, clamps, and bench space laid out beforehand makes glue-ups almost boring — which is the goal.
Common Mistakes to Avoid
- Too much camber. A strongly bowed caul dishes thin panels and concentrates pressure at the center seam. Stay around a millimeter.
- Skipping the tape face. One glue-up against bare plastic and you will spend longer chiseling the caul free than you saved.
- Clamping cauls gorilla-tight first. If the caul clamps are fully tight before the panel clamps close the seams, boards cannot slide into alignment. Snug, align, then tighten in stages.
- Using cauls that are too short. If the clamp lands on the panel edge instead of past it, the caul tips and presses unevenly.
- Storing cauls standing on end in a hot corner. PETG is forgiving, but a leaned-on caul stored badly for a summer can take a warp. Hang them flat.
Care, Storage, and When to Choose an Alternative
Care is trivial: peel off glue spots, replace the tape face when it roughens, and check straightness against your bench edge once in a while. If a caul ever cracks at a slot, reprint that one — the whole point of printing them is that replacements cost a few cents of filament.
There are jobs where traditional cauls or other tools win. Very wide, thick slabs for workbench tops deserve heavy wooden or steel cauls that shrug off serious clamp tonnage. Production shops gluing panels daily will still reach for machined aluminum. And for keeping panel edges aligned rather than faces flat, our guide “3D Printed Assembly Squares” approach — assembly squares and edge clamps — complements cauls rather than replacing them. For the home workshop gluing tabletops, doors, and shelves, printed cauls cover nearly everything.
FAQ
How many cauls do I need for a tabletop?
For a typical 900 to 1,200 mm tabletop, use three pairs: one near each end and one in the middle. Smaller panels like cabinet doors need two pairs. Print four cauls of your most-used length so you always have two pairs ready.
Will the plastic cauls flex too much under clamp pressure?
Printed solidly — five or six walls, 40 to 50 percent infill, with a ribbed top — a PETG caul is stiff enough for home panel glue-ups. The camber does most of the work; the clamps only need moderate pressure. If a long caul bows visibly, print it with a deeper rib rather than simply cranking the clamps harder.
Can I use cauls on veneered or finished panels?
Yes, with the tape face clean and smooth, and a slip of wax paper between caul and delicate surfaces for insurance. Keep clamp pressure moderate, and never let squeeze-out glue dry against a finished face — tape and paper together make cleanup harmless.
What filament lasts longest for cauls?
PETG is the sweet spot: stiff, tough, and resistant to the slow creep that can flatten PLA under a long clamp-up in a warm room. ASA prints a little stiffer still. Whichever you choose, store cauls flat and out of direct sun.
Conclusion
Flat panels are not luck. They are the predictable result of holding every board in one plane while the glue cures, and cauls are the simplest tool that does exactly that. A printed set — cambered, tape-faced, slotted for your own clamps, and sized for the panels you build — turns glue-up day from a scramble into a procedure.
Print a pair this week, run one test panel, and check it with a straightedge. Once you see that unbroken line of contact, you will not glue a panel without them again.