Introduction
Edge banding gives a plywood or melamine shelf its finished look, hiding the raw layered edge behind a thin strip of wood veneer or plastic. It also has a habit of peeling. Heat, humidity, a knock from a heavy book, or just age can lift a corner, and once a corner lifts, the whole strip starts to follow. Regluing it is easy in principle — the hard part is holding the strip tight and flush along its whole length while the glue sets, without a forest of clamps that will not fit on a shelf edge anyway.
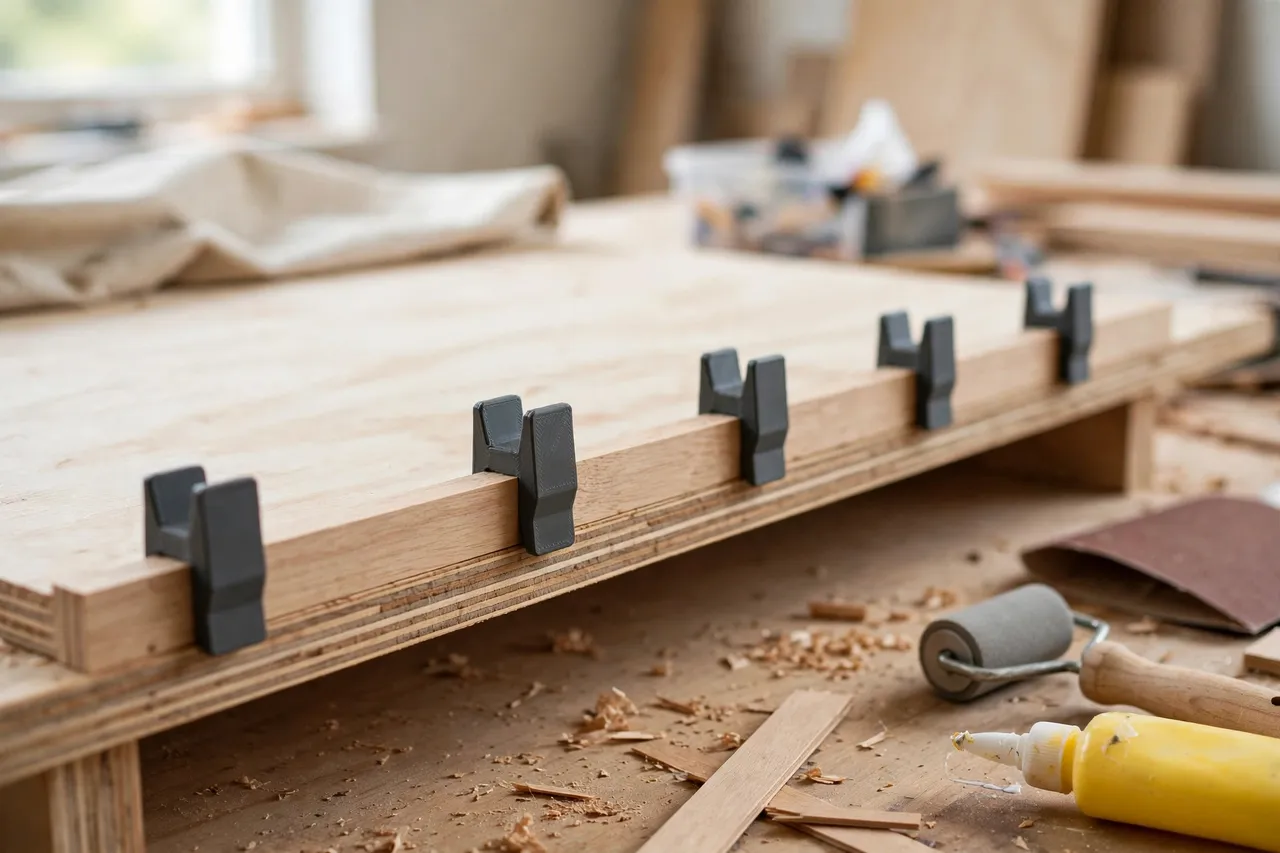
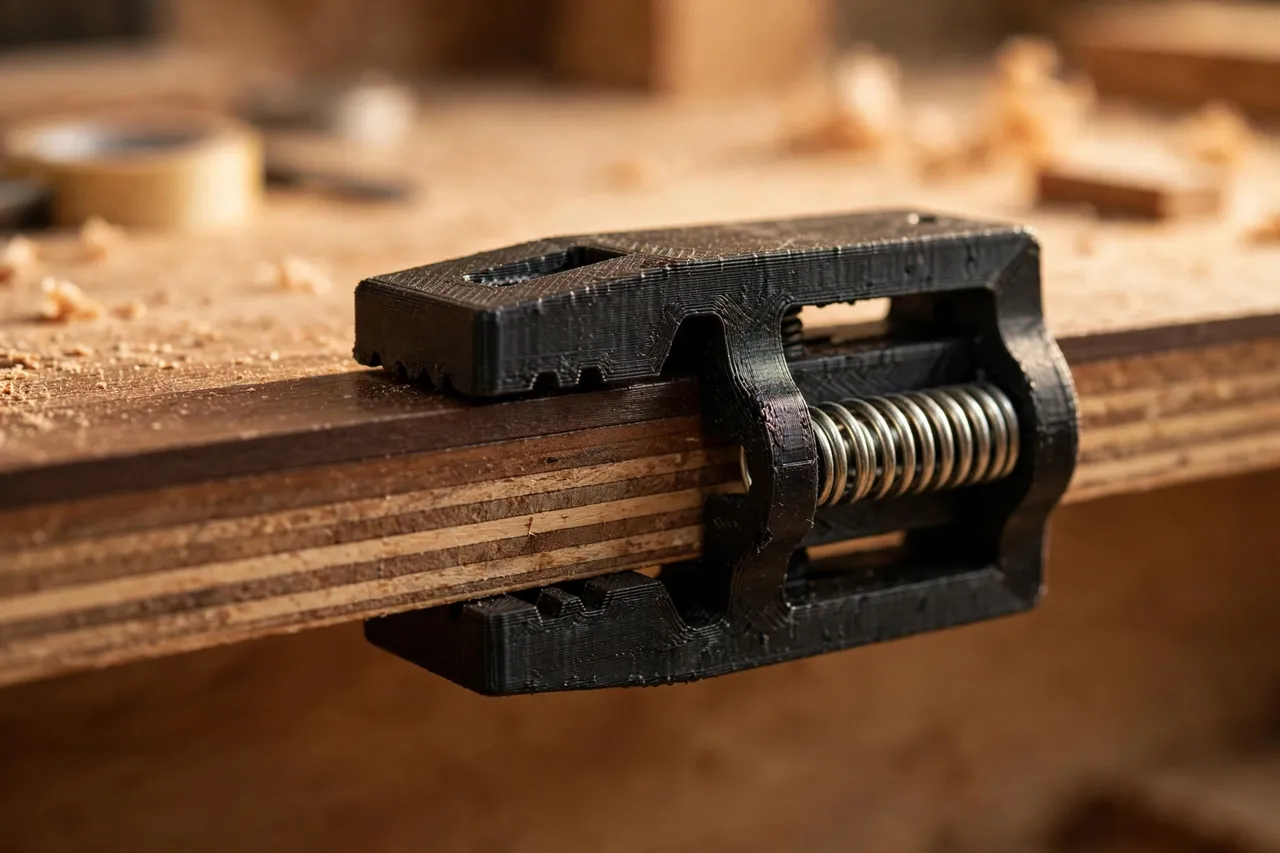
That is where a 3D printed edge trim clip earns its keep. It is a small spring-like clip that grips the shelf edge and presses the banding flat while the adhesive cures. It is a workshop aid, not a permanent part of the shelf: you clip a row of them on, leave them while the glue sets, and take them off to reuse next time. Because they are printed, you can make them in exactly the size your shelf thickness needs, and make as many as a long shelf demands.
This guide covers measuring your shelf, designing a clip with the right grip, printing a set, and using them for a clean, bubble-free banding repair.
What You Need
Trim clips are small and quick to print, so make plenty — a long shelf edge needs a clip every 100 to 150 mm to hold the banding evenly, and running short halfway through a glue-up is frustrating.
Materials and tools
- A home 3D printer with a build area of roughly 120 mm in at least one direction
- PETG for clips that need to flex repeatedly without cracking; PLA works for a few uses but fatigues faster
- Edge banding and a suitable adhesive (iron-on banding, or contact adhesive for non-iron-on types), following the adhesive manufacturer’s instructions
- Calipers or a ruler, a pencil, and a sharp utility knife or banding trimmer
- A household iron or edge banding iron for iron-on banding, plus a small roller or block for pressing
- Fine sandpaper or a small file for smoothing clip jaws
PETG is the better choice for a clip that will be flexed on and off many times. PLA clips are fine for a single repair, but they tend to lose their spring or crack after repeated use, especially in a warm workshop.
Suggested print settings
- Layer height: 0.20 mm, which gives a smooth jaw face that will not mark the banding.
- Walls: 3 to 4 perimeters, so the clip’s spring arms stay strong.
- Infill: 30 to 40 percent, grid or gyroid, is enough for a clip that grips rather than carries load.
- Top and bottom layers: 4 or more, for a clean jaw surface.
- Orientation: Print the clip on its side, so the layer lines run along the spring arms rather than across them — this greatly improves flex life.
- Supports: Usually none for a simple U-shaped clip.
Print one clip first and test its grip on a scrap shelf edge before printing a full set. Grip that is too loose is useless; grip that is too tight will dent soft banding or be hard to remove.
Design Considerations
A trim clip is essentially a U-shaped spring that slides over the shelf edge, with one jaw pressing the banding and the other gripping the back of the shelf. The details decide whether it works or just slides off.
1. Size the jaw to the shelf thickness
Measure the shelf thickness including the banding, because that is what the clip must grip. Common shelf thicknesses are around 18 to 25 mm, but older shelves vary. Size the clip’s inner gap to be about 0.5 to 1.0 mm smaller than the shelf-plus-banding thickness, so the spring arms flex slightly when fitted and grip firmly. Too small a gap and the clip will not go on; too large and it falls off.
2. Make the jaws kind to the banding
The jaw that presses the banding should be smooth, flat, and reasonably wide — at least 15 to 20 mm — so pressure spreads evenly and does not dent the veneer or leave a line. Lightly sand the jaw face and round its edges. If you are working with delicate veneer, a thin felt pad stuck inside the jaw protects the surface further. Never use a clip with a rough or sharp jaw on a finished banding strip.
3. Give the clip a grip-friendly shape
Add a small thumb tab or flared entry to the clip’s open end, so it slides on easily and pulls off without tools. A clip that needs pliers to remove will damage banding sooner or later. A slight outward flare at the jaw tips also helps the clip find its way onto the edge without catching the banding’s edge and lifting it.
4. Plan for a full row
One or two clips will not hold a long strip flat. Plan on a clip every 100 to 150 mm, plus one near each end, and print that many before you start gluing. It is far better to have spares left over than to be short with wet glue on the shelf.
Step-by-Step: Printing the Clips
- Measure the shelf thickness with the banding in place, at several points along the edge.
- Model a U-shaped clip with an inner gap slightly smaller than that measurement, a wide smooth banding jaw, and a flared entry.
- Print a single test clip in PETG, on its side for flex strength.
- Test the grip on a scrap shelf edge with banding. It should slide on with firm thumb pressure and stay put without sliding off.
- Refine the gap. Too loose? Reduce the gap by 0.3 mm. Too tight? Open it by 0.3 mm and reprint.
- Print the full set once the test grips well, plus a few spares.
- Clean up stringing and sand the jaw faces smooth, rounding all edges that touch the banding.
Keep clips of different sizes in labelled bags — shelf thicknesses vary across a house, and a labelled set saves measuring again next time.
Step-by-Step: Using the Clips for a Banding Repair
- Prepare the edge. Remove loose banding, clean off old glue, and lightly sand the shelf edge so the new banding bonds well.
- Cut the banding slightly over length, with a little overhang at each end to trim later.
- Apply the adhesive or position iron-on banding according to its instructions, working in sections if the shelf is long.
- Press the banding into place with a roller or block, working out air bubbles from the centre outward.
- Clip a row of trim clips along the edge, spacing them evenly and checking the banding stays flush and aligned as you go.
- Leave the clips in place for the adhesive’s full curing time — do not rush this, even if the banding feels stuck sooner.
- Remove the clips, trim the overhang with a sharp trimmer or utility knife, and lightly sand the edge smooth.
Tips for Better Results
- Print plenty. Running out of clips mid-glue-up is the most common way this repair goes wrong.
- Use felt pads on delicate veneer. They cost nothing and prevent jaw marks.
- Work in a warm room. Most banding adhesives cure better at normal room temperature than in a cold garage.
- Trim after curing, not before. Trimming while the glue is soft can lift the banding edge you just fixed.
- Keep a set for each shelf thickness. A small labelled collection covers most shelves in a house.
Common Mistakes to Avoid
- Sizing the clip to the bare shelf. The clip must grip shelf plus banding, so measure with the banding in place.
- Printing flat instead of on edge. Layer lines across the spring arms make clips that snap; printing on the side keeps them flexible.
- Spacing clips too far apart. Gaps between clips let the banding bow or bubble while the glue sets.
- Removing clips too early. Patience during curing is what makes the repair last.
- Using rough jaws on veneer. A rough jaw leaves marks that are harder to fix than the original peeling banding.
Care, Storage, and When to Choose an Alternative
Store clips in labelled bags by size, away from heat. PETG clips should survive many uses; retire any that have lost their spring or cracked at the bend. A clip that no longer grips firmly is worse than no clip, because it gives false confidence during curing.
Choose a different clamping method — such as painter’s tape, a long clamp with cauls, or a manufactured banding clamp — when the shelf edge is very thick, curved, or profiled in a way a simple U-clip cannot grip, or when the banding is a thick solid-wood lipping that needs serious pressure. Printed clips are workshop aids for standard flat shelf edges; they are not a substitute for proper clamping on demanding work.

FAQ
How many clips do I need for a shelf?
A good rule is one every 100 to 150 mm, plus one near each end. For a 900 mm shelf, that is about seven or eight clips. Print a few spares as well.
Will the clips work on melamine shelves as well as plywood?
Yes, provided you size the clip to the shelf-plus-banding thickness and use an adhesive suited to melamine. Clean the edge well first, as melamine can be dusty and smooth.
Can I leave the clips on permanently as edge protectors?
They are designed as temporary gluing aids, not permanent trim. For a permanent edge protector, a different design — one that is meant to stay on and look finished — is a better choice.
My banding still bubbles after using clips. Why?
Usually the glue had not cured fully, the edge was dusty or uneven, or the clips were too far apart. Re-glue with a clean edge, closer spacing, and the full curing time.
Conclusion
Peeling edge banding is a small flaw that makes a whole shelf look tired, and it is one of the most satisfying repairs to get right. A row of printed trim clips, sized to your shelf and spaced evenly, holds the banding flat while the glue does its work — no expensive clamps, no tape residue, no bubbles.
If your shelves need more work, you may also enjoy Light-Duty Shelf Brackets: When 3D Printed Brackets Make Sense — and How to Print Them Strong and Edge Banding Trimmer Guide: 3D Print a Flush-Trim Guide for Clean Shelf Edges, which cover the supports and the finishing trim for the same shelves. Print a set in each size you need, keep them labelled, and the next peeling edge will be a quick, calm repair.