Introduction
A chisel’s edge is its whole value, and it is astonishingly easy to ruin. One roll across a bench into a screwdriver, one afternoon rattling loose in a toolbox with its brothers, and an edge you honed to shaving sharpness has a nick that takes twenty minutes of stone work to remove. The loose toolbox and the coffee can of chisels are where good edges go to die.
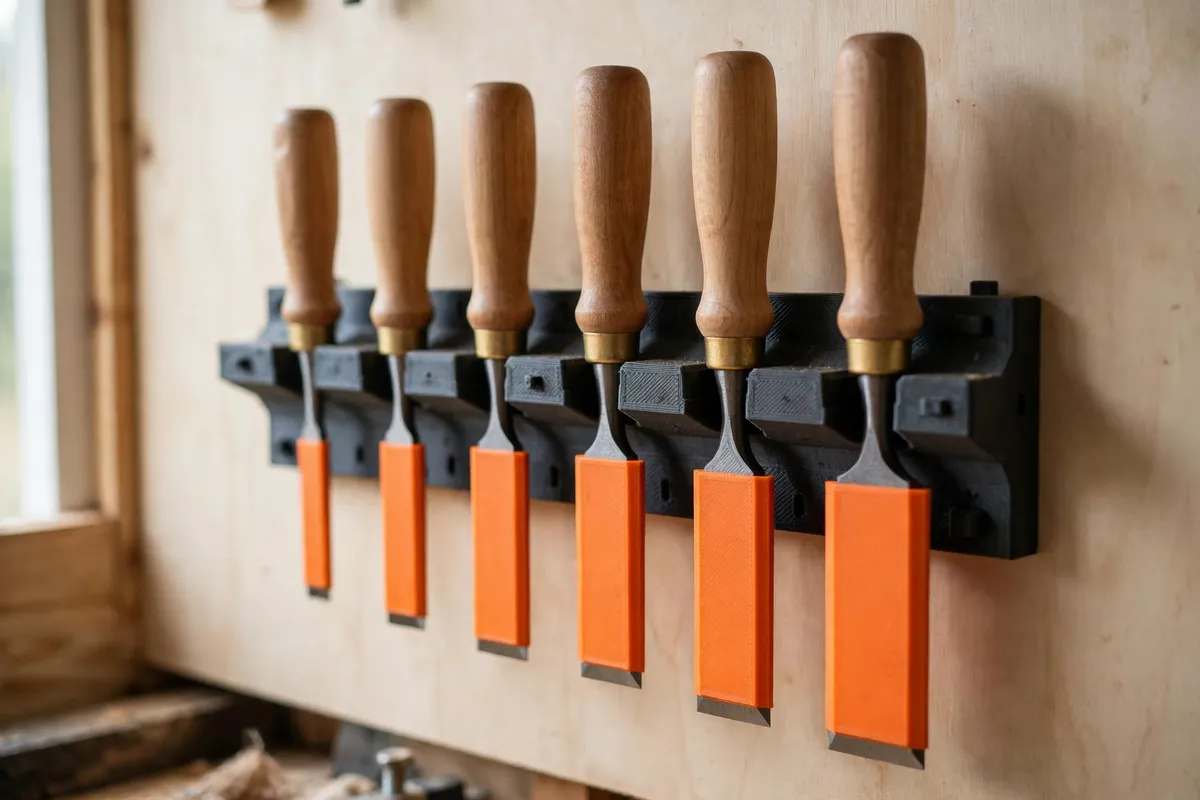
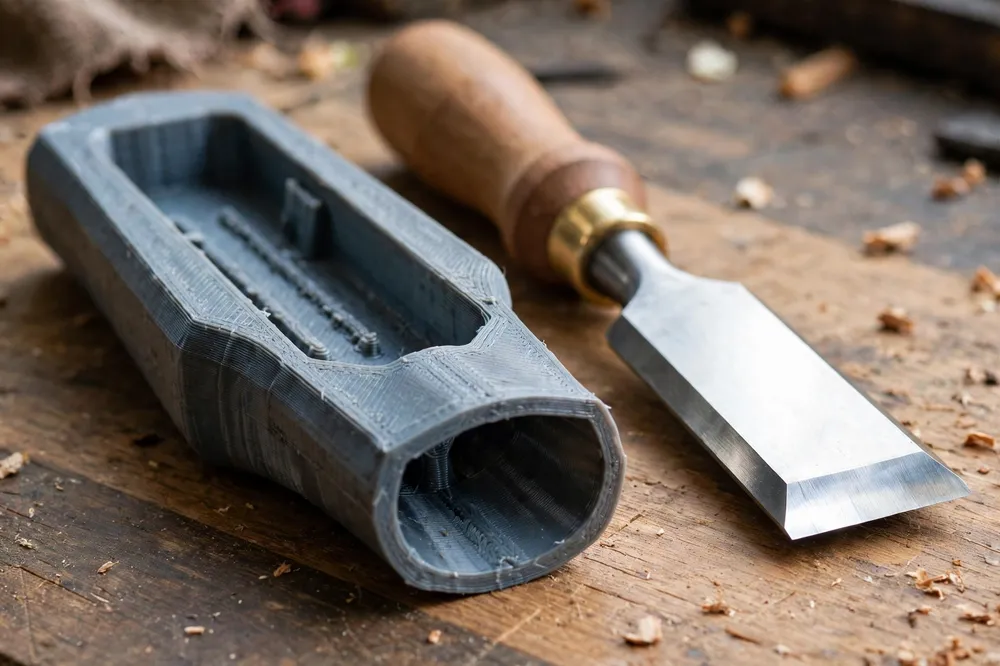
A 3D printed chisel rack with individual blade guards attacks both problems at once. Every chisel gets its own slot, sized to its width, with the blade covered by a guard that snaps over the bevel end. Edges never touch each other, guards make the rack safe to reach into without looking, and a wall-mounted rack puts the full set in view so you grab the right width first time.
This guide walks through designing the rack and guards, printing them, and setting up storage that treats your edges — and your hands — properly.
What You Need
This is a precision-adjacent project: slots and guards must fit your actual chisels, so measuring tools matter as much as the printer.
Materials and tools
- A home 3D printer with a build area of about 200 mm for a wall rack, or smaller for drawer trays printed in sections
- PLA filament is fine for indoor racks and guards — this is storage, not a load-bearing tool; PETG if your workshop gets hot or damp
- A digital caliper to measure blade widths, blade thicknesses, and handle diameters
- Your chisel set, every size you own, laid out in order
- A pencil and paper to sketch the rack layout before modeling
- Screws and wall fixings for a wall rack, or nothing at all for a drawer tray
- A file or fine sandpaper for easing guard mouths after printing
Measure before you model. Chisel widths are nominal — a “19 mm” chisel may measure 18.6 or 19.4 — and guards printed to the nominal number will either rattle or refuse to fit.
Suggested print settings
- Layer height: 0.2 mm for guards, where fit matters; 0.24 to 0.28 mm is fine for the rack body.
- Walls: 4 perimeters on guards and slot dividers — enough for a snap fit that survives daily use.
- Infill: 20 to 30 percent for the rack; guards are mostly walls and can print near-solid at small size.
- Top and bottom layers: 4 or more.
- Orientation: Print guards standing on their closed end with the mouth up, so the inner surfaces come out smooth. Print the rack flat on its back.
- Supports: Guards should need none; keep the rack’s screw holes as countersunk cones to avoid supports too.
Design Considerations
1. Slots sized per chisel, in order
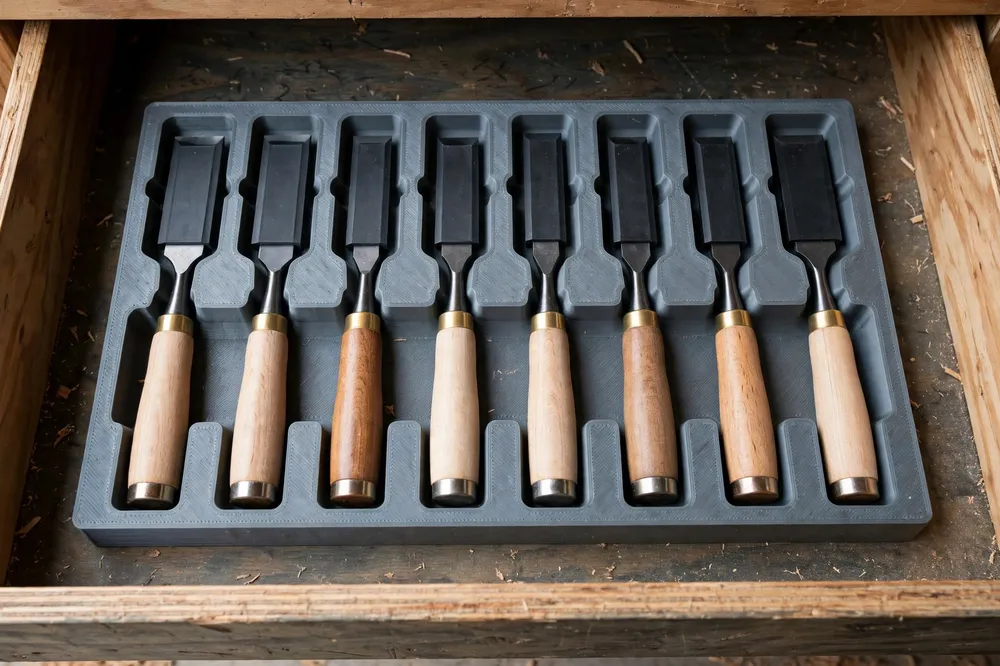
A rack with identical slots invites chisels to migrate into the wrong homes. Model each slot to its chisel: blade width plus about 1 mm of clearance, with a cradle that also supports the handle so the chisel rests level rather than hanging by its blade. Arrange the slots in strict size order. Your hands learn the layout in a week, and a missing chisel announces itself as a visible gap in the sequence.
Emboss the width of each chisel into the rack beside its slot as part of the model. Unlike labels, modeled numbers cannot peel off in a dusty shop.
2. Guards that protect the last millimeter
The guard’s job is to cover the cutting edge completely while never touching it. Model the guard as a tapered sleeve a few millimeters longer than the blade’s bevel, with an internal ridge or shoulder that bears on the flat of the blade well behind the edge, so the edge floats inside a hollow tip. Add a slight flare at the mouth so the guard slides on without you aiming the edge into a slot — the moment a guard is fiddly, it starts staying off.
Give the guard a flat side or a small fin so it cannot roll off the bench, and make the closed end chunky enough to survive being dropped on concrete.
3. Three homes: wall, bench, and drawer
Model the system in three variants from the same slot geometry. The wall rack angles the chisels slightly outward at the top so handles clear the wall and blades stay covered. A bench rack is the same row on a weighted, wide footprint that cannot tip when you pull a chisel one-handed. The drawer tray drops the height: chisels lie in shallow cradles with guards on, in a tray sized to your drawer, printed in interlocking sections if needed.
Sharing one measured slot design across all three means your set is consistent wherever it lives — and a growing set just means printing one more section.
4. Room to grow
Chisel sets grow one flea-market find at a time. Leave the rack design parametric in spirit: keep your measurements in a notebook or the model file, and end each rack section with a flat joining face so sections can butt together seamlessly when you add the 6 mm chisel you swore you did not need.
Step-by-Step: Printing the Rack and Guards
- Measure every chisel: blade width, blade thickness at the shoulder, handle length and maximum diameter. Write them down in size order.
- Model one guard first for your most-used chisel, print it, and test the fit — it should slide on with light friction and stay put when the chisel is held guard-down and shaken gently.
- Adjust the guard fit in small steps: 0.2 mm of extra clearance loosens; a slightly deeper internal ridge sharpens retention. Dial in one guard and the rest follow the same offsets.
- Model and print the rack using your measurements, then dry-fit every chisel before mounting anything.
- Ease any tight mouths with a file, fit all guards, and only then mount the rack or settle the tray in its drawer.
Step-by-Step: Setting Up Your Storage
- Choose the wall spot within arm’s reach of your bench but out of the swing path of boards and doors.
- Mount the rack into solid fixing — studs or proper wall plugs — level, with the bottom edge at a height where guards are easy to see.
- Load the chisels in size order, guards on, handles seated in their cradles.
- Fit the bench rack or drawer tray as your second home if you work away from the wall often; chisels travel between homes guarded, always.
- Adopt the rule on day one: a chisel that leaves its slot wears its guard until it reaches the workpiece, and the guard goes back on before the chisel does. Habits are the real storage system; the rack just makes them easy.
Our guide “Pegboard Tool Holders: 3D Print a Complete Organizer Set for Screwdrivers, Pliers and Wrenches” follows the same philosophy for the rest of the tool wall — a printed home for every tool, sized to the tool itself — and the rack looks perfectly at home mounted beside a pegboard set.
Tips for Better Results
- Print guards in a bright color — orange or red — whatever the rack’s color. Bright guards are easy to spot if one is left on the bench, and they read as a visual warning that an edge lives inside.
- Keep a spare guard for your most-used size clipped to the rack; guards are small and occasionally wander.
- Store honing gear nearby. The rack pairs naturally with the grit-sorted system in “Sandpaper Organizer and Storage Box: 3D Print a Grit-Sorted System for Your Workshop” if you keep abrasives and stones in one sharpening corner.
- Wipe blades with a lightly oiled cloth before guarding them in a damp shop; the guard keeps dust off but traps whatever moisture you seal in.
- Photograph your rack when it is complete and keep the measurements with the photo. Reprinting an identical section two years later is then a five-minute job.
Common Mistakes to Avoid
- One-size slots. Guards and slots printed to nominal sizes will fit half your chisels badly. Measure each one.
- Guards that touch the edge. A guard resting on the cutting edge dulls it slowly and defeats the purpose. The internal shoulder must bear behind the bevel.
- Slots so deep the blade hides. If you cannot see which chisel is which, you will pull three before finding the right one. Show the handle and a little shoulder.
- Mounting the rack too high. Reaching up and fumbling a chisel out of a slot above shoulder height is how guards end up skipped. Keep the rack at bench-reach height.
- Skipping the guard “just for a second.” Every unguarded trip across the shop is a dice roll for the edge and your fingers. The guard takes two seconds; re-honing takes twenty minutes.
Care, Storage, and When to Choose an Alternative
Blow dust out of the slots occasionally, check guards for cracks at the mouth, and reprint any guard that has gone loose — a sloppy guard is worse than none because it can slip off in a drawer unnoticed. The rack itself needs nothing beyond a wipe.
Alternatives exist. Leather rolls are lovely for site work and protect edges well, though they hide sizes and slow you down. Magnetic strips are quick but leave edges naked and exposed to every passing tool — and to hands. A traditional wooden rack is a fine project if you prefer making to printing. For a mixed, growing set of chisels that changes size by size, though, the printed system wins: every slot is exactly its chisel, and expanding it costs a few grams of filament.
FAQ
Will a printed guard dull my chisel edge?
Not if it is designed correctly. The guard’s internal shoulder contacts the flat of the blade behind the bevel, and the cutting edge floats inside a hollow space at the tip without touching anything. Test with your sharpest chisel: if the guard slides on without any contact at the edge, it is right.
What filament should I use for guards?
PLA is fine for guards in a normal indoor workshop and prints the crispest fit. Choose PETG if your shop gets hot in summer or you store chisels in a vehicle or site box, where PLA can soften or turn brittle.
How do I handle chisels with very different handle shapes?
Measure the largest handle diameter in each slot’s cradle and support the chisel by its blade shoulder and handle together. Bench chisels, mortise chisels, and cranked-neck paring chisels can share one rack as long as each slot is modeled from that chisel’s own measurements.
My chisel set is large. Will the rack get too long?
Print the rack in interlocking sections of four or five slots. Sections butt together on the wall into a run as long as you need, and a future section is a small print rather than a whole new rack.
Conclusion
Sharp chisels are not an accident; they are what happens when edges are never allowed to touch anything they should not. A printed rack with fitted guards — every slot measured, every edge covered, every size in order — turns storage from the thing that ruins your edges into the thing that preserves them.
Measure your set tonight, print one guard, and test the fit. The rest of the system builds itself from there, one exact slot at a time.