

Introduction
A fence post almost never rots from the sides. It rots from the top. The flat end of a post is a bundle of open straws — end grain drinks rain, holds it, and feeds it downward, which is why so many fences fail with posts that are sound everywhere except the soft, crumbling crown. Metal caps exist, but they come in a few standard sizes, cost more than they should, and never quite match the odd post or the style of the fence.
A printed cap solves the real problem with a shape you control: a sloped or domed top that sheds water off the end grain, a skirt that hugs the post, and a look that runs consistently down the whole fence line. Size it to your posts — true 4×4, the smaller dressed dimension most posts actually measure, chunky 6×6 gate posts — and every post gets the same clean finish. It is pure weather protection and decoration: a hat for a post, nothing structural, and it asks nothing of the fence but to be measured.
This guide covers measuring posts honestly, designing a cap that sheds water and stays on in a gale, and printing it in a filament that laughs at weather.
What You Need
One of the easiest outdoor prints there is. Success is decided by your tape measure and your filament choice.
Materials and tools
- A home 3D printer big enough for your post size — a 6×6 cap may need a larger bed or a two-piece design
- ASA filament, first choice for permanent outdoor duty; PETG is a solid second
- A tape measure and calipers for measuring your posts across several points
- The posts themselves, checked for size variation along the fence
- A ladder or step stool for fitting caps safely along the run
- Stainless screws (optional, one per cap) or exterior construction adhesive if your design uses a mechanical fixing
- A brush for cleaning post tops before fitting
Skip PLA entirely here: a dark cap on a summer fence reaches temperatures that soften it, and a sagged cap holds water instead of shedding it — the exact opposite of the job.
Suggested print settings
- Layer height: 0.24 to 0.28 mm. Caps are large, simple shapes; print them fast and coarse.
- Walls: 4 to 5 perimeters — the skirt takes knocks from trimmers and ladders.
- Infill: 20 to 30 percent, gyroid. The pyramid top is mostly shell anyway.
- Top and bottom layers: 5 or more on the crown so the water-shedding surface is fully sealed.
- Orientation: Print crown-up as it sits on the post, so the top surface is layered smooth and watertight.
- Supports: A pyramid or shallow dome prints clean without supports; steep domes may want a touch inside the skirt.
Design Considerations
A post cap has two jobs that pull in opposite directions: seal the top like a roof, grip the post like a hat in wind. These decisions deliver both.
1. Measure the post you actually have
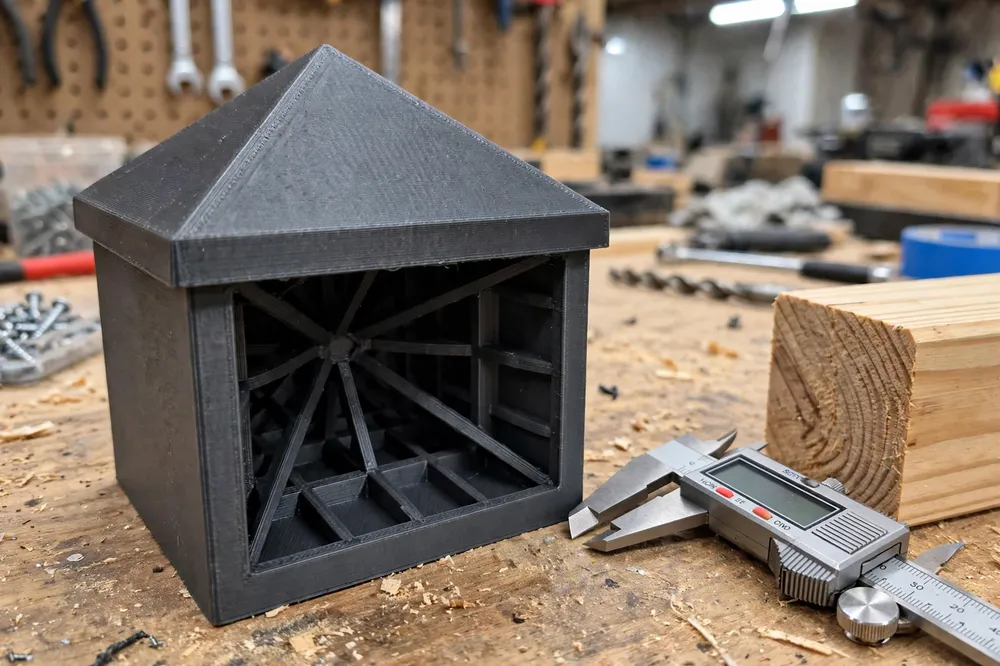
A “4×4” post is rarely 4 inches square. Dressed posts typically measure around 89 to 92 mm, rough-sawn posts run larger and vary post to post, and old posts have swollen, shrunk, or been trimmed out of square. Measure each size class across both directions at the top, take the largest reading, and model the cap’s inner skirt 1.5 to 2.5 mm bigger all around. That clearance slips over out-of-square tops without splitting, and shallow ribs inside the skirt (below) take up the slack so the cap still sits firm.
2. Shed water like you mean it
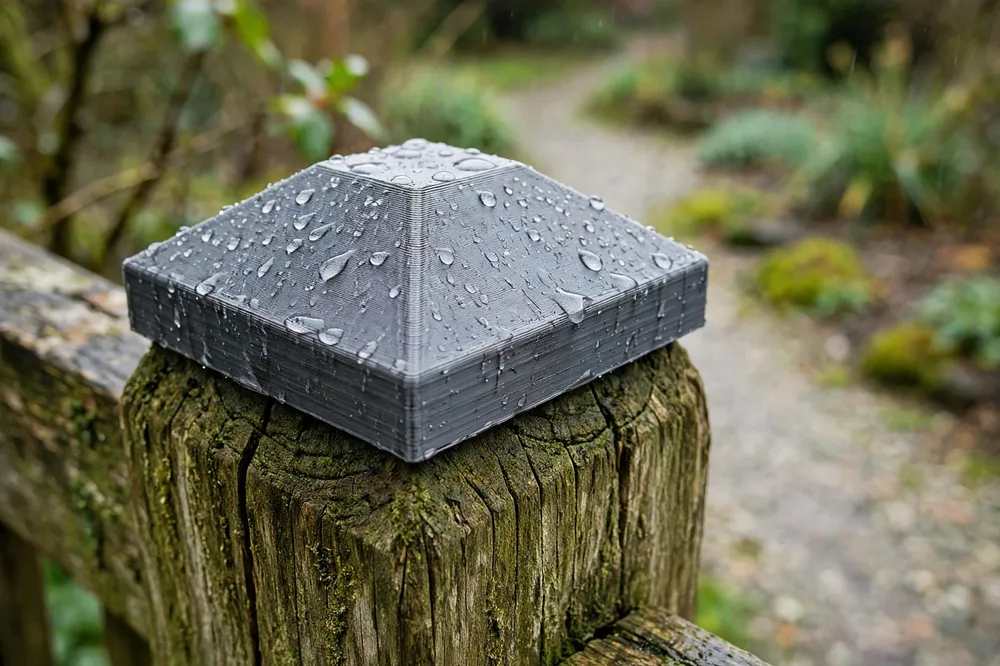
The crown is the business end. A pyramid with at least a 20 to 30 degree slope, or a dome with a genuinely curved profile, throws water off the post top and — just as important — off the cap itself, so no puddle sits working at the print’s layer lines. Add a drip edge: a small overhang and a slight undercut at the skirt’s rim so running water drops clear of the post face instead of tracking down it. Round the crown’s edges; sharp corners are where coatings fail and prints start to split after winters of freeze and thaw.
Print the crown with enough top layers and walls to be truly watertight — water that finds a pinhole into the infill will freeze there and wedge the print apart over a season.
3. Grip: ribs, depth, and one honest fixing
Wind lifts caps. Gravity alone is not a retention strategy. Give the skirt real depth — 40 to 60 mm down the post — and mold three or four shallow vertical ribs inside it that press lightly against the post faces. For most garden fences that friction fit, plus depth, is plenty. For tall, exposed, or coastal fences, model one discreet screw hole in the skirt’s least visible face and drive a single stainless screw into the post. A cap that can be unscrewed can also be removed for post maintenance, which glued caps cannot.
4. A style that runs the whole fence
The quiet pleasure of printing caps is consistency with personality: identical caps down the whole run, in a shape no store stocks. Choose your profile — crisp pyramid, soft dome, flat-top with a chamfered edge, or a stepped design that echoes the house trim — and hold it constant. A small finial ball or ridge reads beautifully on gate posts only, marking the entrance without shouting. Print gate-post caps in the same filament batch as the rest so the color match holds in sunlight.
Step-by-Step: Printing and Fitting
- Survey the fence. Group posts by actual measured size; note any tops that are split, sloped, or cut out of square.
- Trim and clean the post tops flat where needed, and brush away loose fiber so caps seat fully.
- Model the cap for each size class: clearance inside, ribs, sloped watertight crown, drip edge.
- Print one cap and test-fit it on the worst post in its class — the biggest, least square one. If it fits that post, it fits the run.
- Check the grip: the cap should push on with firm hand pressure and resist a straight upward pull.
- Adjust the clearance or rib height in small steps until the fit is right, then print the run.
- Fit caps dry along the whole fence first, trimming any post top that refuses its cap.
- Add the single screw per cap where your exposure demands it, on the face least seen from the house.
- Step back and enjoy the most finished your fence has ever looked.
Step-by-Step: A Seasonal Cap Check
- Each spring, walk the fence and press each cap down; any that have loosened get a look underneath.
- Check crowns for cracks after hard winters — a split crown is a funnel, not a cap, and gets reprinted.
- Clear debris that lodges between cap and post; trapped leaves hold moisture against the wood.
- Re-seat any cap disturbed by ladders, trimmers, or falling branches during the year.
- Note fading. ASA holds color for years; if a cap has gone chalky after many seasons, a fresh print restores the run for pennies.
Tips for Better Results
- Print the test cap in your final filament. ASA and PETG shrink differently; a test in PLA approves a fit the real cap will not have.
- Batch by size class. Print all the 4×4 caps together, then the gate 6x6s, so a setting change never mixes sizes mid-run.
- Vent the underside. A shallow groove inside the skirt lets any moisture that does get under the cap dry out instead of stewing against the end grain.
- Caps love company outdoors. If your fence carries lights, our guide “Solar Light Wall Mounts: 3D Print Brackets for Patios, Fences and Pathways” shows how to mount them to the same posts, and “3D Printed Brackets for Solar Garden Lights: Repair Broken Stakes and Mounts the DIY Way” handles the garden end of the run.
- Keep the file and a note of sizes. Fences gain posts; future caps should match without re-measuring the world.
Common Mistakes to Avoid
- Trusting the nominal post size. “4×4” is a name, not a measurement. Model from calipers, not the label.
- A flat-topped cap. Flat crowns pond water, and ponded water finds every layer-line weakness. Slope is the whole point.
- Too tight a skirt. Forcing a cap onto a swollen old post splits the skirt by autumn. Clearance plus ribs beats interference.
- Printing in PLA. Sun and heat will slump it into a water-holding dish. ASA or PETG, no debate.
- Gluing every cap solid. One day a post needs trimming, treating, or replacing, and a removable cap is a mercy. Friction or one screw is enough.
Care, Storage, and When to Choose an Alternative
Caps ask for the spring walk described above and nothing more. Keep one or two spare caps from the original print batch in the shed; storm-thrown branches occasionally crack one, and a spare turns the repair into a two-minute job.
Choose metal caps when the fence is a formal front boundary and you want a specific manufactured finish, or when posts are so irregular that a rigid printed skirt cannot follow them — a flexible TPU cap can handle mild irregularity, but a post shaped like a banana wants a carpenter, not a cap. For the great majority of garden fences, though, a printed cap in ASA will outlast the fence’s paint, cost less than its screws, and match every post exactly because it was made from them.
FAQ
Do post caps really stop rot?
They stop the biggest cause of it. Most post rot starts at the end grain on top, where rain soaks straight down into the wood. A sloped, watertight cap sheds that water off the crown entirely. Caps do not fix rot already deep in a post, and ground-line moisture is a separate battle fought with gravel and post choice — but for the top of the post, a cap is the whole answer.
What size should I print for a standard fence post?
Measure yours. Most dressed 4×4 posts measure about 89 to 92 mm square, so a cap with an inner skirt around 93 to 95 mm plus ribs is a typical starting point. Rough-sawn and older posts vary far more. One measurement per size class beats any number from a chart.
ASA or PETG for post caps?
ASA is the outdoor champion — it resists ultraviolet light and summer heat the best and holds its color for years. PETG is a respectable second and easier to print. Both work; neither PLA nor bargain filament belongs on a fence top.
How do the caps stay on in strong wind?
Depth and friction: a skirt 40 to 60 mm deep with internal ribs gripping the post faces holds through ordinary gales. On exposed sites, add the single stainless screw through the skirt. If a cap ever does lift off, it is light and harmless — refit it and add the screw this time.
Conclusion
Every fence deserves a dry crown. A printed post cap — sloped to shed, ribbed to grip, sized from your own posts — stops rot where it starts and gives the whole run a finished look no mixed bag of store caps can match.
Measure the posts, print one honest test cap, and hat the whole fence.
If your fence also carries lights, you may enjoy our guide “Solar Light Wall Mounts: 3D Print Brackets for Patios, Fences and Pathways” for brackets that match the same tidy finish.


