Introduction
House numbers do quiet, important work: they guide guests, deliveries, and anyone trying to find you quickly to the right door. Yet on many homes they are faded, crooked, hidden behind a shrub, or in a script font nobody can read from a moving car. A printed plaque fixes the whole problem in one afternoon project — bold numerals, strong contrast, sized for your wall and your street.
This is a purely decorative, weather-facing project: a backplate, raised numerals, and a slim frame, mounted with ordinary screws. It connects to nothing, carries nothing, and its only job is to be read clearly from the street in daylight and in dusk. Because it lives outdoors full-time, material choice matters more here than in most prints, and ASA is the headline act.
This guide covers laying out numerals for genuine legibility, designing a two-part plaque that prints cleanly, and mounting it straight and secure.
What You Need
The plaque prints in two parts — backplate and numerals — which makes color contrast easy: print them in different colors, no painting required.
Materials and tools
- A home 3D printer with a build area sized to your plaque — a three-digit plaque typically needs 220 mm or more of width, or a design that splits the backplate
- ASA filament in two contrasting colors — charcoal and white is the classic modern pairing; black and warm brass-look filament also reads well
- A tape measure for the wall position and for judging numeral height against your street distance
- A level and pencil for mounting marks
- A drill with bits suited to your wall, plus screws and wall plugs to match — stainless or coated for outdoors
- Optional: a clear matte UV-resistant spray coat for extra insurance in harsh sun
Skip PLA entirely for this project: a sunlit wall can soften it, and outdoor prints in PLA fade and turn brittle. ASA is made for exactly this life.
Suggested print settings
- Layer height: 0.2 mm for the numerals gives clean faces; 0.24 to 0.28 mm is fine for the backplate.
- Walls: 4 perimeters on both parts — the plaque’s stiffness comes from its walls.
- Infill: 20 to 30 percent on the backplate; numerals can be mostly walls with light infill.
- Top and bottom layers: 5 on the backplate’s front face for a smooth, weather-shedding surface.
- Orientation: Print both parts face-down on a smooth bed for the cleanest visible faces.
- Supports: None if the frame lip is modeled as a shallow angle rather than an overhang.
Design Considerations
Think like a sign designer first and a printer second: legibility from thirty meters beats cleverness at one meter every time.
1. Numeral size and font come first
The rule of thumb used by sign makers is roughly 25 mm of letter height for every 7 to 8 meters of viewing distance. For a typical front wall read from the street, numerals 100 to 130 mm tall are the sweet spot — large enough to read at a glance, small enough to sit elegantly on a plaque.
Choose a bold, simple sans-serif style with open shapes: the kind of numerals used on road signs, not on wedding invitations. Thin strokes disappear at distance and print weakly; bold strokes read and survive. Avoid scripts, outlines, and novelty fonts entirely — house numbers are information, not decoration that happens to contain digits.
2. Contrast does the reading
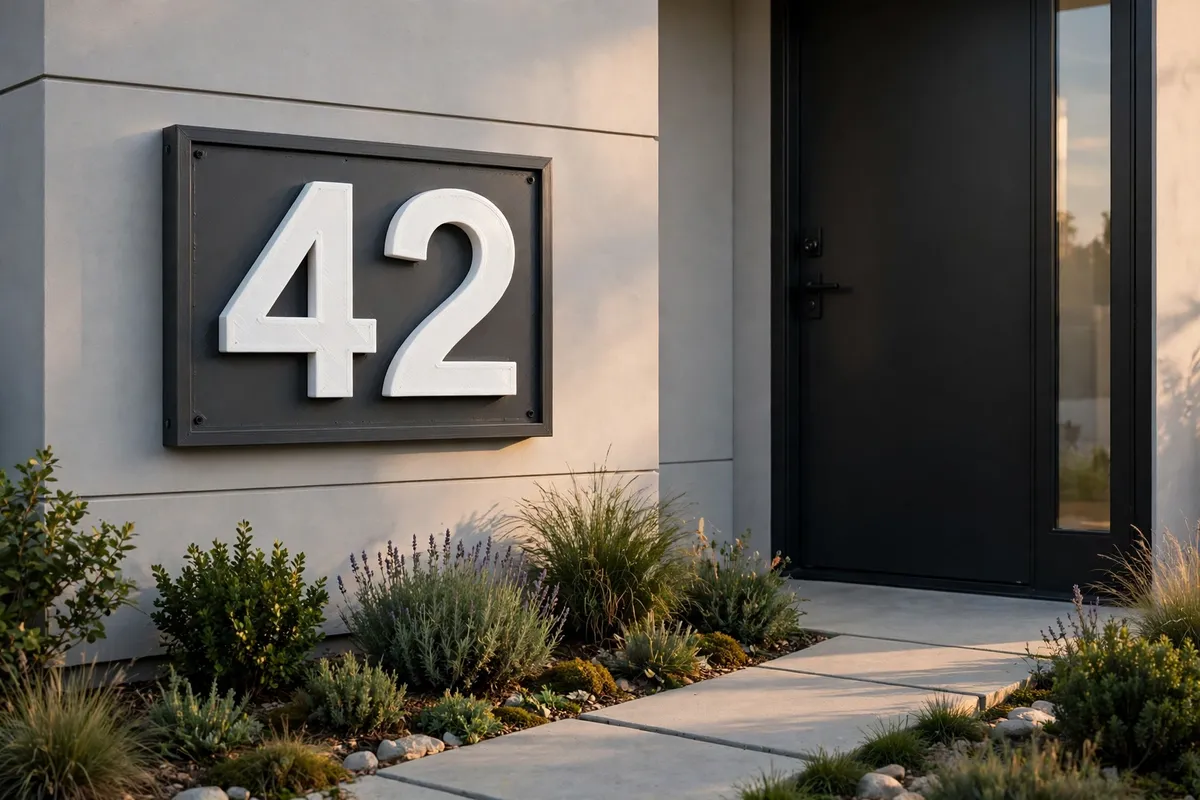
A plaque is read by contrast, not by color alone. Light numerals on a dark plate or dark numerals on a light plate both work; mid-tone on mid-tone fails from the street no matter how stylish it looks on the bench. The two-part printed design makes this free: pick your pair for maximum difference in lightness, then sanity-check it by viewing your printed numerals against the plate across the room, squinting. If they shimmer into the background, change a color.
Matte finishes out-read glossy ones outdoors, because glare washes gloss out in sun. ASA prints naturally satin-matte, which is another point in its favor.
3. The frame and backplate give it architecture
A slim raised frame around the backplate — a lip 8 to 12 mm wide standing 3 to 4 mm proud — turns a flat board into a finished object. It casts a thin shadow line that separates the plaque from the wall and makes the whole thing look made rather than printed-in-a-hurry. Round the frame’s outer corners gently; sharp corners outdoors collect grime and look harsh.
Give the backplate a solid margin around the numerals: at least 30 to 40 mm on all sides, more at top and bottom. Crowded numbers look anxious; breathing room looks designed.
4. Hidden fixings and a flat back
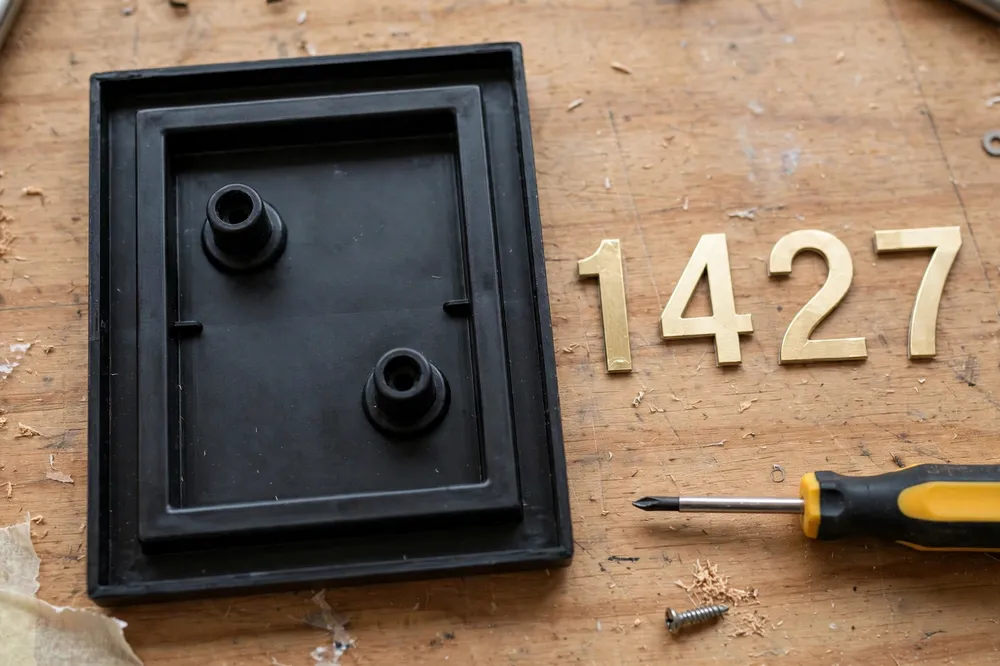
Nothing spoils a modern plaque like screw heads through the numerals. Put the fixings on the back: two raised bosses with keyhole slots, or recessed pockets that accept screw heads, positioned near the top corners where the frame gives depth. The plaque slides or sits onto pre-driven screws and hangs flat, fixings invisible.
Model shallow standoff ribs on the back so the plaque sits a few millimeters off the wall. Airflow behind the plate prevents the damp, algae-friendly trap that flush mounting on masonry eventually creates, and the small shadow gap adds to the finished look.
Step-by-Step: Designing and Printing the Plaque
- Count your digits and choose numeral height from your street distance — 100 to 130 mm for most homes.
- Pick a bold sans-serif numeral style and lay the digits out with even spacing; judge spacing by eye at the gaps, not just the number widths.
- Model the backplate with its margin, frame lip, rounded corners, back bosses, and standoff ribs.
- Model the numerals 6 to 8 mm thick with a very slight bevel on their front edges for a crafted look.
- Print the backplate face-down in your darker or lighter base color, then the numerals in the contrasting color.
- Test the pairing across the room, then across the garden. Fix contrast now, not after mounting.
- Bond numerals to plate with a weatherproof adhesive suitable for ASA, weighted flat while it cures, or design in two small screws from the back per numeral if you prefer mechanical fixing.
Step-by-Step: Mounting the Plaque
- Choose the position: near the door or on a gate pillar, unobstructed from the street, and where evening light or a porch lamp falls on it if possible.
- Hold the plaque in place, level it, and view it from the street before marking anything. Crooked-by-a-degree is obvious forever.
- Mark the fixing points through the back bosses onto the wall.
- Drill and plug to suit your wall — solid masonry takes standard plugs; render over block needs care to keep holes clean; timber cladding fixes with screws alone.
- Drive the screws to the depth your keyholes or pockets need, hang the plaque, and nudge it level.
- Step back to the street and read your numbers as a stranger would. If you can read them at a glance, you are done.
Tips for Better Results
- Print a single numeral first and hold it against the wall from the street. Size and contrast decisions are far easier at full scale.
- Space digits optically. A “1” needs less room around it than an “8”; even visual gaps beat mathematically even spacing.
- Match the house, loosely. A charcoal plaque suits modern render; a deep green or black plate sits better on brick. Contrast with the wall matters too, not just within the plaque.
- Consider a second small plaque with the same design at the gate or mailbox post if the wall sits far back from the street.
- Photograph the finished plaque from a car at the curb. That is the view that counts, and the photo does not flatter.
Common Mistakes to Avoid
- Numerals too small or too thin. This is the classic failure. If in doubt, go 20 percent bigger and bolder — nobody complains that house numbers are too easy to read.
- Low-contrast color pairs. Mid-grey on beige looks elegant in the slicer and invisible from the street.
- Printing in PLA for a sunny wall. It will warp and fade. This is the exact project ASA exists for.
- Screw heads through the numerals. Plan hidden fixings in the design stage; patching the look afterward never works.
- Mounting flush on masonry with no gap. Trapped damp streaks the wall and grows algae behind the plaque. Standoff ribs cost nothing.
Care, Storage, and When to Choose an Alternative
Care is nearly nothing: a rinse or wipe when you clean the front door, and a yearly check that the fixings are snug. ASA shrugs off sun and rain for years; if you added a clear UV coat, renew it every couple of years in harsh climates.
Choose an alternative when your home falls under heritage or housing-association rules that specify plaque style or material — check before printing — or when your numbers must be illuminated to be found at night on an unlit rural road, where a properly rated lit sign is the honest tool. For the great majority of homes, a bold printed plaque in ASA is clearer, cheaper, and better-looking than the faded numbers it replaces.
FAQ
How big should 3D printed house numbers be?
For most homes, 100 to 130 mm tall reads clearly from the street. Use roughly 25 mm of height for every 7 to 8 meters between the plaque and where it must be read. If your wall sits far back, size up — and always test one numeral at full scale from the curb before printing the set.
What is the best filament for an outdoor house number plaque?
ASA, without much contest. It is formulated for ultraviolet and weather resistance, prints with a satin finish that reads well in sun, and will not soften on a hot wall. PETG is an acceptable second choice in mild, shaded positions. Avoid PLA outdoors.
How do I attach the numerals to the backplate?
A weatherproof adhesive rated for plastics, applied to clean, dry surfaces and weighted while curing, is simple and invisible. For a fully mechanical approach, model two small pilot holes per numeral and fix from behind with short stainless screws. Either outlasts the plaque’s first decade if done neatly.
Can I make the plaque match a longer address or include a street name?
You can, but read the result from the street honestly. Extra lines shrink the numerals, and numerals are the point. If your address needs more than the number to be found, consider the number plaque by the door and a second, simple name board at the gate — each doing one job at a readable size.
Conclusion
Good house numbers are a small kindness to everyone who visits, delivers, or hurries to your door: big, bold, high-contrast, and straight. A two-part printed plaque — framed ASA backplate, raised numerals, fixings hidden — achieves all of it in an afternoon, in colors that suit your home.
Design for the view from the street, print it in ASA, and enjoy being the easiest house to find on the road.
If you like signs and lettering projects, you may also enjoy our related guide, “Router Sign-Making Templates: 3D Print Letter and Number Guides for Wood Signs,” which covers the routed-wood route to the same handsome result.