Introduction
Every deep clean and every repair behind a big appliance starts with the same miserable job: dragging a hundred kilograms of fridge, washer, or cabinet across a floor it would rather gouge. Appliances do not roll where you want them, their little feet dig in, and the “walk it out corner by corner” dance risks the floor, the appliance, and your back in roughly that order.
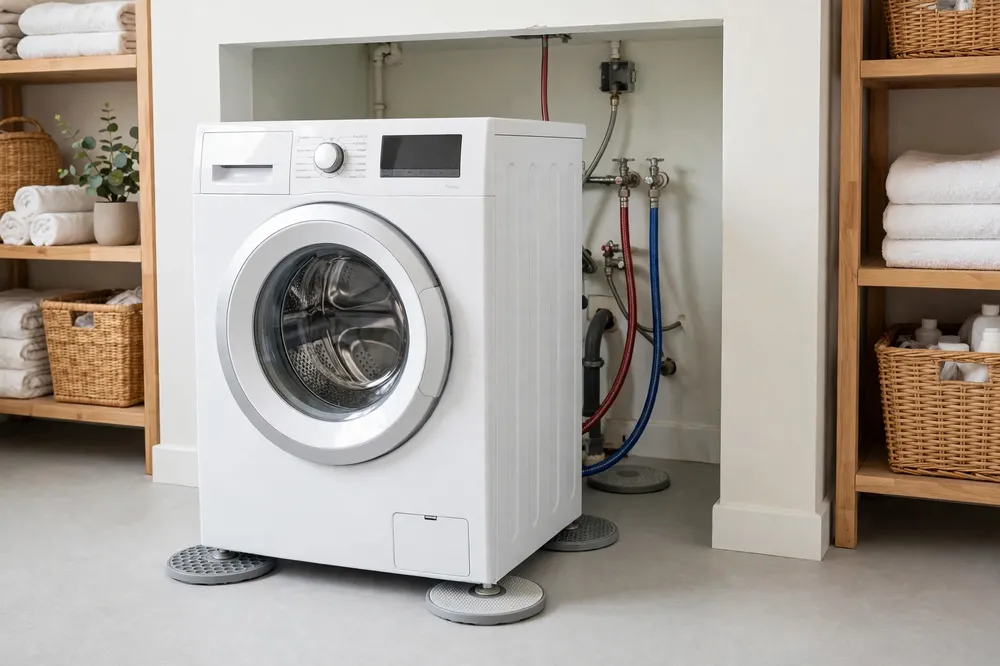
Slider pads change the physics. A pad is a wide, smooth-bottomed cup that slips under each appliance foot, spreading the weight over a broad area and presenting the floor with a low-friction surface instead of a digging foot edge. The appliance glides — genuinely glides — in the direction you push, and steering becomes a gentle nudge instead of a heave. Printed pads have a real edge over the generic store sets: the cup can be sized to your appliance’s actual feet, and the base can be shaped for your floor.
A note on sensible use: sliders are for sliding appliances at floor level, with the appliance upright, unplugged, and emptied of loose contents — never for lifting, jacking, or propping an appliance up, and never as a substitute for a proper dolly on stairs or thresholds. Used at floor level as intended, they are one of the kindest prints your floors will ever meet.
This guide covers measuring appliance feet, designing a cup and base that carry real weight, printing pads that will not fold, and moving day technique that keeps everything — floor, appliance, and you — intact.
What You Need
These are structural prints in everything but name. A fridge concentrates serious weight on four small points, and the pads must not creep, crack, or curl.
Materials and tools
- A home 3D printer with a build area of roughly 150 mm or more for full-size pads
- PETG filament for toughness and a naturally slick surface; ASA if the pads will live in a hot garage. Avoid brittle basic PLA for the heaviest appliances
- A tape measure and calipers for the appliance feet — diameter, shape, and how they sit
- A pry bar with a wide, flat blade or a set of wooden shims, for lifting each corner just enough to slip a pad under (a helper’s hands work too)
- A friend. Two people move appliances better than one, sliders or not
- A broom and cloth for the floor: grit under a slider is a scratch waiting to happen
Suggested print settings
- Layer height: 0.28 mm. These are big, hidden shapes; speed is welcome.
- Walls: 6 to 8 perimeters. The cup walls carry the appliance’s weight outward to the base.
- Infill: 60 to 80 percent, gyroid or cubic. This is a genuinely load-bearing print — do not skimp.
- Top and bottom layers: 6 or more on the bottom face; the base is the sliding surface and must be thick and true.
- Orientation: Print base-down, cup opening up, so the sliding face forms flat against the bed and layer lines run around the cup, not across the load path.
- Supports: A shallow cup with a drafted wall prints clean without them.
Design Considerations
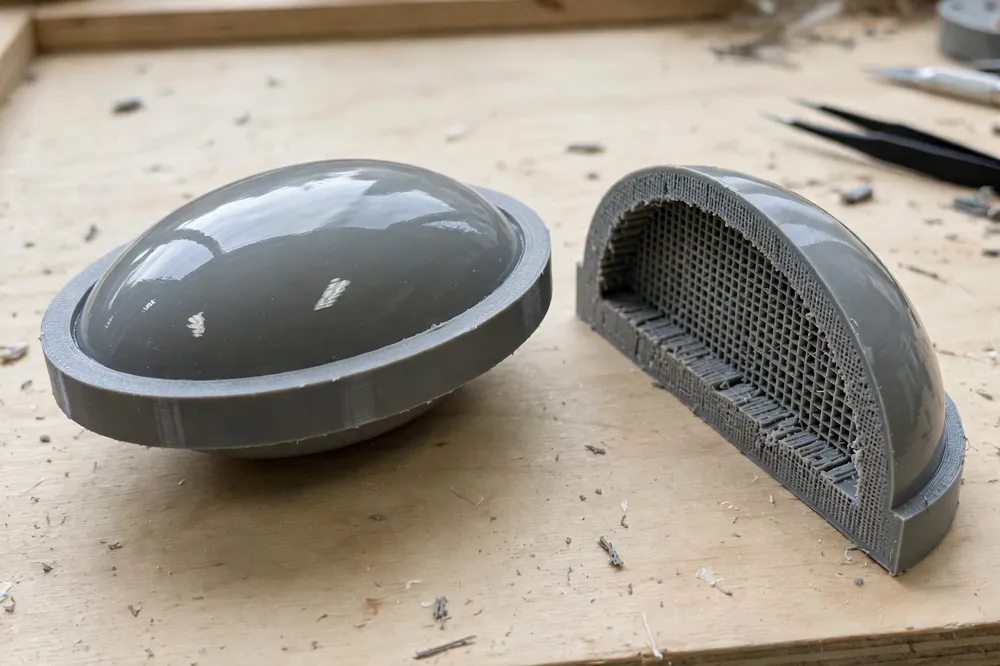
Model the pad in any basic CAD program as two working surfaces joined by muscle: a smooth, wide base below and a shallow cup above, with a thick transition between them.
1. Size the cup to the actual foot
Appliance feet vary more than you would guess — round leveling feet on fridges, broad rubber pads on washers, slim glides on cabinets. Measure the widest point of the foot and model the cup 4 to 6 mm wider, with a depth of 10 to 15 mm: deep enough that the foot cannot walk out mid-glide, shallow enough that slipping the pad under takes only a small lift. For leveling feet with a threaded stem, a shallow central dimple in the cup floor keeps the stem centered.
2. The base is the business end
The base earns the glide. Make it wide — 100 to 130 mm across for fridges and washers — because width spreads weight, and spread weight is what stops a pad digging into vinyl or marking timber. Round or gently dome the base’s edge profile so there is no sharp perimeter to catch on grout lines or floorboard seams; a pad should ride over a 2 mm grout line, not collide with it. The underside must be smooth: print it against the bed for the flattest finish, and never use a pad with a support scar or blob underneath.
3. A transition that will not fold
Between cup and base, the wall does the hard work. Keep it thick and filleted on both sides, with no thin waist. Under load, a weak transition flexes, the cup tilts, the foot climbs the cup wall, and the pad spits out sideways — the one failure mode that matters. If in doubt, add material here; a slider pad is no place for elegant thin sections.
4. Tune friction to the floor
All floors are not equal, and your pad set does not have to be either. On hard floors — tile, timber, laminate, polished concrete — the smooth printed base glides beautifully as-is. On carpet, no slider truly glides, but a wide, smooth, slightly domed base still transforms a drag into a manageable push. Print one set optimized for your main floor, and know that the same cup with a wider base serves the carpeted room.
For the stay-in-place cousins of these pads, our guide “Replacement Furniture Feet and Levelers: 3D Print Custom Feet for Cabinets and Tables” covers permanent printed feet, while these sliders are the moving-day specialists.
Step-by-Step: Printing and Test Fitting
- Measure every foot style on the appliances you plan to move — diameter, shape, and clearance under the appliance.
- Model the pad: cup sized to the largest foot, wide smooth base, thick filleted transition.
- Print one pad at full structural settings. This is a long print; a test in draft settings proves nothing about strength.
- Load-test the single pad under the heaviest appliance’s corner: slip it under, set the corner down, and leave it for several hours. Check for cracking, creep, or cup deformation.
- Glide-test it. With one pad under one corner, the corner should shift noticeably easier than the others when you push.
- Print the full set of four — plus a spare — once the test pad passes.
Step-by-Step: Moving an Appliance on Slider Pads
- Prepare the appliance. Empty loose contents, remove shelves that slide, unplug it, and for washers and fridges, secure or disconnect hoses and lines per the maker’s instructions before moving anything.
- Clean the path. Sweep the route thoroughly. One grain of grit trapped under a loaded pad can score a floor.
- Lift each corner just enough — a centimeter is plenty — with a wide pry or a helper’s lift, and slip a pad under each foot, cup centered on the foot.
- Check all four pads are seated and pointing the way you will travel before pushing.
- Push low and slow from the appliance’s base, not its top. Steady pressure, small corrections; the glide does the work.
- Reposition pads at transitions. Pause at thresholds, rug edges, and grout-heavy patches and confirm each pad is still under its foot.
- Set it down in its new spot, lift each corner once more, remove the pads, and re-level the appliance on its own feet before reconnecting anything.
The floor-friendliness of the whole system is the same idea that drives “Chair Leg Glides and Floor Protectors: 3D Print Custom Feet to Stop Scratches on Wood Floors” — spread the load, smooth the contact, protect the surface.
Tips for Better Results
- Print a spare pad. Losing one mid-move to a crack or a kick across the room should not stall the job.
- Move fridges upright and give them a rest. After any move, let a fridge stand for a while before switching it back on, as the maker recommends — oil needs to settle.
- Use the pads as permanent sliders only if the appliance stays put. For a washer that walks during spin, remove the pads after positioning — vibration plus sliders is a slow-motion escape act.
- Push with your legs, from low down. Sliders cut the force dramatically, but body mechanics still matter.
- Photograph the hoses and connections before you disconnect. Reassembly from memory is a game nobody wins.
Common Mistakes to Avoid
- Skimping on infill to save time. A 20-percent-infill pad under a washer corner is a collapse scheduled for moving day. Print structural or do not print.
- Skipping the load test. One pad, one corner, a few hours — that small patience prevents the only dramatic failure available here.
- Moving on a dirty floor. The pads spread weight, but trapped grit concentrates it again. Sweep first.
- Leaving pads under a vibrating appliance. Washers and dryers must sit on their own feet for running; sliders are transport, not furniture.
- Using sliders on stairs or steep thresholds. Sliders are a flat-floor tool. Stairs get a dolly, straps, and help.
Care, Storage, and When to Choose an Alternative
Wash the bases after a move — embedded grit turns a smooth pad into sandpaper — dry them, and store the set stacked in the laundry or garage cupboard where future-you will look for them. Inspect cups for cracks before each use; a pad that has carried a fridge a dozen times has earned its inspection.
Commercial slider sets are cheap and fine for standard furniture, and a proper appliance dolly remains the right call for stairs, long carries, and very heavy ranges. Printed pads earn their shelf space when your appliance feet are an odd size the store sets fit poorly, when you want a base wide enough for a soft vinyl floor, or when the move is today and the spool is already on the printer.
FAQ
Can printed pads really carry a full-size fridge?
Yes, when printed as specified: PETG, six-plus walls, 60 to 80 percent infill, and a thick cup transition, then load-tested under one corner first. The physics help you — four pads share the weight, and each pad spreads its share over a wide base. The load test is what turns “should” into “does.”
Will slider pads work on carpet?
They help, with realistic expectations: no glide, but a wide smooth base converts an impossible drag into a firm, controllable push, especially on low-pile carpet. Deep pile defeats any slider; there, use a sheet of hardboard under the pads as a rolling road, or a dolly.
Can I leave the pads under the appliance permanently?
For a static piece — a cabinet, a fridge in its final spot — a well-printed pad left in place does no harm and makes the next pull-out easy. For anything that vibrates, especially washers and dryers, remove them: the appliance will travel on its sliders during cycles.
How big should the pads be for a washing machine?
A base around 110 to 130 mm across with a cup sized a few millimeters over the foot is a good starting point for washers and fridges. Measure your machine’s feet rather than trusting the average — feet vary by brand and model more than any other part of this project.
Conclusion
Moving a big appliance stops being a floor-threatening wrestling match the moment each foot sits in a smooth, wide, weight-spreading pad. Cup sized to the foot, base smooth enough to glide, walls and infill honest enough for the load — and a hundred kilograms starts behaving like furniture instead of a siege engine.
Measure the feet, load-test one pad, and glide the next move.