Introduction
Touch-up paint lives a hard life. Quart cans end up stacked two deep on a shelf, slid behind bigger tins, or stored wherever they were last set down — until the day you need the exact hallway color and find three similar off-whites, one with a lid rusted half open and its label long gone.
Poor storage ruins paint quietly. A can knocked on its side can weep at the lid, a lid pried and reseated carelessly skins over, and a can stored where it freezes or bakes can separate beyond saving. Half the “the paint went bad” stories in home repair are really “the can lived badly” stories.
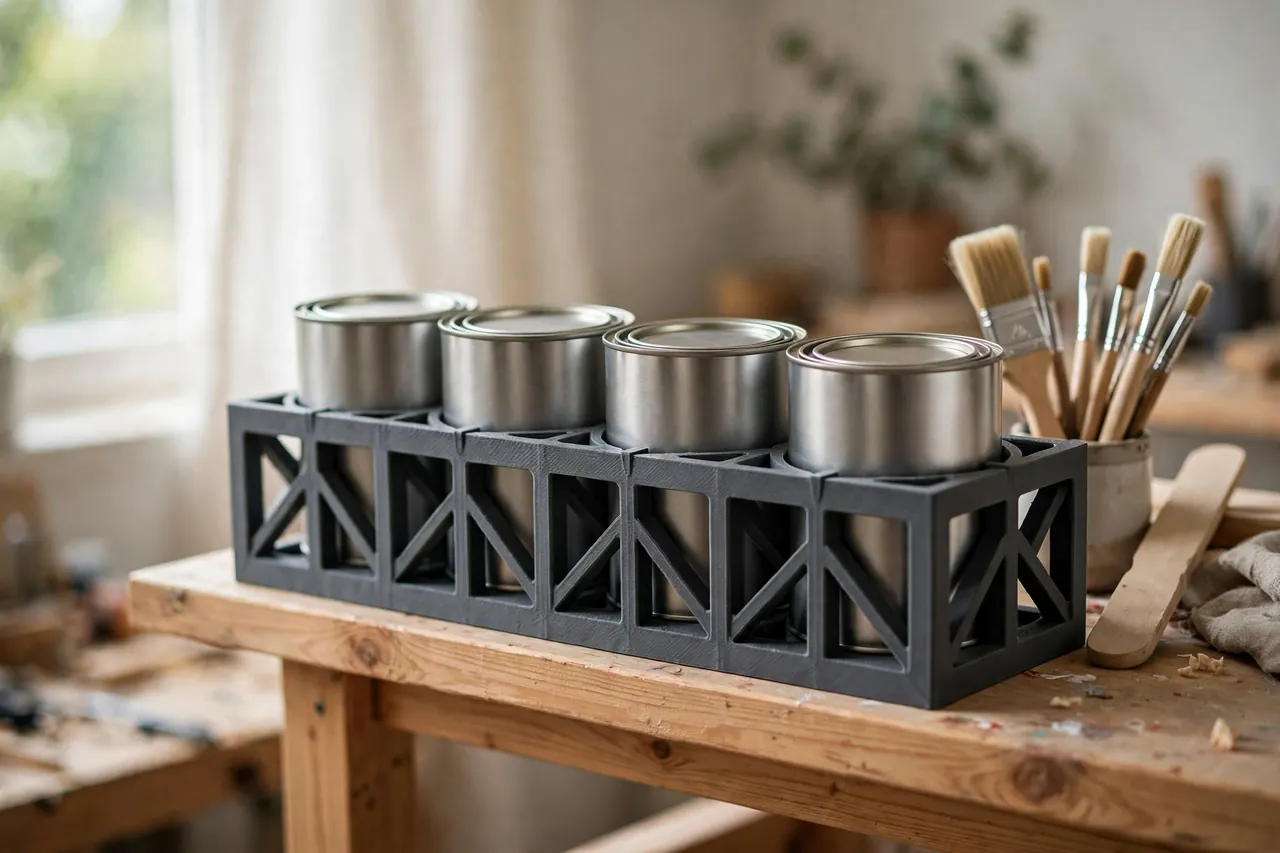
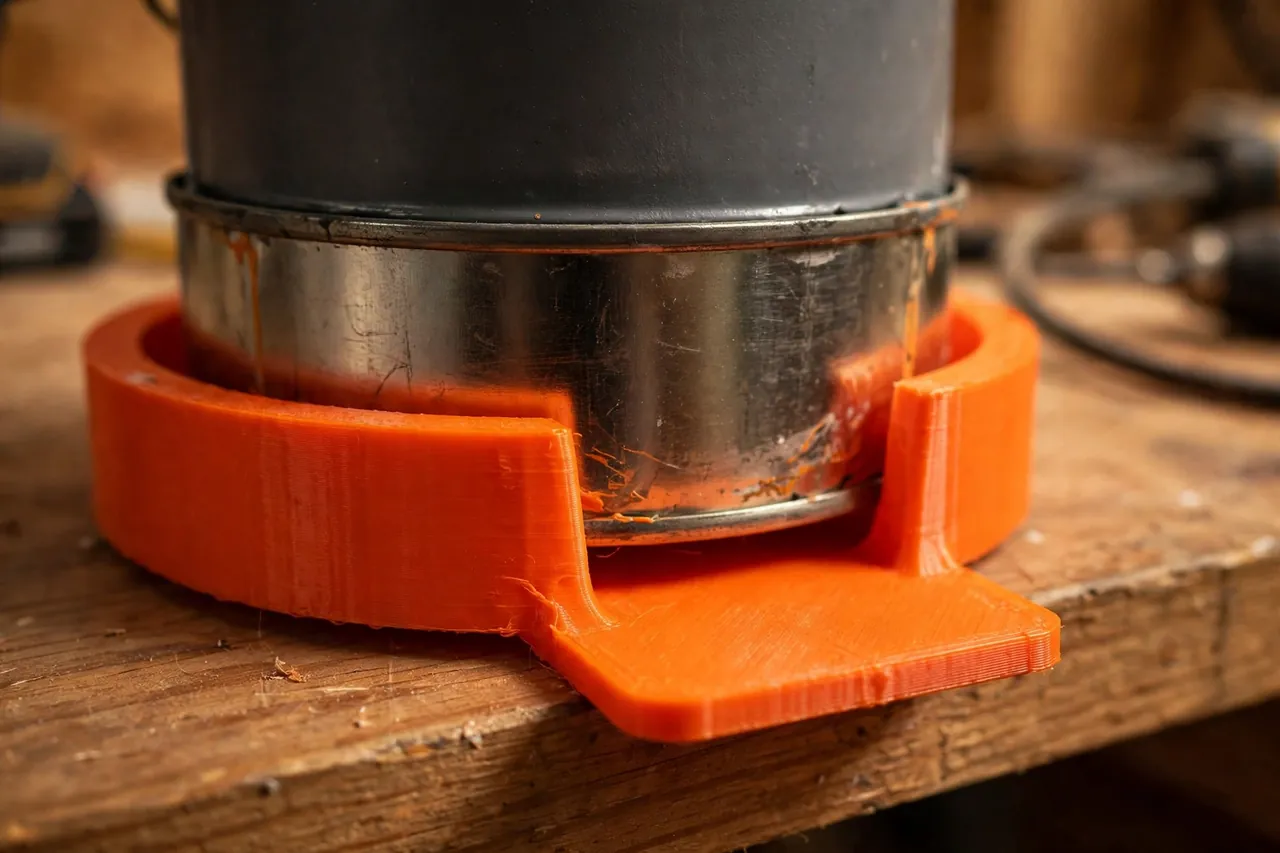
A 3D printed paint can rack gives each quart can its own upright parking spot. Cans sit level in individual cradles, in a single visible row, each with a label tab in front — so the color you need is the can you can see, reach, and read, with its lid sealed flat the way it should be.
This guide covers designing, printing, and loading a rack for standard quart cans. It is a storage organizer — cradles and a frame that hold closed cans on a shelf — built around one rule: cans stay upright, separated, and identified.
What You Need
The rack is a base frame with a row of cradle rings and label tabs, printed in sections sized to your shelf.
Materials and tools
- A home 3D printer with a build area of roughly 180 mm in at least one direction
- PETG filament for a rack that shrugs off drips and damp shelf spots, or PLA indoors
- Your actual quart cans to measure — diameters vary a little by brand
- Calipers or a tape measure for can diameter and shelf depth
- A small file or sandpaper for easing cradle edges
- A paint pen or label maker for the tabs
- Optional screws if you want the rack fixed to the shelf
PETG is the better keeper here: it tolerates the odd drip, wipes clean, and will not mind a cool garage shelf. PLA is fine for the test section and for a rack living in a dry indoor cupboard.
Suggested print settings
- Layer height: 0.20 mm is plenty for a shelf rack.
- Walls: At least 3 to 4 perimeters — cradle rings take a small knock at every can change.
- Infill: 25 to 35 percent, grid or gyroid, for a frame that feels solid under a full row.
- Top and bottom layers: 4 or more, so the base sits flat and the label tabs stay crisp.
- Orientation: Print the frame flat on its base for a true, level footprint.
- Supports: A simple ring-and-frame design needs none.
Print one single-can test cradle first, check a real can in it, then print the full row to that settled size.
Design Considerations
You can model the rack in any basic CAD program. A level base, a ring per can, and a tab per ring carry the whole design.
1. Cradle diameter from your own cans
Quart cans are nominally around 108 to 118 mm in diameter depending on brand and whether the can is metal or plastic, so measure the cans on your shelf rather than trusting the nominal size. Give each cradle about 2 to 3 mm of clearance over the can’s widest point — usually the lid rim — so cans lift out cleanly without rocking loosely in a sloppy ring.
2. Keep cans upright and separated
The rack’s real work is positional: each can upright, level, and unable to touch its neighbor. A ring or three-sided cradle at the base, plus the frame’s front and back rails, keeps cans from sliding into a cluster when the shelf gets bumped. Never design stacking into a can rack — a stored can should never carry another can’s weight on its lid.
3. A label tab for every can
Put a flat tab, roughly 40 to 50 mm wide, at the front of each cradle. On it goes the room, the color name, and the date opened, written with a paint pen or stuck on as a label. Lids get swapped and original labels fade; the rack’s tab is the record that stays put when a can is out being used.
4. Honest weight framing
A full row of quart cans is genuinely heavy for its size — several kilograms across four cans. The rack spreads that load on a shelf; it is not a wall-hung part and should not be asked to carry cans cantilevered off brackets. Print the base generous and flat, and let a sound shelf do the structural work while the rack does the organizing.
Step-by-Step: Printing and Assembly
- Measure your cans — diameter at the lid rim and body, and the depth of the shelf the rack will live on.
- Model one cradle with its label tab and check it against the frame rails’ height.
- Print a test cradle and seat your widest can; it should drop in and lift out with a small, even gap.
- Adjust if needed. Tight rings gain 0.5 mm; loose fits lose the same.
- Print the full rack in sections if needed, joining them in a straight line on the shelf.
- Clean it up. Ease the ring edges so can labels never snag going in or out.
- Set it on the shelf and load it can by can, writing each tab as its can goes in.
If your shelf is deep, two racks front and back beat one deep unit — the back row should hold the rarely used colors, the front row the current rooms.
Step-by-Step: Using the Rack
- Load one can per cradle, upright, lid fully seated — tap the lid down evenly all round with the heel of your hand.
- Write the tab as the can goes in: room, color, and the month and year opened.
- Wipe the rim before resealing any can you have just used, so the lid seals on metal, not on a paint ridge.
- Return cans to their own cradle after a job; a can parked “anywhere for now” restarts the old chaos.
- Keep the rack’s row single-deep. If a new color arrives, an old one should graduate to the back shelf — the visible row stays current.
- Check lids seasonally. A quick pass pressing each lid confirms everything is still sealed tight.
- Retire dead paint properly. Skinned-over, rusty, or separated cans leave the rack and get disposed of per your local rules for paint waste.
A labeled rack turns touch-ups from an archaeology dig into a thirty-second errand, and your future self — the one holding a marked-up wall — will be grateful.
Tips for Better Results
- Dab a spot of the color on the tab beside the words; a visual match beats a name when colors are close.
- Order the row by room, left to right in the sequence you walk the house, so finding a can becomes muscle memory.
- Note the finish on the tab — matte, eggshell, satin — because the same color in two finishes is a classic mix-up.
- Keep one cradle spare for the project color of the month, rather than doubling a can into a neighbor’s spot.
- Date every can. Paint that predates two redecorations is a candidate for the retirement check.
Common Mistakes to Avoid
- Cradles sized from the nominal can size. Brands differ at the rim; measure the cans you own.
- Letting cans touch or lean. Leaning cans stress lids and hide labels; separation is the design’s job.
- Storing a can on its lid or side “temporarily.” Temporary becomes permanent, and the lid seal pays for it.
- No date on the tab. Undated paint gets kept years past its useful life and tried hopefully on a visible wall.
- Overloading a shelf because the rack looks tidy. The rack organizes weight; it does not reduce it. Respect what the shelf itself can carry.
Care, Storage, and When to Choose an Alternative
Wipe drips off the rack as they happen and wash a section in warm soapy water if it gets grubby. Check the frame for cracks at can-change time, and keep the shelf spot dry and frost-free — printed plastic tolerates a garage, but paint prefers a steady, cool indoor temperature, so a house cupboard shelf often beats the garage for the rack’s home.
If you own two cans total, a labeled shelf corner is honestly enough, and gallon cans belong on the shelf or floor directly, not in a quart rack. Commercial can organizers exist too, but the printed rack fits your shelf depth and your exact can count. It sits naturally beside the spout from our related guide, “Paint Can Pouring Spout: 3D Print a Snap-On Spout and Lid for Drip-Free Paint Jobs,” which handles the messy half of the same job.

FAQ
Do all quart cans fit one rack size?
Mostly, once you have sized the cradles to the widest rim you own — but verify with your cans. A cradle printed with 2 to 3 mm of clearance over the biggest can will accept the slightly narrower brands without fuss.
Can the rack hold sample pots or half-pint cans too?
Small pots sit loose in a quart cradle and tend to hide. Print one short section with smaller cradles, or park samples on the shelf above in their own row — they deserve the same upright, labeled treatment at their own scale.
Is it safe to keep paint in a garage on this rack?
The rack is fine anywhere; the paint is the limit. Prolonged freezing or high heat shortens paint life wherever it sits, so keep the rack in the steadiest spot you have and treat garage storage as a compromise, not the ideal.
How do I stop lids rusting in storage?
Start dry: wipe the rim and lid clean before sealing, store cans upright so paint never sits against the lid seam, and keep the shelf dry. The rack’s upright, separated parking already does most of that work for you.
Conclusion
Paint goes bad in bad storage and gets lost in worse. A printed rack with a cradle and a label for every quart keeps cans upright, sealed, and identifiable at a glance — which is all touch-up paint ever asked for.
Measure your cans, print a test cradle, and give the current colors a labeled row. The next scuffed wall becomes a quick fix instead of a shelf excavation.
For the tools that share that shelf, you may also enjoy our related guide, “3D Printed Paint Brush and Roller Holders: Keep Your Painting Tools Ready Between Coats,” and for labeling every tab and shelf the same way, see “Workshop Label Holders and Bin Tags: 3D Print a Labeling System for Every Drawer,” which completes the system this rack starts.