Introduction
A workshop apron only helps if you actually wear it. Too often it ends up folded on a bench, draped over a chair, or buried under offcuts — and by the time you need it, hunting for it feels like more trouble than skipping it. The fix is not a better apron. It is a better parking spot, placed exactly where you put the apron on.
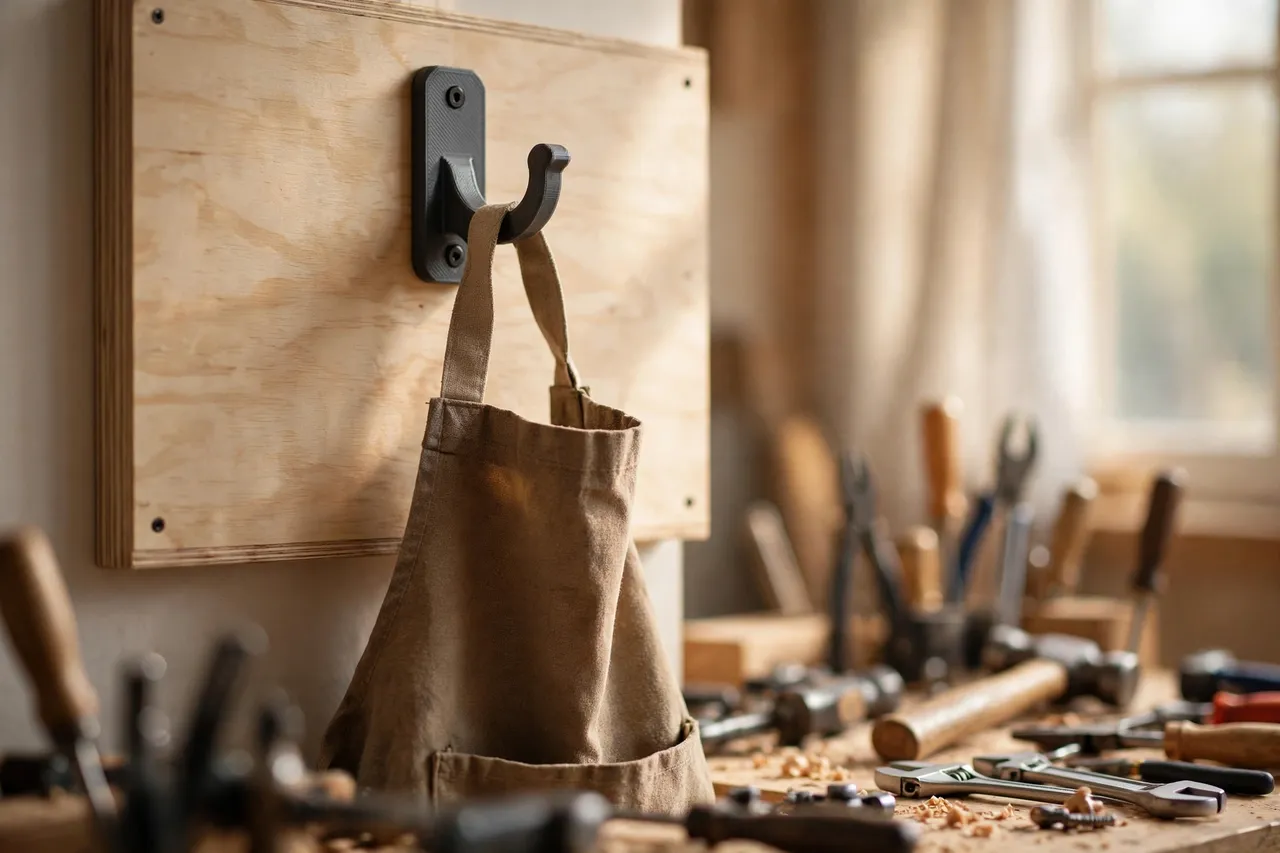
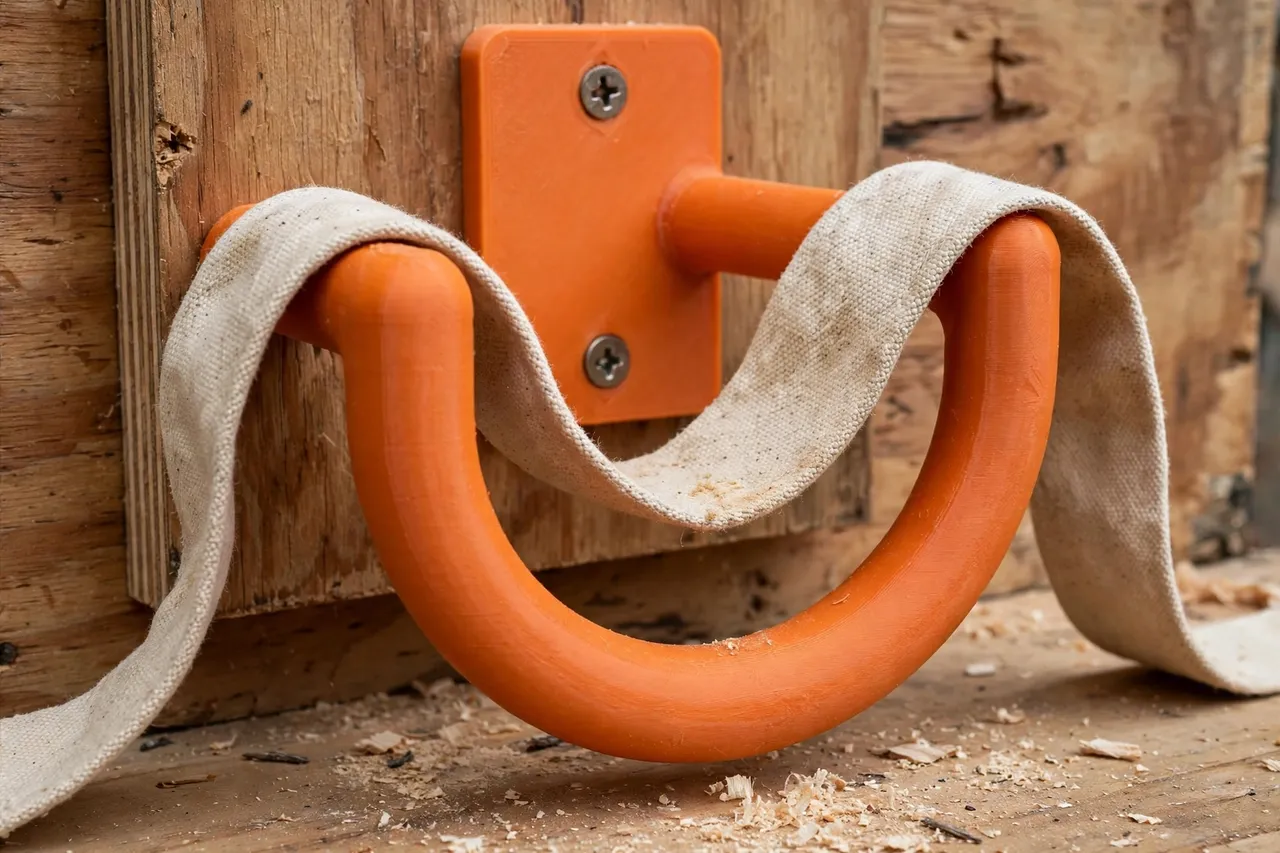
A 3D printed apron hook solves this small problem well. Unlike a generic nail or a thin wire hook, a printed hook can be shaped for the job: a wide, rounded cradle that supports a thick neck strap without creasing it, a back plate with two solid screw holes, and a profile that keeps the apron hanging clear of the wall so it dries instead of bunching damp against paint or plywood. Print one for the bench, one by the door, and one near the finishing area, and the apron stops wandering.
This guide walks through designing, printing, and mounting apron hooks that suit heavy canvas and leather shop aprons as well as lighter fabric ones. These are storage hooks for a garment, nothing more — they are not rated for heavy or overhead loads, and they should never be used to hang tools, bags of hardware, or anything that could fall on someone. For aprons, though, they are an ideal printed project: quick, cheap, and easy to customize.
What You Need
Apron hooks are small, flat-backed parts that print well on almost any home printer. You do not need special equipment or exotic filament.
Materials and tools
- A home 3D printer with a build area of roughly 100 mm in at least one direction
- PETG filament for hooks in a warm garage, or PLA for a first version indoors
- A tape measure or calipers, and the apron you plan to hang
- Wood screws suitable for your wall material, plus wall anchors if mounting to drywall
- A drill or driver, a small drill bit, a pencil, and a spirit level
- Sandpaper or a small file for smoothing the cradle
PETG is the better long-term choice because it flexes slightly instead of snapping and tolerates warm workshops better than PLA. PLA is fine for testing the shape and for hooks in a cool, dry room — just keep it away from direct heat and strong sunlight.
Suggested print settings
- Layer height: 0.20 mm for a good balance of speed and surface finish.
- Walls: 4 perimeters, so the hook arm and back plate stay rigid.
- Infill: 40 to 60 percent, gyroid or grid, with extra density around the arm if your slicer allows it.
- Top and bottom layers: 4 or more, for a smooth back plate that sits flat on the wall.
- Orientation: Print flat on its back, hook arm pointing up, so layer lines run across the load rather than along it.
- Supports: Usually none, if the hook curve is kept gentle; add supports only for a deep undercut.
Print one test hook first and hang your heaviest apron on it for a day before printing a full row.
Design Considerations
A good apron hook looks simple, but a few dimensions make the difference between a hook that works and one that drops the apron on the floor.
1. A wide, rounded cradle
Apron straps are wider than coat hooks expect — often 25 to 40 mm — and stiff canvas or leather does not fold neatly over a thin wire. Give the cradle a width of at least 30 mm and a generous rounded curve, roughly 20 to 25 mm in radius, so the strap rests in a smooth U rather than kinking over a sharp edge. A shallow lip at the front of the curve stops the strap sliding off when you brush past.
2. Clearance from the wall
The hook must stand proud of the wall by enough that a bunched apron does not press flat against it. Aim for 35 to 50 mm of clearance from the wall face to the inside of the cradle. That gap also lets air circulate, which matters if the apron is dusty or slightly damp from a finishing session. Keep the arm thick — 8 to 10 mm at its thinnest point — so it does not flex under a heavy canvas apron.
3. A back plate that actually holds
Two screw holes, spaced vertically about 50 to 60 mm apart, spread the load far better than a single central screw. Add small countersinks so screw heads sit flush and do not snag fabric. If you are mounting into a stud or plywood panel, short wood screws are enough. Into drywall alone, use proper wall anchors — a printed hook is only as strong as its fixing, and a hook ripped out of plasterboard helps nobody.
4. One hook or a row
For a single apron, one hook by the bench is plenty. For a shared workshop, print a row of three on a common mounting rail or spaced evenly along a board. Consistent spacing looks tidy and stops aprons overlapping. Label nothing on the hook itself if you want a clean look, or add a small printed tag holder beside each hook for family workshops where everyone has their own apron.
Step-by-Step: Printing and Mounting
- Measure your apron strap. Note its width and thickness, and check whether it hangs from a neck loop, a cross-back strap, or a waist tie.
- Model or adapt the hook. A back plate roughly 70 mm tall and 45 mm wide, a curved arm with a 30 mm wide cradle, and two countersunk screw holes is a solid starting point.
- Print a test hook in PLA or PETG and check the fit. The strap should sit in the cradle without forcing and lift off easily with one hand.
- Clean up the print. Sand the cradle smooth so rough layer lines do not catch or wear the strap, and clear the screw holes.
- Choose the spot. The best place is where you naturally put the apron on: beside the bench, by the workshop door, or near the finishing area. It should be at shoulder height and clear of swinging doors and saw paths.
- Mark the holes. Hold the hook level, mark through the screw holes with a pencil, and drill pilots slightly smaller than your screws.
- Fix the hook. Drive the screws snugly without cracking the back plate. Into drywall, fit anchors first.
- Test with the real apron. Hang it, tug it gently, and leave it overnight. If the arm flexes visibly, reprint with thicker walls or higher infill.
- Repeat for the row. Use the first hook as a template for spacing, and keep heights consistent.
Tips for Better Results
- Round every edge the fabric touches. A few minutes with sandpaper prevents frayed straps and snagged pockets.
- Add a second small hook below for a towel. A shop towel paired with the apron keeps wiping rags off the bench too.
- Mount on a board, not bare drywall, if you can. A plywood strip spreads fixings and lets you move hooks later without new holes.
If you are organizing the whole bench area, you may also enjoy “3D Printed Dust Mask Hooks: Hooks for Masks at the Bench,” which uses the same mounting approach for another item that always goes missing, and “3D Printed Headlamp Wall Hooks: A Parking Spot for Headlamps,” for the gear you reach for in the same moment as the apron.
Common Mistakes to Avoid
- Printing a coat hook and calling it done. Narrow wire-style hooks crease straps and drop wide aprons. Size the cradle for the strap you own.
- Using one screw in drywall. It will pivot, loosen, and eventually pull out. Two fixings, or an anchor, every time.
- Mounting too high or too low. A hook above head height means the apron drags on the floor when you lift it off; too low and it pools on the bench below. Shoulder height is the sweet spot.
- Ignoring arm thickness. A slim, elegant arm looks nice in the slicer and bends under a heavy leather apron. Keep the arm chunky.
- Placing the hook behind a door swing. Every time the door opens, the apron gets knocked off. Check the swing before you drill.
Care, Storage, and When to Choose an Alternative
Brush off dust occasionally and check screws every few months, especially in a garage where temperature swings loosen fixings. If a hook cracks or the arm starts to bow, reprint it — the file is already done, and a fresh hook costs very little filament.
Sometimes a manufactured hook is the better call. If you want to hang a heavy tool bag, a loaded tool belt, or anything heavier than an apron and a towel, buy a metal hook rated for that weight and fixed with proper hardware. Printed hooks are for light garments and accessories. Used within that limit, they last well and look far tidier than a nail.
FAQ
Will a printed hook hold a heavy leather apron?
Yes, if it is printed thick enough and fixed well. Use PETG, 4 or more walls, 50 percent infill, and two screws into a stud or plywood. A thin PLA hook with one drywall screw will not — that is a fixing and thickness problem, not a reason to abandon the idea.
Can I hang more than one apron on a single hook?
You can, but it gets awkward fast. Two light fabric aprons share a wide cradle fine. Two heavy canvas aprons bunch, hide each other, and slide off. A row of hooks is almost always better than overloading one.
What if my wall is brick or concrete?
Use masonry plugs and screws rated for the wall, and drill with a masonry bit. The printed hook itself does not change; only the fixing does. Test the fixing by pulling firmly before trusting it with your best apron.
Does PLA or PETG matter for an indoor hook?
For a cool indoor workshop, PLA is fine and prints easily. For a garage that gets hot in summer, PETG is the safer choice because it softens at a higher temperature. Either way, keep hooks out of direct sun and away from heaters.
Conclusion
An apron hook is a tiny project with an outsized effect on workshop habits. When the apron has a dedicated spot at shoulder height, right where you work, you wear it more, lose it less, and stop finding it under a pile of offcuts. Print one hook, mount it well, and see how quickly it becomes part of the routine.
Start with the bench hook, then add a row by the door if the first one earns its place. Small, tidy storage like this is what turns a cluttered workshop into a place where every tool — and every apron — has a home.