Introduction
Work gloves have a special talent for disappearing. One is on the bench, the other is in the garage, under a toolbox, or still in yesterday’s jacket pocket. You spend five minutes looking for a pair that costs very little but protects a great deal, and the job starts late and annoyed.
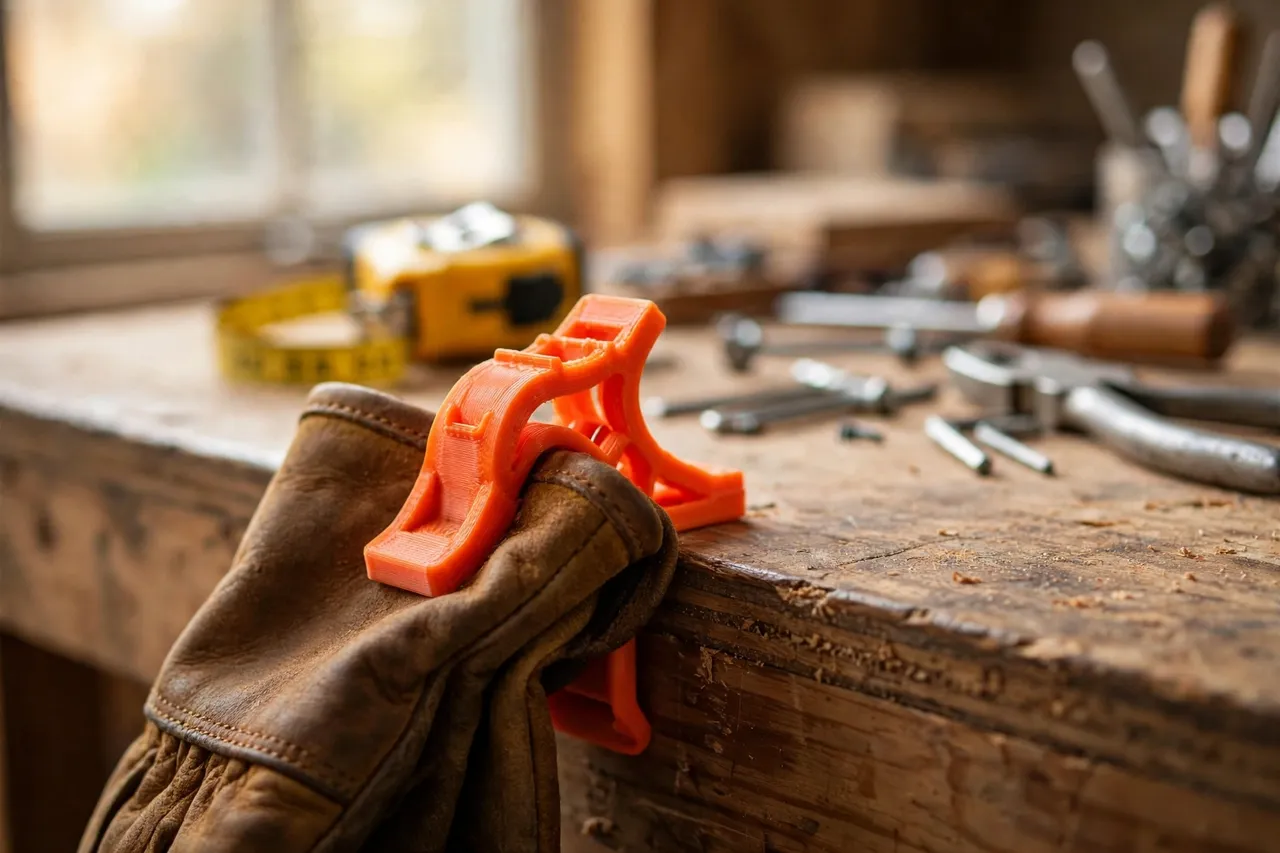
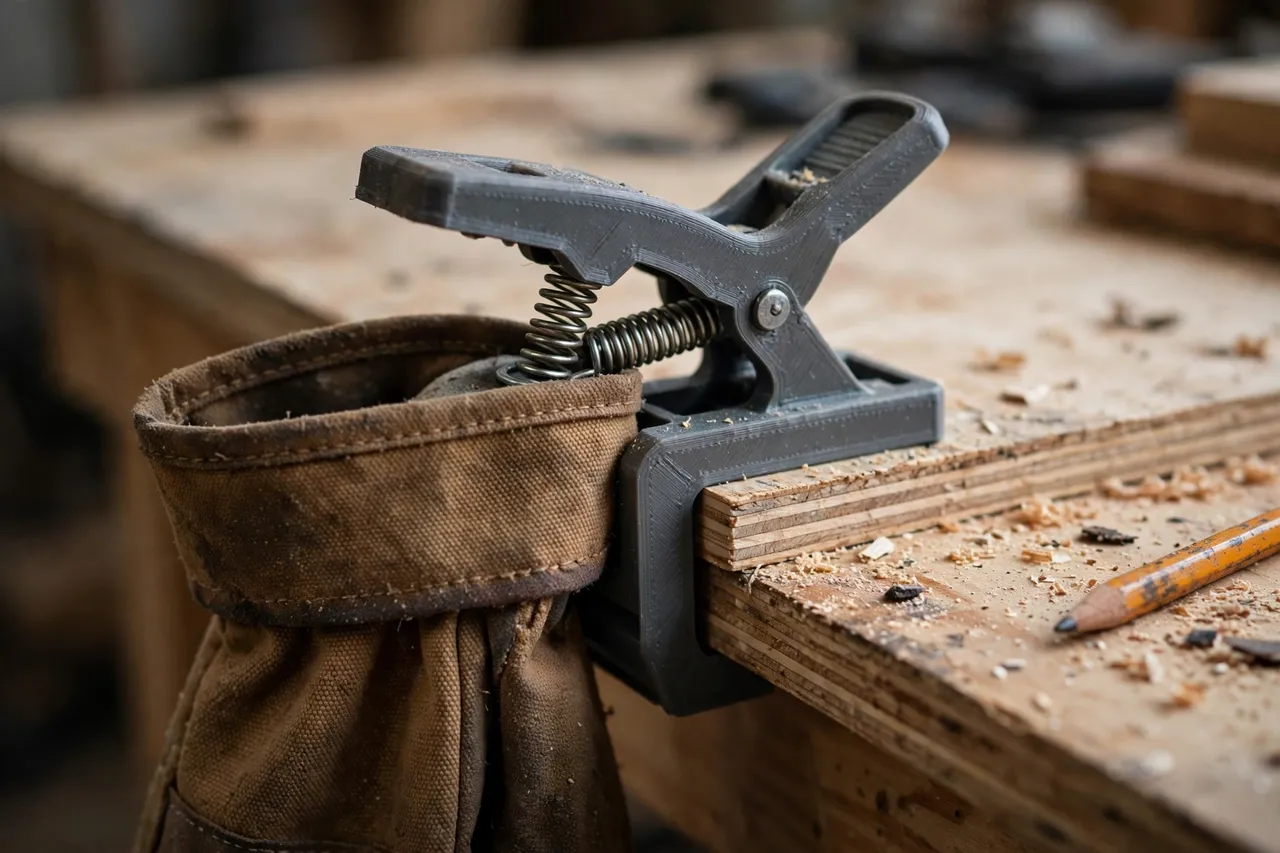
The reason is simple: gloves have no natural home. They are too bulky for a drawer, too floppy for a hook, and too easy to toss aside when you take them off with dusty hands. A 3D printed glove clip gives them a home that is visible, reachable, and impossible to ignore. Clip the pair to the bench edge when you finish, and they are exactly where your hands expect them next time.
This guide covers bench-edge clips and wall-mounted clips sized for leather work gloves, lighter gardening gloves, and the disposable gloves many workshops keep for finishing and gluing. These clips are storage accessories for gloves only. They are not load-bearing clamps, they are not a substitute for proper glove storage in a clean, dry place, and they should never be used to hold tools, cords, or anything heavy.
What You Need
Glove clips are small, forgiving prints. Most of the design work is getting the jaw grip right, not chasing exotic materials.
Materials and tools
- A home 3D printer with a build area of roughly 80 mm in at least one direction
- PETG filament for clips that will live in a garage, or PLA for indoor bench use
- The gloves you actually wear, in their usual thickness, for test fitting
- A tape measure or calipers
- Sandpaper or a small file, and a drill and screws if you are making wall-mounted versions
- Optional: a small rubber strip or adhesive foam for extra grip inside the jaw
PETG flexes a little without snapping, which suits a clip jaw that opens and closes many times. PLA works for a first version, but its jaws can fatigue and crack faster with repeated flexing, so treat PLA clips as prototypes and PETG clips as keepers.
Suggested print settings
- Layer height: 0.20 mm, or 0.16 mm if the jaw surfaces print rough.
- Walls: 4 perimeters, especially around the jaw and hinge area.
- Infill: 40 to 50 percent, gyroid, so the jaw stays springy rather than brittle.
- Top and bottom layers: 4 or more.
- Orientation: Print the clip on its side so the jaw flexes across layer lines, not along them, where it would split more easily.
- Supports: Usually none for a simple C-shaped bench clip; a wall clip with a screw plate may need light supports under an overhang.
Print one clip, test it with your thickest gloves, and only then print a set.
Design Considerations
A glove clip has two jobs: grip the glove firmly enough that it does not slide out, and release it easily with one hand when your other hand is already gloved.
1. Jaw shape and grip
The classic shape is a wide C or clothespin-style jaw, about 50 to 60 mm wide, with gently rounded teeth or ribs inside. The ribs do most of the gripping — smooth flat jaws let a leather cuff slide out, while a few shallow ribs bite just enough without tearing fabric. Keep the opening force modest. If you have to wrestle the clip open, you will stop using it.
2. Spring versus fixed grip
Two approaches work. A living-hinge clip, printed as one piece with a thin flexible section, is simplest and has no parts to lose. A two-piece clip with a small bolt or a printed pin as a pivot grips harder and lasts longer under heavy gloves. For most workshops, a living-hinge clip in PETG is plenty. If your gloves are thick leather riggers, go for the pivoted version.
3. Bench edge or wall mount
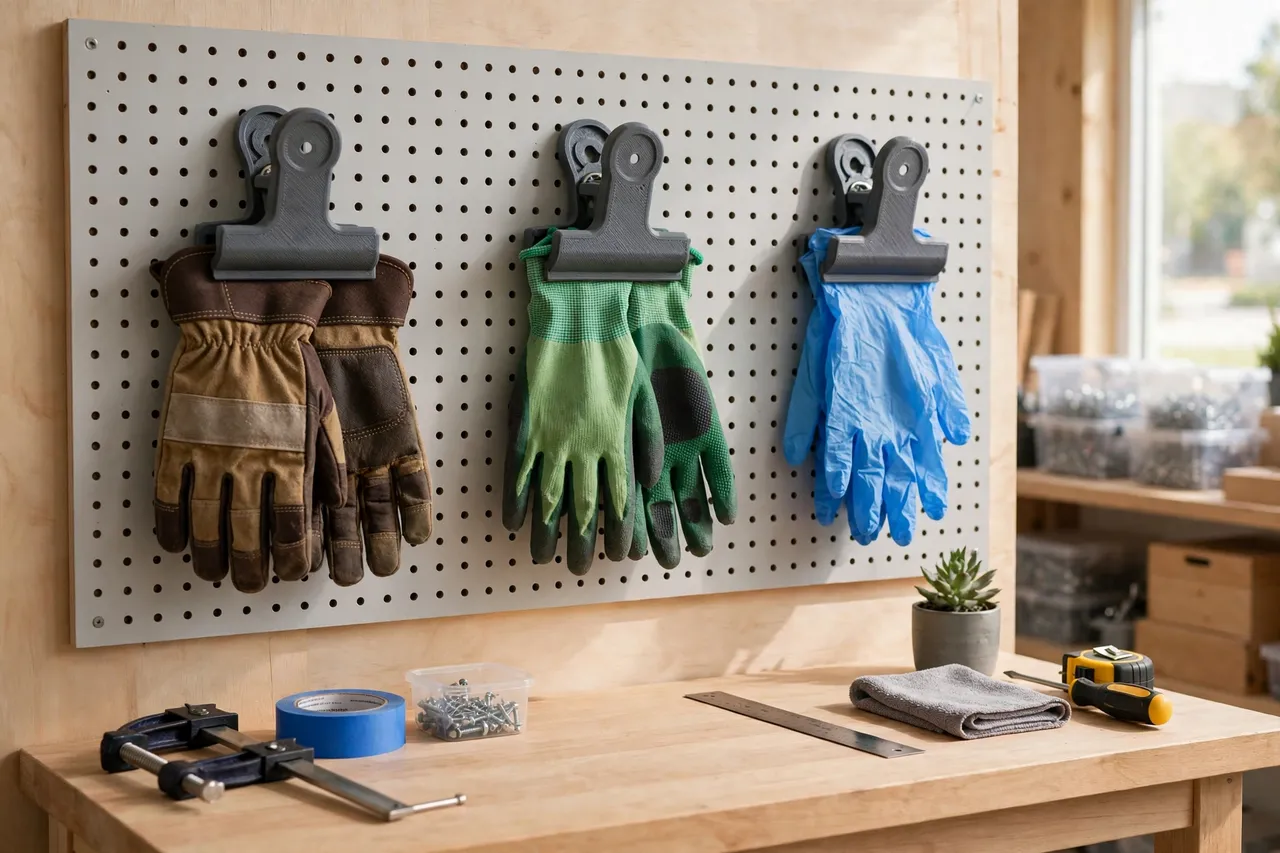
A bench-edge clip slides over a bench top up to about 40 mm thick and stays put by friction, with an optional screw underneath for a permanent spot. A wall-mounted clip screws to a board and holds gloves flat against the wall, which suits a row of pairs by the door. Decide which you need before printing: a bench clip that is also screwed down loses its portability, and a wall clip without a back plate has nothing to screw through.
4. Sizing for different gloves
One size does not fit every glove. Thin disposable gloves need a narrower, gentler jaw or they tear. Thick leather gloves need a wider opening and stronger spring. Print clips in different colours for different glove types — orange for leather work gloves, grey for gardening gloves, blue for disposables — and the colour coding becomes part of the system.
Step-by-Step: Printing and Setting Up
- Measure your gloves. Fold a cuff to its usual thickness and measure it. Measure your bench edge thickness too, if making bench clips.
- Model the clip. Start with a jaw about 55 mm wide, a gap that closes to slightly less than your cuff thickness, and a bench slot matched to your bench edge.
- Print one test clip. Check that it slides onto the bench edge without forcing and grips the cuff without crushing it.
- Test the release. Put one glove on, then try unclipping the second glove with your gloved hand. If it is a struggle, widen the jaw gap slightly or soften the ribs.
- Clean up. Sand the jaw ribs lightly so they grip without snagging threads, and remove any stringing inside the slot.
- Fit the set. Print clips for each pair you keep at the bench, and place them where you take gloves off — at the bench end, not across the room.
- For wall clips, mark and fix. Hold the clip level, mark the screw holes, drill pilots, and fix with screws into a board or stud, or anchors into drywall.
- Load them up. Clip each pair by one cuff so the pair hangs together. A pair clipped together cannot lose its partner.
Repeat the test with dusty or slightly damp gloves, since grip changes when cuffs are dirty.
Tips for Better Results
- Clip pairs together, not singly. One clip per pair, gripping both cuffs, is the whole point. Single gloves still wander.
- Put the clip at the spot where gloves come off. By the bench vice, beside the door, or at the end of the workbench — not in a cupboard.
- Add a foam strip inside the jaw for disposable gloves. It spreads the pressure and stops thin gloves tearing on hard ribs.
- Keep a spare clip printed. Clips are small and cheap; a spare in a drawer means a cracked jaw never breaks the system.
- Colour-code by job. Leather, gardening, finishing, and disposable gloves each get a colour, and anyone in the workshop can see at a glance which pair is which.
Pairing this system with other bench-edge storage helps too. If you liked this idea, you may also enjoy “3D Printed Dust Mask Hooks: Hooks for Masks at the Bench,” which keeps another easy-to-lose item in the same visible zone, and “3D Printed Pencil and Marker Holders for Benches: Marking Tools Always in Reach,” for the small tools that vanish just as reliably as gloves.
Common Mistakes to Avoid
- Making the jaw too tight. A clip that needs two hands and a grunt will be abandoned. Grip should be firm, not fierce.
- Printing the jaw so it flexes along layer lines. Orient the print so flexing bends across layers, or the hinge will split after a few dozen uses.
- Sizing for one glove type only. A clip tuned for thin gloves will not hold leather riggers, and vice versa. Print variants.
- Clipping gloves by the fingers. Fingers tear and stretch. Always clip by the cuff, where the material is thickest.
- Hiding the clips. A clip inside a drawer or behind a toolbox defeats the purpose. Visibility is the feature.
Care, Storage, and When to Choose an Alternative
Shake dust out of clips occasionally and wipe the jaws clean so grit does not wear glove cuffs. Inspect living hinges every few months; if a hinge whitens or cracks, reprint the clip before it fails. Store spare clips flat in a drawer, out of heat.
For heavy or safety-critical holding, a printed clip is the wrong tool. If you need to clamp workpieces, hold loads, or secure anything overhead, use a proper manufactured clamp rated for the job. Glove clips are for gloves — light, soft, and replaceable — and within that job they are excellent.
FAQ
Will a printed clip hold heavy leather gloves?
Yes, if it is sized for them and printed in PETG with thick walls. A small PLA clip tuned for thin gloves will struggle. Match the clip to the glove, and test with the heaviest pair you own.
Do living-hinge clips wear out?
Eventually, yes — any flexing plastic fatigues over time. PETG lasts far longer than PLA here. When a hinge starts to whiten or feel soft, reprint it. The file is already done, so replacement takes under an hour.
Can I clip gloves to a belt loop with these?
A small belt-loop version works for carrying a pair around a large workshop or garden, but keep it light and expect it to be a convenience, not a secure attachment for climbing, ladders, or machinery work. At the bench, a fixed clip is more reliable.
What about disposable gloves — do they tear in the clip?
They can, if the jaw is ribbed aggressively. Use a smooth or foam-lined jaw for disposables, grip by the cuff, and do not over-tighten. A dedicated gentle clip for disposables is worth printing separately.
Conclusion
Gloves go missing because they have nowhere obvious to live. A printed clip fixes that for pennies: one clip per pair, placed where gloves come off, gripping by the cuff so partners stay together. It is a small habit change, supported by a small piece of plastic, and it pays off every single time you start a job without a search.
Print one, test it with your thickest gloves, and then print the set. Your future self — the one who used to hunt for the second glove — will be grateful.