Introduction
Workshop knives — craft knives, marking knives, carving knives, and sturdy utility knives used for trimming and fitting — have the same storage problem as loose blades, only larger. Tossed in a drawer, they slide around, nick each other, dull their edges, and surprise the next person who reaches in. Left on a bench, they get buried under project parts and knocked to the floor.
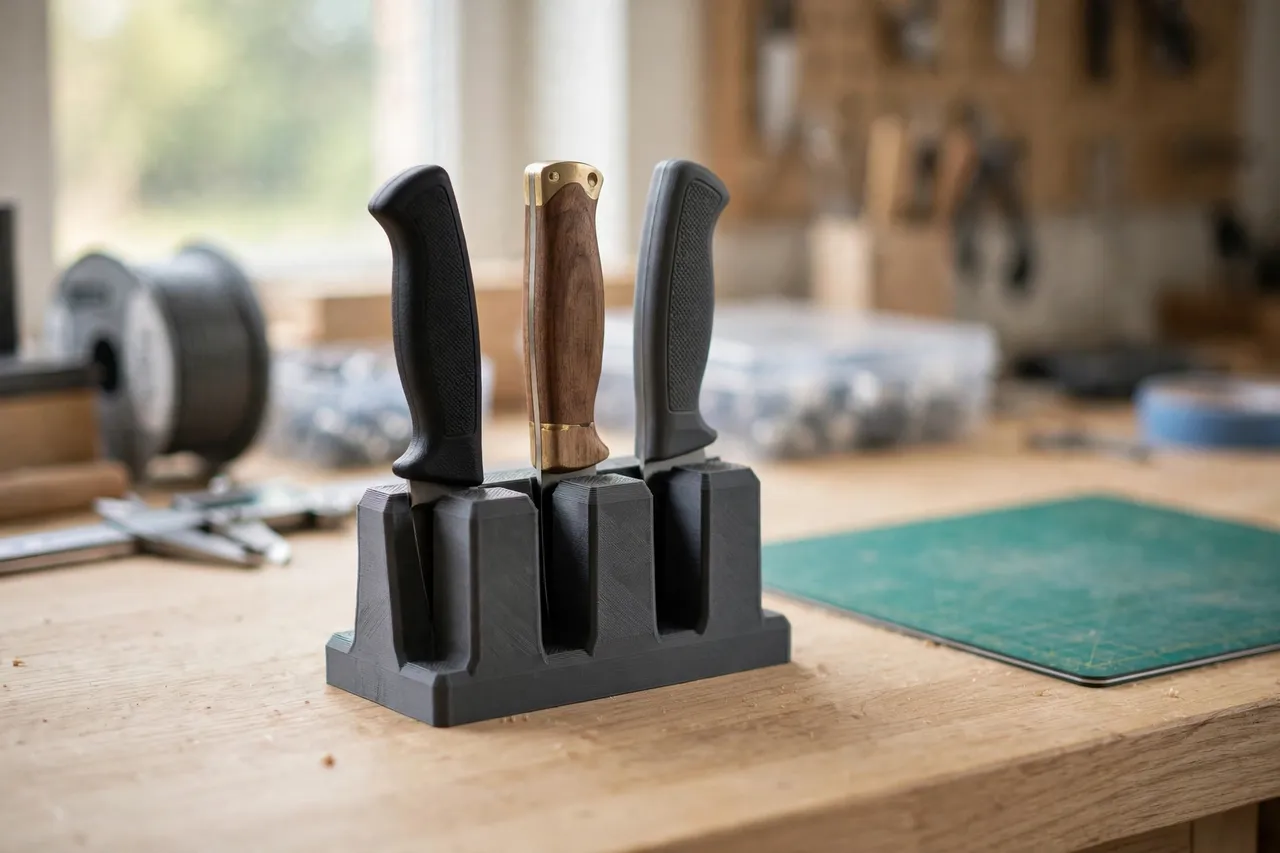
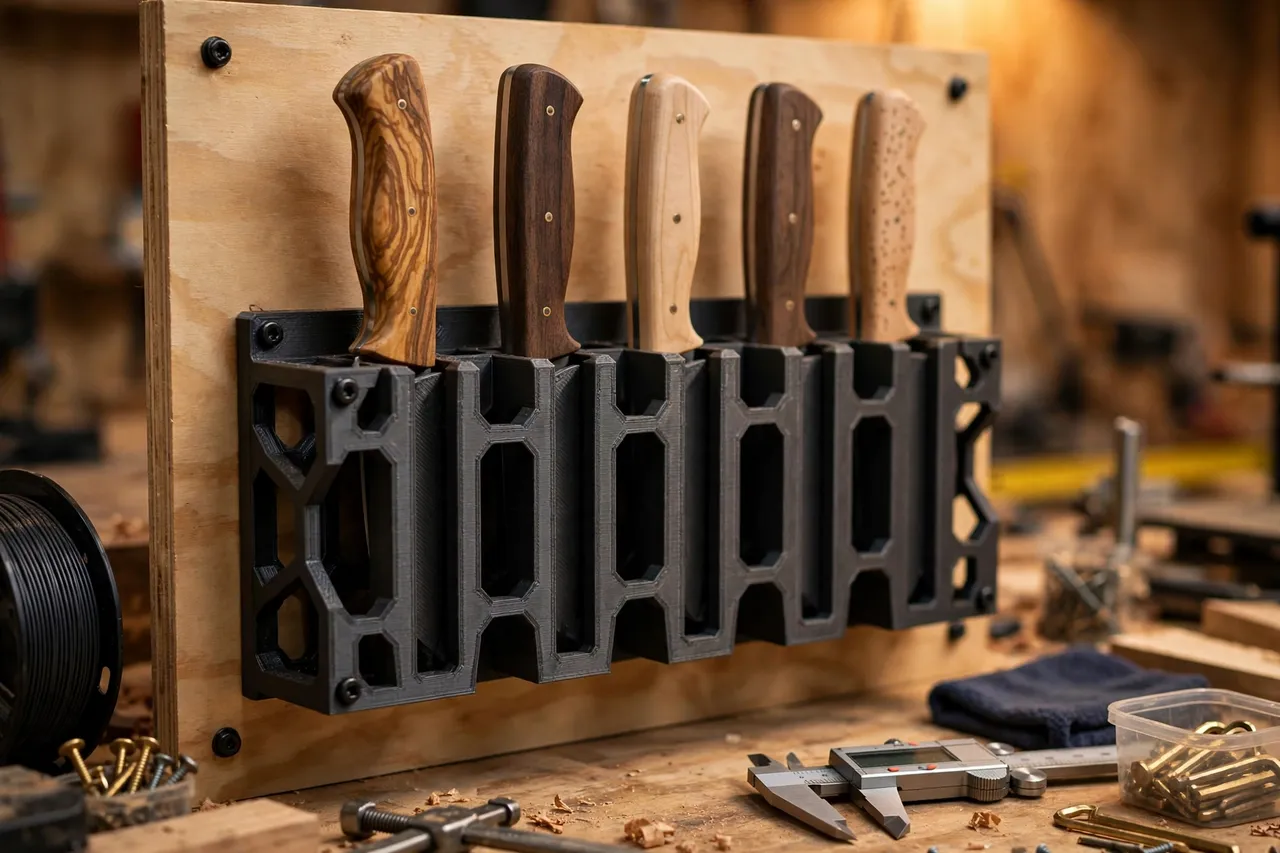
A 3D printed knife storage rack gives each knife its own slot, with the blade seated point-down or fully covered and the handle easy to grip. This is adult workshop storage for ordinary cutting tools, and the same cautions apply as with any sharp storage: the rack belongs in a workshop or toolbox that adults control, out of reach of children, and it must never be presented as a safety device for children. A rack organizes knives for the adults who use them; it does not make knives safe for children to access.
This guide covers a simple rack for a small set of workshop knives, with covered or point-down blade slots and clear handle access. For the spare blades themselves, see “3D Printed Utility Blade Organizer: Blades Stored Safely,” and for knives carried on a belt, “3D Printed Utility Knife Sheaths: Safe Sheaths for Loose Utility Knives” covers that separate job.
What You Need
Knives vary in length and handle shape, so measure your own set before designing. The rack itself is a straightforward block with slots, plus a back plate if it hangs on a wall.
Materials and tools
- A home 3D printer with a build area of roughly 180 mm in at least one direction
- PETG filament preferred for a tougher rack, or PLA for a light bench rack indoors
- The workshop knives you want to store, with any sheaths or blade guards removed for measuring
- A tape measure or calipers and a pencil
- A wall screw and wall plug if you plan to hang the rack
- Sandpaper or a small file for cleanup
PETG is the better default here: knives are heavier than tape or small parts, and a rack that gets daily use benefits from the extra toughness. PLA is acceptable for a small bench rack that is rarely moved.
Suggested print settings
- Layer height: 0.20 mm, or 0.16 mm for crisper slot edges.
- Walls: 4 perimeters on slot walls, since knives press sideways when inserted and removed.
- Infill: 30 to 40 percent, grid or gyroid.
- Top and bottom layers: 4 or more.
- Orientation: Print the rack block upright or flat depending on your design, keeping slot walls vertical where possible.
- Supports: Design slots to print support-free by keeping them open at the top.
Print one test slot for your widest blade and fattest handle before printing the whole rack.
Design Considerations
Knife storage design is mostly about three things: blade coverage, handle grip, and separation.
1. Blades covered or point-down, always
Every slot should cover the blade or hold it point-down inside the rack body, so no edge or point is exposed when the knife is stored. A slot that is deep enough for the full blade length, with the handle protruding at the top for gripping, achieves this naturally. Never design a rack where blades stick out sideways, point up, or rest exposed on an open tray — that defeats the purpose of the rack. If a knife is longer than your rack design, print a taller rack rather than letting the tip poke out.
2. One slot per knife, handles spaced
Give each knife its own slot, spaced so handles do not crowd each other. You should be able to grip one handle and lift its knife straight out without touching a neighboring blade or handle. Spacing of 25 to 35 mm between slot centers suits most workshop knives, but check your fattest handle and add clearance. A small notch or widened opening at the top of each slot helps you seat the knife without scraping the blade against the rack.
3. Wall or bench, and where it lives
A wall rack at adult height near the bench keeps knives visible and off the work surface, and it is the easiest version to keep out of reach of children when the workshop itself is adult-controlled. A bench rack suits a small set used at one station. Either way, the rack’s location matters as much as its design: store it in a workshop, drawer, or toolbox that children do not access, and never in a play area, a low kitchen drawer, or anywhere children can reach. The rack is adult storage, full stop.
4. Sizing for different knives
Craft knives are slim, marking knives are small with shaped handles, and heavier workshop knives are broader. Group similar sizes together rather than making every slot identical, and leave one spare slot for the next knife you buy. Rounded slot entries protect blade edges when you slide a knife in, and a slight taper — wider at the top, snugger at the bottom — guides the blade home without rattling.
Step-by-Step: Printing and Assembly
- Gather your workshop knives. Include every knife you want stored, so the rack fits the real set.
- Measure each knife: blade length, blade width, and handle width and thickness. Note the longest blade — it sets the rack height.
- Sketch the layout: slots by size, handles spaced for a comfortable grip, one spare slot.
- Model the rack with full-depth blade slots, a back plate with mounting holes for a wall version, and rounded slot entries.
- Print a test slot for your longest and widest knife and check that the blade sits fully covered with the handle easy to grip.
- Adjust if needed. A slot that is too tight scrapes edges; one that is too loose lets knives lean. Adjust by 0.5 mm and retest.
- Print the full rack and clean it up. Sand slot entries smooth so they do not dull edges on insertion.
- Mount or place the rack in its adult-controlled spot, level and solid, before loading any knife.
Do not load knives into a rack that is still on the printer bed or sitting loose on a bench edge. Mount it first, then load it.
Step-by-Step: Using It
- Seat each knife blade-first, point-down, into its own slot. The handle should protrude enough for a full, comfortable grip.
- Check that no blade or point is exposed. If any tip pokes out, that knife does not belong in that slot — resize the rack, do not accept an exposed tip.
- Take knives out by the handle, straight up and out. Do not drag a blade sideways across the rack or a neighboring handle.
- Return each knife right after use. Knives left on the bench are how drawers get dangerous again.
- Keep the rack in its adult-controlled place. If the workshop is shared, the rack stays where adults control access — not moved to a general household drawer for convenience.
- Inspect edges when returning a knife. A quick look tells you whether a blade needs attention before its next job, rather than discovering a dull edge mid-cut.
- Clean the slots occasionally. Brush out dust and wipe any residue so blades seat fully every time.
Tips for Better Results
- Keep a sharpening stone or strop near the rack, not in it. Edge care belongs beside knife storage, so a dull knife gets attention instead of going back dull.
- Do not overload the rack. One knife per slot, with a spare slot free, keeps the rack usable. A second rack beats a crammed one.
- Test on scrap first. A freshly stored knife still deserves a test cut on an offcut when you switch materials — sharp and suited are different things.
Common Mistakes to Avoid
- Letting a tip or edge stay exposed. If a blade does not fit fully covered, the slot is wrong, not the knife. Resize and reprint.
- Storing knives loose “just for one project.” One project becomes a habit, and the rack sits empty while knives pile up.
- Crowding handles. Handles that touch make it hard to remove one knife without disturbing others, which leads to dragging blades.
- Placing the rack where children can reach it. This is the most important mistake to avoid. The rack is adult workshop storage and must stay out of reach of children, in a space adults control.
- Describing the rack as child-safe. Never do this. It organizes knives for adults; it does not make them safe for children, and it must not be used to justify storing knives where children can get to them.
Care, Storage, and When to Choose an Alternative
Brush out slots, check wall fixings, and reprint the rack if a slot cracks or a blade no longer seats fully covered — a damaged knife rack should be fixed promptly, not used with an exposed edge. Keep PLA racks out of heat, and keep the rack in adult-controlled storage at all times.
A manufactured knife block or a lockable tool chest is sometimes the better choice. If you store a large kitchen-style set, a purpose-made block fits it better; if the workshop is accessible to children at any time, a lockable cabinet is the responsible option and a printed open rack is not. For a small set of workshop knives in an adult-controlled workshop, a printed rack with covered, point-down slots is a tidy, practical solution that pairs with the wider organization in “3D Printed Scissor Rack: Scissors Hung and Ready.”
FAQ
Is this rack safe for homes with children?
The rack itself does not make knives safe for children. It is adult workshop storage and must be kept out of reach of children, in a workshop or toolbox that children do not access. If children can access the area, use a lockable cabinet instead.
Will it fit craft knives and larger workshop knives together?
Yes, if you size slots by knife rather than making them identical. Slim slots for craft knives and wider, deeper slots for larger knives in the same rack work well.
Should blades point up or down in the rack?
Point-down, fully covered inside the slot, with the handle up for gripping. Point-up storage leaves tips exposed and is harder to use safely.
Is PETG better than PLA for a knife rack?
Generally, yes. PETG is tougher and handles daily use and a warm workshop better. PLA is fine for a small, rarely moved bench rack.
Conclusion
Workshop knives deserve better than a drawer, and a printed rack with one covered, point-down slot per knife is a straightforward fix — provided it lives where adults control it and children cannot reach it. Measure your knives, print a test slot, and mount the rack where you actually work.
Done that way, the rack keeps edges sharp, handles findable, and the bench free of surprises — which is exactly what good workshop storage should do.