Introduction
Paint rollers are another tool that never stores well. Tossed in a box, sleeves get dented and flattened, which leaves marks in the next coat. Leaning in a corner, frames bend and sleeves collect dust. Left on a tray, they take up bench space and dry with paint caked in exactly the wrong places.
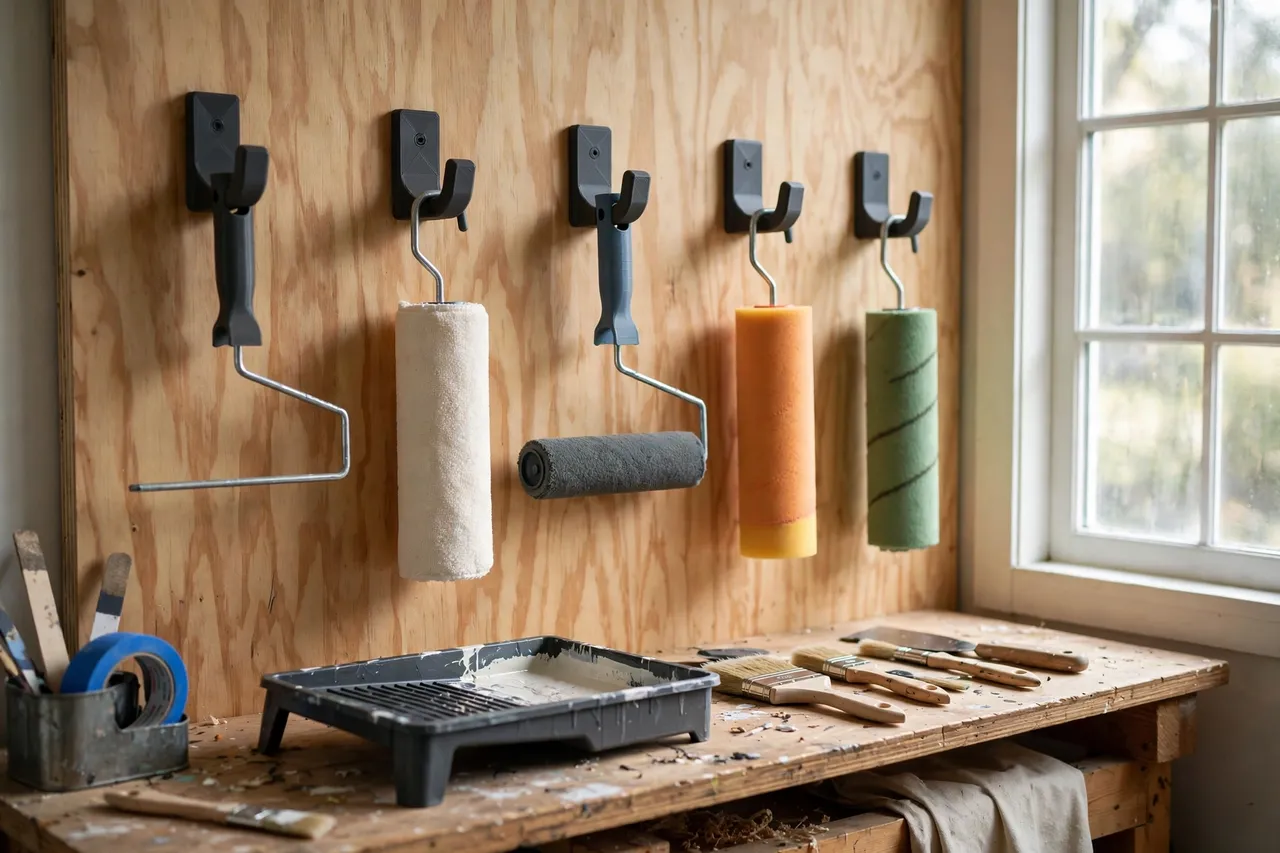
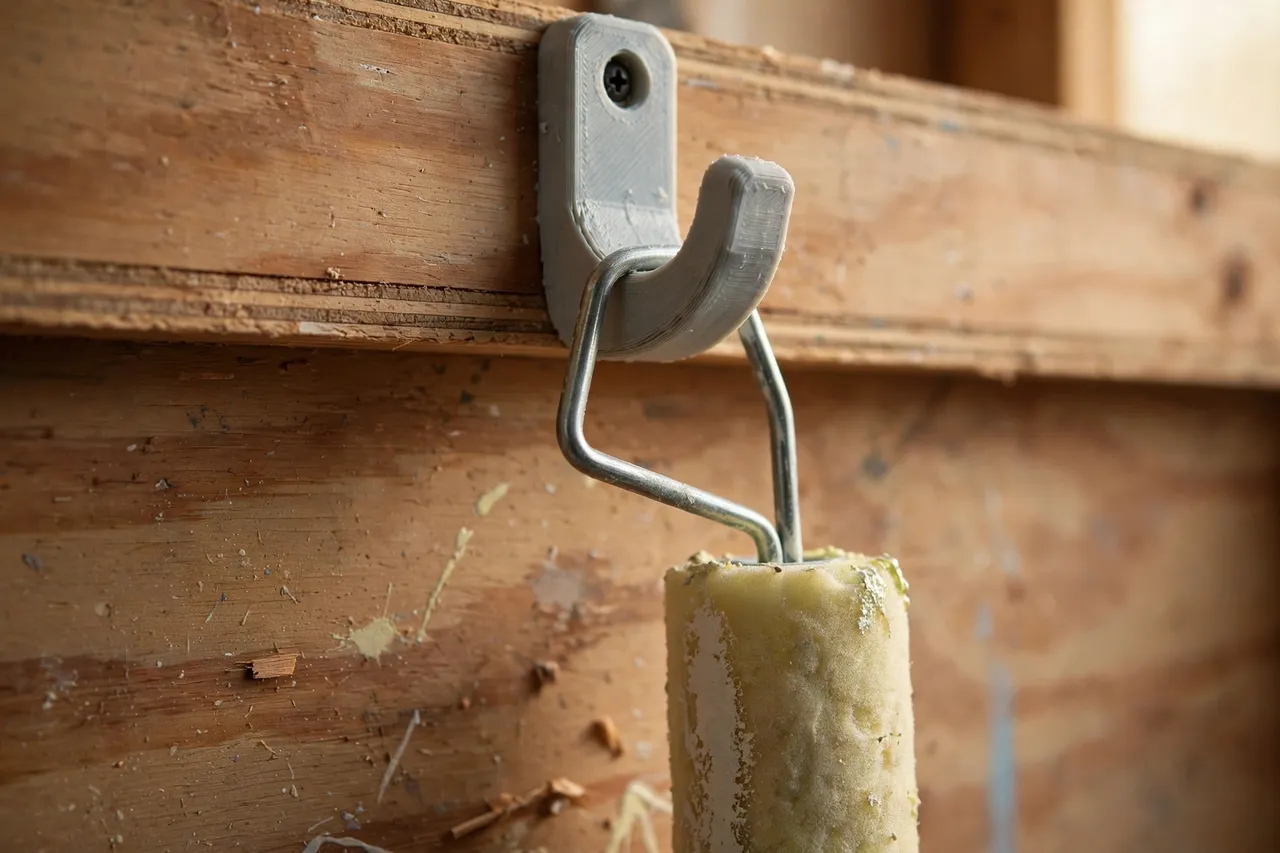
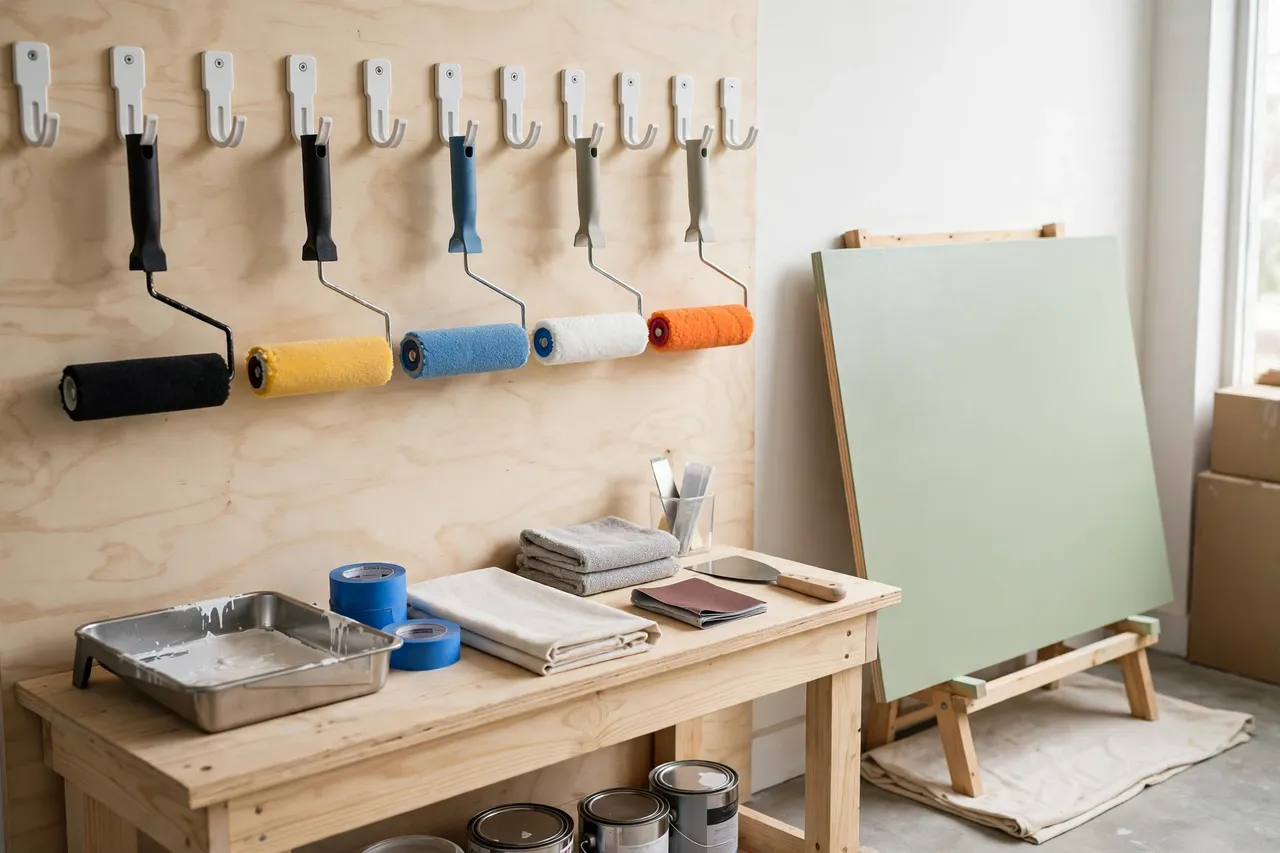
Hanging rollers vertically solves most of this. A frame hung by its handle lets the sleeve hang free, dry evenly, and keep its round shape. A sleeve stored on its own hook stays dent-free and dust-free. And a row of hooks on the wall means you can see at a glance whether you have the sleeve you need — a smooth sleeve, a textured sleeve, a mini roller — before you start painting.
This guide covers printed hooks for roller frames and for sleeves, sized to the rollers you own. The hooks are storage for finished painting tools only. They do not change how a roller paints, and they are not a place for wet rollers dripping paint — let rollers dry, or drain them properly, before they go on the wall.
What You Need
This is a simple print-and-mount project. The only measuring that matters is the handle and frame sizes of your rollers.
Materials and tools
- A home 3D printer with a build area of roughly 120 mm in at least one direction
- PLA or PETG filament; PETG is better in a warm garage and wipes clean of paint dust
- Your roller frames and sleeves, for measuring handle diameter, frame wire thickness, and sleeve length
- A stud finder, pencil, spirit level, and tape measure
- Wood screws (35 to 45 mm) for plywood or studs, plus wall plugs for masonry
- A cordless drill, pilot drill bit, and screwdriver
- Sandpaper or a small file for cleanup
Suggested print settings
- Layer height: 0.20 mm is fine for hooks.
- Walls: 4 perimeters, so the hook arm resists flexing under a frame’s weight.
- Infill: 30 to 50 percent, gyroid or grid.
- Top and bottom layers: 4 or more for a flat mounting plate.
- Orientation: Print flat with the mounting plate down, or on the side for a stronger hook arm; avoid printing the arm as a thin upright.
- Supports: Usually none for a simple hook shape.
Print one hook first and test it with your heaviest frame before printing a row.
Design Considerations
Rollers come in two parts that store differently: the frame, which is a wire arm with a handle, and the sleeve, which is a soft cylinder that dents easily. A good storage system handles both.
1. Hooks for frames
A frame hangs best by its handle or by the bend where the wire meets the handle. A J-hook with a cradle about 25 to 35 mm wide accepts most handles, and a raised front lip stops the frame sliding off. The hook’s standoff from the wall — about 30 to 40 mm — lets the frame hang flat without the wire pressing against the wall.
Measure the fattest handle you own and size the cradle for it, with a little clearance. A hook that fits a slim mini-roller handle will not accept a fat full-size handle, so print two sizes if your collection spans both.
2. Hooks and pegs for sleeves
Sleeves should hang vertically, never stacked flat under other tools. Two approaches work:
- A peg or dowel-style hook: The sleeve slides over a short horizontal peg, hanging by its core. This keeps the nap untouched and the sleeve round.
- A wide cradle hook: The sleeve rests in a broad, gently curved cradle. This suits sleeves with end caps or sleeves you do not want to slide onto a peg.
Either way, keep the sleeve’s nap clear of the wall and of neighboring sleeves. A sleeve pressed flat against a wall or another sleeve develops a flat spot that shows up in the finish.
3. Spacing and drop
Roller frames are long — a standard frame with a sleeve measures 250 to 300 mm from handle to sleeve end. Plan the drop: hooks must be high enough that sleeves clear the bench or shelf below. Space hooks 120 to 180 mm apart so sleeves do not touch each other, wider for thick-nap sleeves that are fatter than standard ones.
4. Mounting
A row of hooks on a rail is easier to level than individual hooks, and it spreads the load. Mount the rail into studs or with rated anchors. A full set of frames and sleeves is not heavy, but a rail that sags looks bad and eventually pulls out.
Step-by-Step: Printing and Mounting
- Measure your frames and sleeves — handle diameter, frame wire size, sleeve length and diameter.
- Decide hook types. J-hooks for frames, pegs or cradles for sleeves.
- Model one hook of each type, with a mounting plate and two screw holes.
- Print one test hook and clean up edges that touch handles or sleeves.
- Test-fit a frame and a sleeve. The frame should hang level, the sleeve should hang free without touching the wall.
- Adjust if needed. Too tight? Widen the cradle. Sleeve touching the wall? Increase standoff.
- Print the rest of the row once the tests pass.
- Mark the wall level, at a height where the longest frame clears the bench below.
- Find studs, drill pilots, and mount the rail or hooks with screws driven snug.
- Hang frames and sleeves, checking each one clears its neighbor and the wall.
If your painting kit includes a roller frame that needs a new grip, the guide 3D Printed Paint Roller Frame Handle: A Replacement Handle for Roller Frames covers making one, and a re-handled frame deserves a hook sized to its new handle — measure again before hanging it. For the wider painting setup, 3D Printed Paint Roller Frame Adapters: Fit Roller Frames to Poles shows how frames adapt to extension poles, which are worth storing on the same wall so the whole painting kit lives together.
Tips for Better Results
- Hang sleeves by size and nap. Group smooth sleeves together, textured sleeves together, and mini rollers together, so you grab the right one without unrolling several.
- Let sleeves dry fully before hanging. A damp sleeve hung on a hook dries evenly; a wet, paint-loaded sleeve drips onto the bench and the hook.
- Clean frames before they go back. Dried paint on a frame wire makes the next sleeve hard to fit. A quick wipe while paint is still workable saves scraping later.
- Keep a drip tray or old sheet below the row for the first day after a painting session, in case a sleeve is damper than you thought.
- Leave a spare hook. Painting kits grow — a new sleeve size, a second frame — and a spare hook keeps the row from overflowing into a pile again.
Common Mistakes to Avoid
- Stacking sleeves flat. Flat stacking dents nap and hides the sleeve you need. Hang them vertically.
- Sizing hooks from one roller. Frames and handles vary. Measure the fattest handle and the fattest sleeve.
- Mounting too low. A frame that rests on the bench is not hung at all, and the sleeve end takes the weight and deforms.
- Cramming sleeves together. Nap pressed against nap flattens both sleeves. Give each one air.
- Hanging wet rollers over finished work. Drips ruin a finished piece below. Let rollers drain and dry before wall storage.
- Printing too weak. A thin hook flexes under a frame and eventually cracks at the arm. Use the settings above.
Care, Storage, and Alternatives
Printed hooks need little care: wipe paint dust off, check screws annually, and reprint any hook that cracks. Sleeves themselves need more attention — clean them promptly after use, dry them fully, and store them capped or bagged if your shop is dusty, since dust in the nap shows up in the next coat.
Alternatives include a shelf with sleeves standing upright, which works for a small collection but hides sleeves behind each other, and a pegboard with generic hooks, which works but rarely matches roller handles well. Printed hooks win on fit and visibility: each frame and sleeve has its own spot, sized for it, where you can see it.
FAQ
Can one hook hold both a frame and a sleeve?
A frame hook can hold a frame with its sleeve still fitted, which is how most rollers are stored between coats of the same job. For long-term storage, though, sleeves last longer removed from frames and hung separately, so having both hook types on the wall is the better setup.
Is PLA strong enough for roller frames?
Yes, with generous walls and infill — a roller frame is light. PETG is the better long-term choice in a warm shop, but a well-printed PLA hook holds frames without trouble.
How do I stop sleeves getting dusty on the wall?
Store the row away from sanding and sawing areas if you can, and slip a loose plastic bag over rarely used sleeves. Dust in the nap is the main enemy; the hooks themselves do not attract it.
My sleeve has a flat spot from storage. Can it be fixed?
Sometimes a good wash and full drying restores the nap, and rolling the sleeve gently on a flat surface can help. A deep, long-standing flat spot may not recover fully — which is exactly why vertical hanging storage matters for the next sleeve.
Conclusion
Painting goes better when the tools are ready. A wall of printed hooks — frames hung by their handles, sleeves hanging free and round — turns a pile of rollers into a proper painting station you can read at a glance.
Measure your rollers, print one test hook, and build the row. The next coat starts with grabbing the right roller, not hunting for it.