Introduction
The magnetic parts dish is one of the great small inventions of the workshop: a shallow stainless bowl with a magnet in its base that grabs screws, bolts, and driver bits and refuses to let them roll away. And yet, in the middle of a job, the dish itself ends up in the wrong place — on the floor where a boot finds it, on the far end of the bench out of reach, or balanced on a ladder rung one wobble from disaster. The parts stay in the dish; the dish goes everywhere.
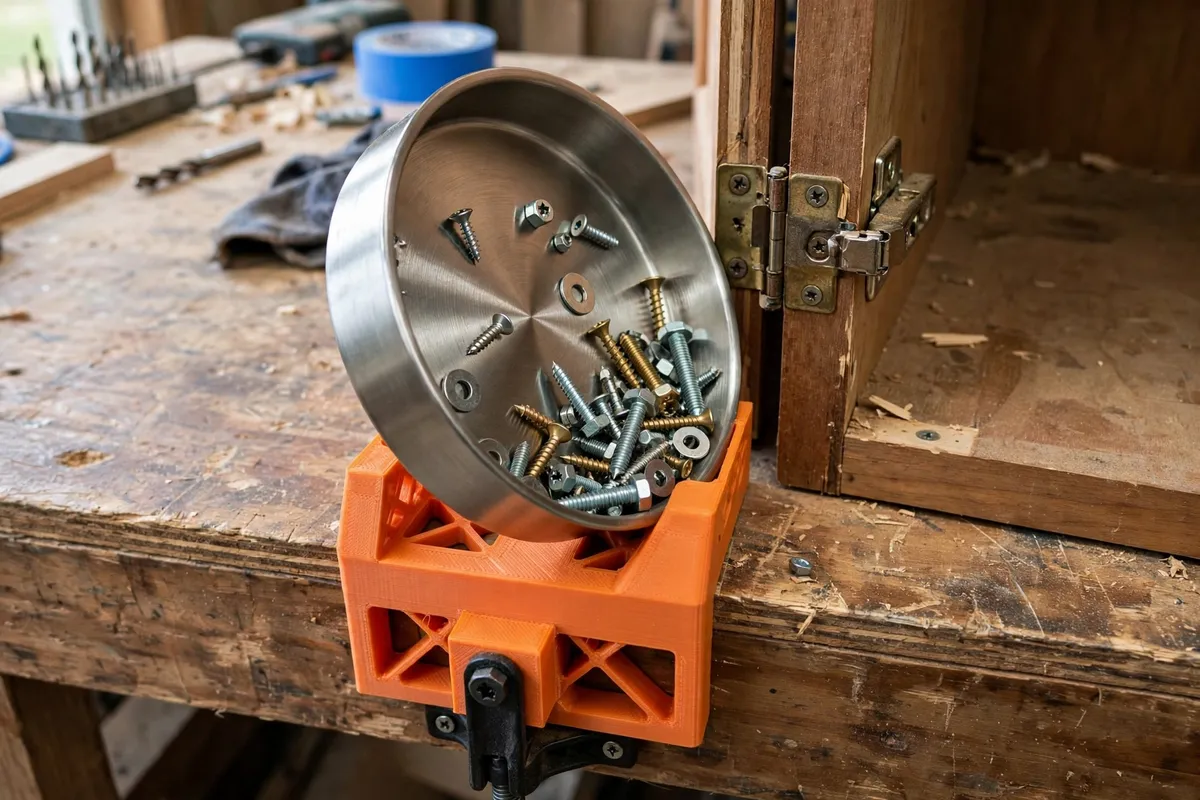
A 3D printed holder gives the dish a fixed home wherever the work is. One cradle design, three mounts: a clamp that grips a bench edge and presents the dish tilted toward you, a ladder mount that locks onto a top rail or rung, and a simple rail or wall bracket for the dish’s permanent parking spot. The dish drops in, the magnet does its magic on the screws, and the holder does its magic on the dish.
A scope note in the spirit of every good holder project: this holder holds a storage dish, nothing more. It is a small-parts organizer for screws, bolts, nuts, and bits during a job — it plays no role in any gas, pressure, electrical, or safety system, and the parts it cradles are ordinary fasteners you have already removed with the power off and the workpiece secured. Holding a dish is the entire job description, and it does it very well.
What You Need
Materials and tools
- A home 3D printer with a build area of about 150 mm or more
- PETG filament for clamp parts that flex slightly and shrug off knocks; PLA is fine for the wall bracket
- One magnetic parts dish — the common sizes are about 75 mm (3-inch) and 150 mm (6-inch); measure yours
- A digital caliper to measure the dish’s rim diameter and depth
- An M5 or M6 bolt, nut, and a wing nut or printed knob for the clamp screw
- A foam or rubber pad offcut to line the clamp jaw (optional, kind to bench edges)
- Your ladder and bench, to measure their rail and edge dimensions
Suggested print settings
- Layer height: 0.24 to 0.28 mm for brackets and mounts; 0.2 mm for the clamp screw threads if you print a knob.
- Walls: 5 to 6 perimeters on the clamp body and cradle ring — these parts take leverage.
- Infill: 40 to 50 percent for the clamp, 25 to 30 percent for brackets.
- Top and bottom layers: 5 or more.
- Orientation: Print the clamp body on its side so its jaw flexes across layers rather than along them.
- Supports: Design the cradle ring with a chamfered underside to avoid supports in the dish seat.

Design Considerations
1. The cradle: hold the dish, free the dish
The holder must grip the dish firmly enough that a bumped ladder does not launch it, yet release it with one hand when you move stations. Model a ring cradle that captures the dish’s rim lip: the dish drops in from above, its rolled edge rests on the ring, and a small sprung tab or a 20-degree bayonet twist locks it from lifting out casually. Tilt the cradle about 10 to 15 degrees toward the user in the bench version — a tilted dish shows its contents at a glance and resists the scoop-and-spill of a flat dish when you fish for one small screw among many.
2. The bench clamp: one hand, any edge
Model a C-clamp body with a throat of about 50 mm to swallow bench tops, shelf edges, and saw-stand rails, driven by a printed knob on a steel bolt — the bolt carries the thread load; the printed knob just makes it friendly. Line the fixed jaw with a pad recess so the clamp grips painted edges and ladder rails without scarring them. The clamp’s back carries the cradle on a short neck; a version with the cradle able to rotate and lock at angles earns its extra bolt the first time you clamp to a sloped rail.
3. The ladder mount: respect the ladder
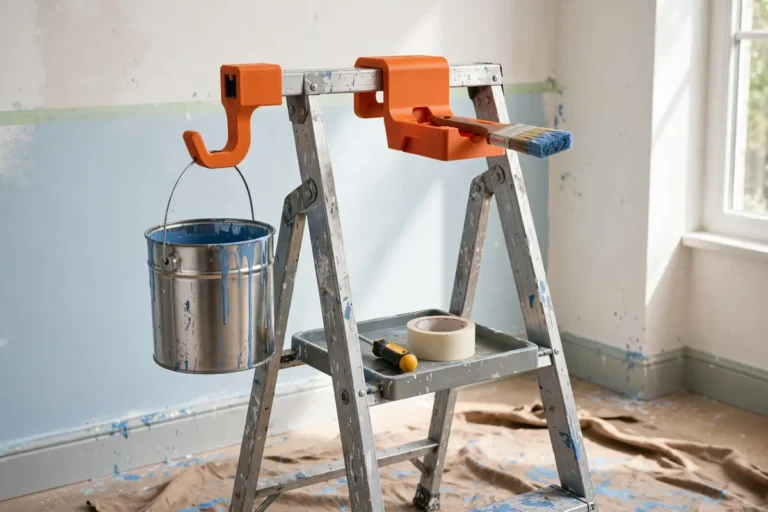
Ladders come in flavors: step ladders with a top cap and pail shelf, extension ladders with rungs and rails. Design the mount around the step ladder’s top rail or a rung clamp that closes fully around the rung — a complete loop cannot slip off — with the cradle held out to the side at hip height of the working step. Nothing about the mount should require modifying the ladder, and nothing should sit where feet or the user’s balance go. The dish lives beside the work, never underfoot and never as a step.
4. Parking: the wall bracket
The system’s quiet hero is a trivial printed bracket by the bench: two hooks and a ring the dish drops into between jobs. Tools with a home get put away; the dish parked visibly also reminds you it still holds the screws from the last job — check it before declaring any screw officially lost.
Step-by-Step: Printing and Assembly
- Measure your dish: rim diameter, depth, and whether its base is flat or domed.
- Measure your mounts: bench edge thickness, ladder rail profile, rung diameter.
- Model the cradle ring with its locking tab, then the three mount variants behind it.
- Print the bench clamp version first — it is the most used — and test: dish in and out one-handed fifty times, clamp on and off edges of different thicknesses, a deliberate bump test with the dish full of screws over a tray.
- Adjust the tab tension in the model if the dish rattles or fights; a holder that annoys will be abandoned by Friday.
- Print the ladder mount and wall bracket, assemble with the steel bolt and knob, and fit pads to the jaws.
Step-by-Step: Using the Holder on a Job
- Clamp the holder at your start position — bench edge by the vise, ladder rail before you climb — and seat the dish with its locking tab engaged.
- Work into the dish: every screw, bolt, and clip comes out of the workpiece and goes directly into the dish, in the order and grouping it came off. The magnet keeps the group honest when the ladder shifts.
- Move stations by moving the dish, not loose handfuls of screws: pop the dish from one mount, click it into the next. One dish, many homes, zero pocketed screws.
- For reassembly, work in reverse order from the dish’s groups — the topmost group goes back first, which is why order at teardown mattered.
- At the end, park the dish on its wall bracket and glance inside: an empty dish means every fastener went home; a leftover screw is a mystery to solve now, not at midnight.
This holder joins the work-holding family of “Bench Dogs and Work-Holding Clamps: 3D Print Accessories for Your Workbench Dog Holes” — different job, same philosophy of printed accessories keeping the small chaos of a repair in order — and it lives happily beside the bits it holds, which themselves belong in “3D Printed Drill Bit and Driver Bit Organizer: A Workbench Storage System That Grows With You.”
Tips for Better Results
- Buy or dedicate two dishes — a small 75 mm for fasteners and a 150 mm for bolts and brackets. The same cradle sized for the big dish holds the small one with a printed adapter ring, so every mount serves both.
- Keep the dish’s groups separated with a fingertip sweep: magnet-held screws stay where you put them in the bowl surprisingly well, and grouping by removal order is a free assembly diagram.
- Add a magnet-safe note to your habits: keep the dish and its magnets away from magnetic media, compasses, and delicate electronics you are servicing — the holder parks the dish; you choose where the parking spot is.
- Print the ladder mount in a bright color. A holder you can see from the ground is a holder you remember to empty before folding the ladder.
- A spare clamp knob in the toolbox costs a gram and saves a job when one rolls under the bench to join the screws of legend.
Common Mistakes to Avoid
- A cradle that only friction-fits. Bumps happen, ladders flex, and a friction-held dish eventually ejects its cargo. The locking tab or twist is the design, not a garnish.
- Clamping to the ladder where you stand. The mount belongs on the top rail or a rung above your working position, out of the foot and balance zones — never on a rung you will step on.
- Printing the clamp screw itself in plastic. Threads under clamp load belong to a steel bolt; printed threads strip at the first serious tightening.
- One mount to rule them all. A bench clamp makes a poor ladder mount and vice versa. The cradle is shared; the mounts are specialists.
- Magnet complacency. The dish holds steel fasteners — it does nothing for brass, aluminum, or plastic clips, which will still roll. Keep a small lidded pot in the dish for the non-magnetic strays.
Care, Storage, and When to Choose an Alternative
Wipe grit out of the cradle so the dish seats fully, check the clamp knob and bolt each season, and reprint any mount that takes a crack — mounts are quick prints, and the model guarantees the replacement matches. Store the dish parked in its bracket, mounts clipped to the ladder and bench where they work.
Alternatives: a magnetic wristband keeps a few screws truly at hand for fiddly work but holds little and snags; a parts tray on the bench is fine until the job moves to the ladder; muffin tins organize beautifully and travel terribly. For the classic home-repair pattern — bench to ladder to floor and back — a dish with printed homes at every station quietly removes one whole category of job-site frustration.

FAQ
My dish is a different size. Will the holder still work?
The cradle is modeled to your dish’s rim, so measure before modeling — the two common sizes (about 75 and 150 mm) cover most dishes sold. A printed adapter ring lets one cradle serve the smaller dish too.
Is the clamp strong enough for a full dish of bolts?
Easily. A full 150 mm dish of steel fasteners weighs well under a kilogram, and a five-wall PETG clamp on a steel bolt handles several times that. The bump test in the build steps proves your print before the ladder does.
Can I mount the holder to a tool rail or pegboard?
Yes — the cradle’s neck is the shared interface, so a rail hook or pegboard back is a five-minute variant of the wall bracket. Keep the dish’s home consistent with your other wall storage and the whole system reads as one.
The magnet in my dish seems weak with the holder. Why?
The holder does not affect the magnet, but a cradle that holds the dish tilted changes how parts settle. If screws cluster away from where you reach, rotate the dish in its cradle so the magnet’s sweet spot faces you — most dishes have the magnet centered in the base, so a level seat matters more than the holder’s angle for small parts.
Conclusion
Screws do not get lost in dramatic moments; they roll away in boring ones, from dishes balanced in the wrong place. A printed holder — one cradle, a clamp for the bench, a mount for the ladder, a bracket for home — puts the dish where the work is, locked in and tilted toward you, from the first screw out to the last screw home.
Print the bench clamp this weekend and run one repair with it. When the job ends with the dish empty and every fastener accounted for, you will print the ladder mount without being told.