Introduction
A curling rug corner is a small thing that never stops announcing itself. It catches your toe every time you pass, it folds back further each week, and eventually it becomes a permanent little ramp that vacuums bounce off and visitors trip over. Corners curl because the rug’s backing dries, shrinks, or simply remembers being rolled — and the corner, with the least material holding it down, lifts first.
The common fixes all have a cost. Adhesive corner pads stick well until you lift the rug to wash it, then leave residue on the floor and a torn backing on the rug. Double-sided tape is worse.
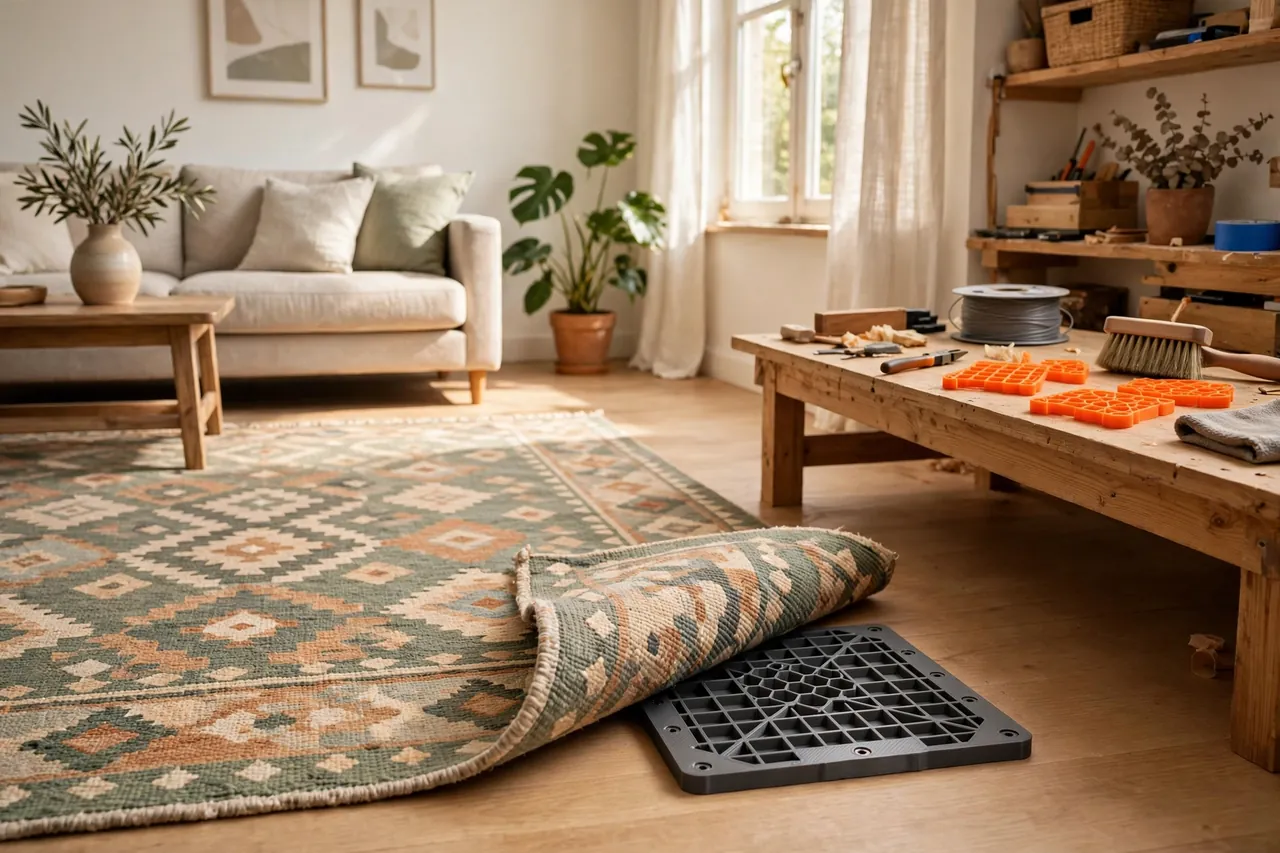
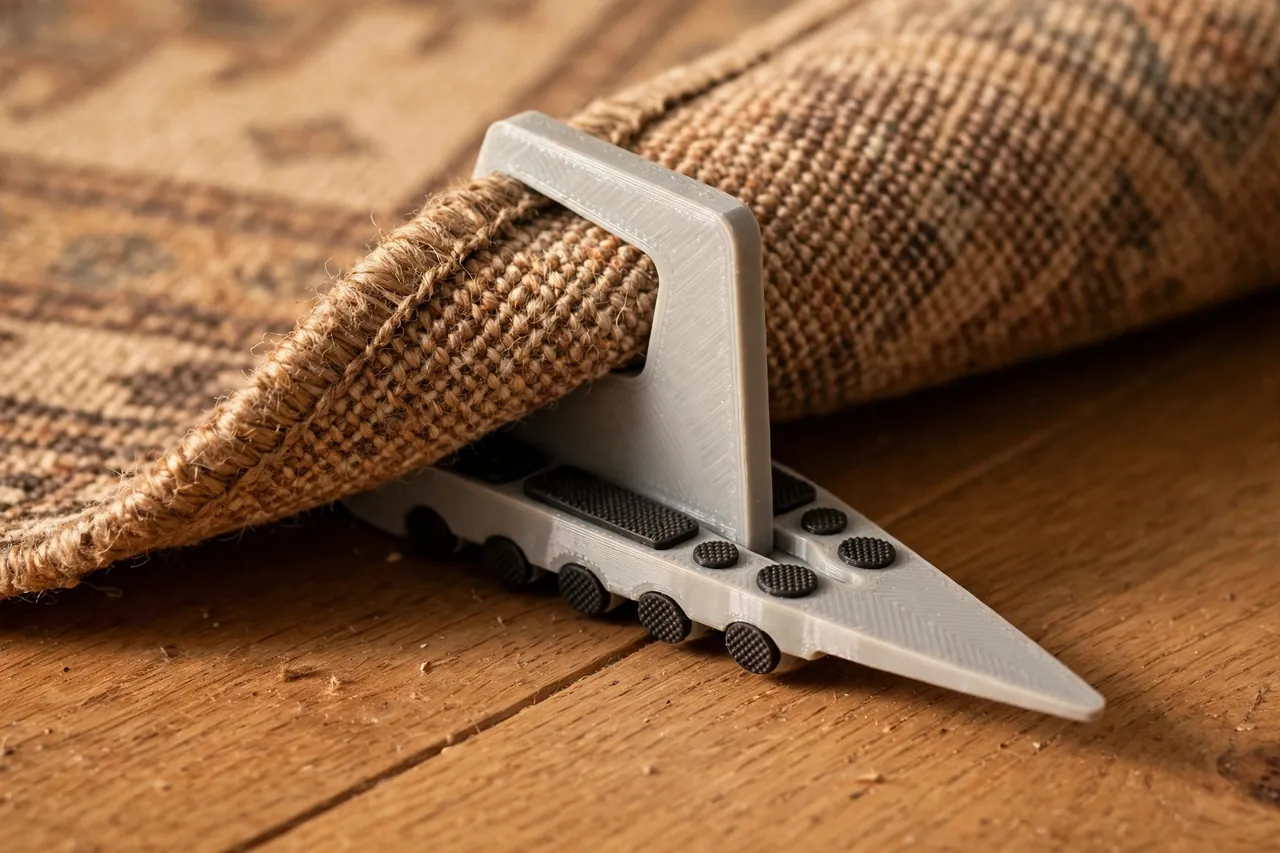
A printed corner gripper takes a mechanical approach instead: a thin, stiff plate that slides under the corner, with a shallow pocket or raised lip system that holds the rug’s corner flat and spread, plus a grippy underside that resists sliding on the floor. No adhesive touches the floor or the rug, so the gripper lifts away cleanly whenever you wash or move the rug.
This guide covers designing grippers for different rug thicknesses, printing them so they stay flat and grippy, and fitting them so corners stay down. The grippers simply hold a rug flat under its own weight — they are a convenience aid for ordinary rugs, not a safety anchor, and they are no substitute for a proper non-slip underlay across the whole rug where one is needed.
What You Need
Each gripper is a flat plate roughly 150 to 200 mm square at the corner. A set of four prints easily in an evening.
Materials and tools
- A home 3D printer with a build area of roughly 200 mm in at least one direction
- PLA or PETG filament for the stiff plate; TPU if you want to print grip pads in the same job
- The rug itself, to measure corner thickness and backing texture
- Calipers or a ruler, and a tape measure
- Optional self-adhesive felt or thin rubber sheet for the underside, if you print in rigid filament only
- A small file or sandpaper to round the plate’s leading edges
For most homes, a PETG plate with a few TPU pads — printed separately and pressed or glued into recesses — grips hardest and lasts longest. A single-material PETG plate with a textured underside still works well on wood and tile. Keep the plate stiff: a gripper that flexes with the curl defeats its own purpose.
Suggested print settings
- Layer height: 0.20 mm; the plate is mostly flat, and speed helps when printing full sets.
- Walls: At least 4 perimeters, giving the pocket walls and rim real rigidity.
- Infill: 40 to 60 percent, grid or gyroid — the plate must resist the rug’s curling force without bowing.
- Top and bottom layers: 5 or more on top for a smooth face under the rug; the underside can carry a printed texture.
- Orientation: Print flat, underside down, so the grip texture forms against the bed or as designed.
- Supports: None — a flat plate with a shallow pocket is a support-free design.
Print one gripper first and live with it under the worst corner for a few days before printing the whole set.
Design Considerations
The gripper wins by being thin at the edges, stiff in the body, and grippy underneath. Three choices get you there.
1. A pocket that spreads the corner flat
The most effective design is a shallow triangular or square pocket: two low walls forming a corner that the rug’s corner slides into. The pocket holds the corner spread out to its natural shape, so the rug cannot fold back on itself. Size the pocket to your rug’s thickness with about 0.5 mm of clearance — snug enough to hold, loose enough to slide in without forcing the backing. Wall height of 4 to 8 mm suits most rugs; deep-pile rugs need a little more room and patience.
2. Tapered edges you cannot feel
A plate under a rug shows itself if its edges are blunt. Taper the two outer edges down to about 1 mm over the last 20 mm, like a wedge, so feet and vacuum cleaners glide over the transition. The corner edge under the rug’s point can stay squarer, since the rug’s own corner covers it. Round every exposed corner of the plate generously — a sharp printed corner under a thin rug is a pressure point you will feel through socks.
3. Grip underneath, smoothness on top
The underside does the holding. Recesses for TPU pads give the best grip on hard floors; if you print one material only, model a field of shallow ribs or a coarse cross-hatch on the underside to break the smooth-on-smooth slip. The top face, by contrast, should be smooth so the rug slides into the pocket easily and the backing is not abraded over months of tiny movements.
4. Size for the rug, not the room
Weigh the corner’s determination honestly: the thicker and stiffer the rug, the larger and stiffer the plate.
Step-by-Step: Printing and Assembly
- Measure your rug’s corner thickness, including backing and pile compressed as it lies.
- Model the plate with its corner pocket, tapered outer edges, and underside grip features or pad recesses.
- Print one test gripper and check it lies perfectly flat off the bed — a warped plate rocks and will never hold quietly.
- Print TPU pads if your design uses them, and press or glue them into their recesses.
- Round the leading edges with a file so the plate slides under the rug without snagging the backing.
- Test the pocket fit: the rug corner should slide in fully with gentle hand pressure and stay spread flat.
- Print the remaining grippers once the test corner survives a few days of foot traffic and a vacuum pass.
Step-by-Step: Fitting the Grippers
- Clean the floor where the corner sits; grit under a gripper both reduces hold and risks scratching.
- Flatten the rug corner by hand as best you can, uncurling it in the opposite direction briefly to relax the backing.
- Slide the gripper under the corner, guiding the rug’s corner fully into the pocket until it seats.
- Press down and walk the corner a few times to settle plate, rug, and grip pads into contact.
- Check the edges by walking over the corner from several directions — you should feel the rug, not the plate’s edge.
- Fit the remaining corners, then vacuum the rug; the vacuum pass is the honest test of whether corners will stay.
- Recheck after a week. A corner that lifts again usually needs a deeper pocket or a larger plate, not more hope.
While you are working at floor level, you may also enjoy our related guide, “3D Printed Flooring Tapping Block and Pull Bar: Fit Laminate Without Chipped Edges,” if fresh flooring is what the rug will be dressing.
Tips for Better Results
- Treat the worst corner first. If the gripper tames the rug’s most determined curl, the rest are a formality.
- Add a spare set for wash day. Grippers that live with the rug get lost in laundry-day shuffles; spares keep the system working.
- Mark the pocket side with a small printed arrow or dot, so anyone remaking the bed or relaying the rug fits them top-side up.
- Pair grippers with a thin underlay on very smooth floors; the plate stops the curl, the underlay stops whole-rug creep.
Common Mistakes to Avoid
- A plate thinner than the curl is strong. A flimsy plate just becomes a curled plate under a curled rug; stiffness is the product.
- Blunt, untapered edges. They announce themselves to every bare foot and catch every vacuum pass.
- Underside as smooth as the top. On polished floors the whole assembly skates; texture or pads are essential.
- Adhesive anyway, just in case. It defeats the clean-lift benefit and can stain the floor the gripper was meant to protect.
- One gripper per rug. Corners curl as a team; an untreated corner keeps folding and drags the rug’s lay crooked.
Care, Storage, and When to Choose an Alternative
Lift grippers off when the rug goes for washing, rinse or brush the underside pads, and store the set clipped together in the rug’s room. Check the pockets each season for grit that could wear the rug backing. Kept clean, a set lasts as long as the rug does.
Keep the honest framing in mind: a gripper flattens a corner; it does not make a rug a safety surface. On stairs, in front of exterior doors where water arrives, or anywhere a rug must genuinely not move underfoot, use a full quality non-slip underlay or fix the rug properly — and for rugs whose backing is cracked and disintegrating, replacement is kinder than gripping. For the ordinary curled corner on an ordinary rug, though, the printed plate is the cleanest fix there is: flat corners, no glue, no residue.
FAQ
Will the plate be felt through the rug when walking?
Not if the edges are tapered and the rug has any pile at all. On a very thin flatweave rug you may sense a faint firmness at the extreme corner — the exact spot feet rarely land — and stepping up one taper length makes even that disappear.
Do grippers work on carpeted floors?
Partly. The pocket still spreads and holds the corner flat, which solves most of the curl, but the underside grip has nothing firm to bite. On carpet, a larger plate with a deeper pocket does the work; grip pads matter less.
Can one design fit all my rugs?
The pocket depth is the variable. Print sets per rug thickness — a thin runner set and a thick living-rug set cover most homes. The plates stack flat in a drawer, so keeping two sizes is no burden.
What if the corner curls again after a month?
Usually the curl was stronger than the plate: go larger and stiffer, deepen the pocket slightly, and make sure the corner is fully seated. A backing that has permanently shrunk may also need the corner weighted overnight after fitting to teach it the new shape.
Conclusion
Curling corners are a rug’s way of asking for structure, and a printed gripper answers with exactly that — a stiff, tapered, grippy plate that holds the corner spread flat without a drop of adhesive ever touching your floor. Lift it clean away on wash day, drop it back after, and the corner behaves.
For other quiet floor-level fixes, you may also enjoy our related guide, “Chair Leg Glides and Floor Protectors: 3D Print Custom Feet to Stop Scratches on Wood Floors,” and our related guide, “3D Printed Leveling Shims and Wedges for Wobbly Tables, Cabinets and Shelves,” — small prints that make floors and furniture get along.
Measure your thickest rug corner, print one test plate, and let a week of flat corners sell you on the full set.