Introduction
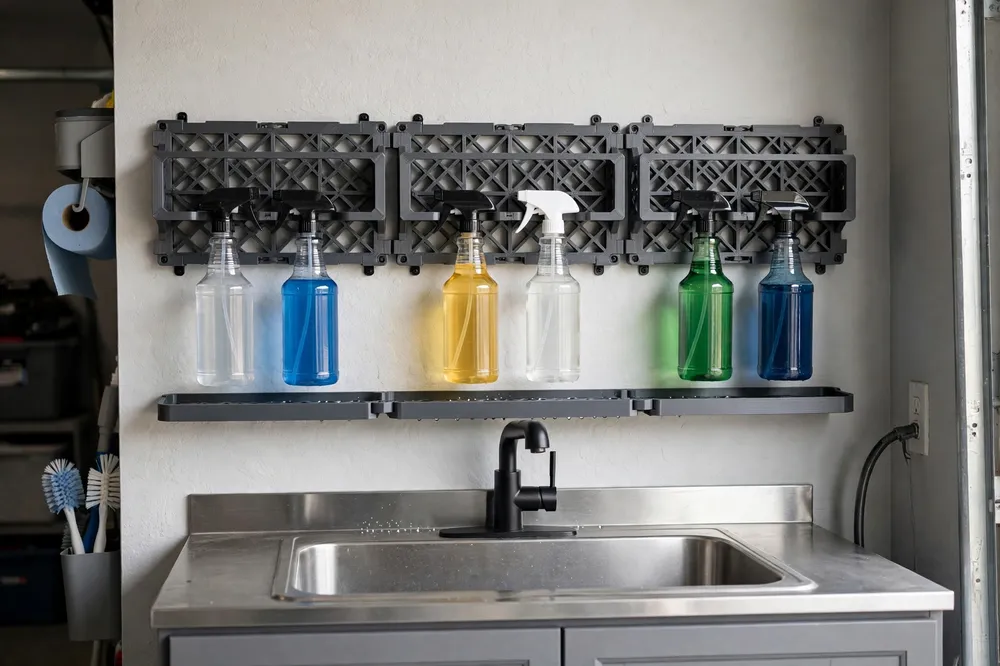
Every garage and workshop has the same crowded corner: a cluster of spray bottles standing on the bench, the shelf edge, or the floor by the sink, each one knocking into the next whenever you reach for one. Spray bottles are tall, top-heavy, and shaped to tip. A wall rack fixes that in an afternoon — each bottle hangs by its neck in its own cradle, visible, reachable, and off your work surface for good.
One point to be clear about before anything else: this is a storage rack only. Bottles rest in it the same way tools rest on a hook. The rack never connects to any bottle’s contents, and you should never print replacement sprayer parts, triggers, nozzles, dip tubes, or caps that seal a bottle — those belong to the bottle’s manufacturer. The rack holds whole, unmodified bottles for storage, and nothing more. Print it, mount it, and hang your bottles as they are.
This guide covers measuring your bottles, designing a cradle that fits them, printing a rack that carries the weight, and mounting it where it earns its keep.
What You Need
The rack is a modest print, but it carries glass-and-liquid weight at a leverage disadvantage, so plan the mount properly.
Materials and tools
- A home 3D printer with a build area of roughly 200 mm for single-piece racks, or any size for modular cradles
- PETG filament — it shrugs off garage temperature swings and the odd splash; PLA is acceptable for an indoor laundry or under-sink version
- Your spray bottles, gathered together, with a ruler or calipers to measure neck diameters
- A tape measure, pencil, and level for marking the mount
- A stud finder if you are mounting on a framed wall
- A cordless drill, suitable bits, and screws matched to your wall — into a stud where possible, or proper wall plugs in masonry
Suggested print settings
- Layer height: 0.24 to 0.28 mm keeps these simple shapes quick.
- Walls: 4 to 5 perimeters. The cradle arms carry the load.
- Infill: 35 to 50 percent, gyroid or grid.
- Top and bottom layers: 4 or more.
- Orientation: Print the rack with the mounting plate flat on the bed so layer lines run across the cradle arms, not along the peel direction.
- Supports: Angle the cradle arms upward at a self-supporting slope and you can skip them entirely.
Design Considerations
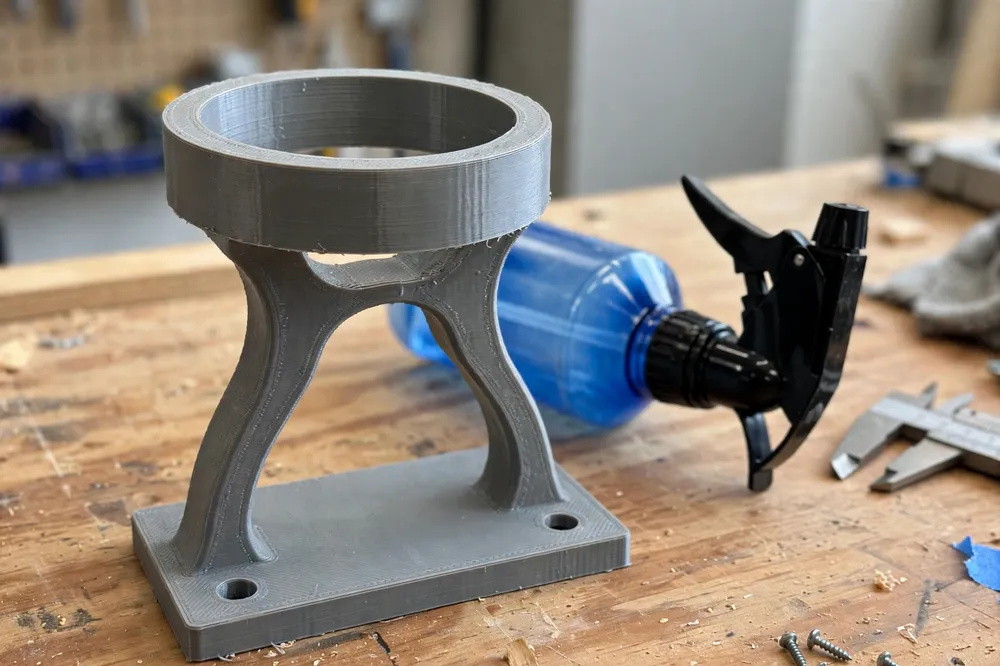
Model the rack in any basic CAD program. Think of it as a flat mounting plate with a row of neck cradles — each cradle a ring or fork that the bottle’s neck drops into, with the trigger head resting on top.
1. Size the cradle to the bottle neck, not the bottle
Spray bottles hang from the narrow neck just below the sprayer head, and that neck is remarkably consistent: most household sprayers share a similar neck diameter, with the wider sprayer head acting as the stop that keeps the bottle from sliding through. Measure the necks of your actual bottles — a few may be slimmer spray or mist bottles — and size the ring about 1 to 2 mm wider than the largest neck. Add one smaller cradle at the end of the row if you keep a couple of slim bottles.
2. Support the trigger head, not just the neck
A ring alone lets a bottle swing and lean. Give each cradle a shallow fork or saddle directly under the sprayer head so the head rests flat and the bottle hangs vertical. Keep the ring’s opening at the front slightly narrower than the neck — a gentle snap-in — so bottles stay put when the garage door slams, yet lift out with a small upward tilt.
3. Space the row for hands and triggers
Bottles hang close, but triggers and labels need room. Space cradle centers at least 90 to 110 mm apart so you can grip a bottle body between its neighbors, and stagger nothing: a straight row at even height reads tidy and makes a half-empty bottle obvious at a glance.
4. A drip ledge and honest mounting
Add a shallow ledge or channel along the bottom of the plate. Spray bottles weep — a drip from a nozzle after use is normal — and a ledge keeps that drip off the wall and the bench below. The mounting plate should be tall enough for two screw rows, top and bottom, spaced into a stud or solid plugs. A full row of bottles can total several kilograms hanging 80 mm off the wall; the mount, not the print, is what makes that safe.
5. One long rack or a row of modules?
A single long rack looks clean but must fit your printer. A modular design — one cradle per print, joined on a shared mounting rail or simply butted together on the wall — grows one bottle at a time and reprints cheaply if a cradle ever cracks. For most garages, modules win.
Step-by-Step: Printing and Assembly
- Gather and measure your bottles. Neck diameters, overall heights, and the count you want on the wall.
- Mark the hanging height. Bottles must clear the bench or sink below with room to lift out upward.
- Model the cradle: neck ring, head fork, grip-friendly spacing, drip ledge, and a mounting plate with two screw rows.
- Print one test cradle and hang your heaviest full bottle in it overnight. Watch for flex or slow creep.
- Adjust and print the set. Beef up the arm where it leaves the plate if the test piece flexed.
- Lightly sand the ring edges. Bottles slide in and out daily; smooth plastic is kind to labels and hands.
There is no other assembly — each module is one print, ready to mount.
Step-by-Step: Mounting and Loading the Rack
- Choose the spot. Above the utility sink or beside the bench are favorites — anywhere bottles get used and set down.
- Find solid fixing. Use the stud finder on framed walls; on masonry, mark solid brick or block and fit plugs.
- Level and mark the line for the top screw row, then transfer the lower row from your printed plate as a template.
- Drill and drive the screws, snug and even, so the plate pulls flat.
- Hang the bottles heaviest in the middle of the row, lightest at the ends.
- Tug-test the rack with a firm downward pull. It should feel completely solid before you trust it with glass bottles.
If your organizing streak is running, the same measure-first approach drives our guide “Workshop Small-Parts Organizer: 3D Printed Stackable Bins and Screw Sorters for Your Workbench” — the rack handles the tall bottles, the bins handle everything small.
Tips for Better Results
- Group by job, not by bottle shape. Car cleaners together, household sprays together — you will grab the right one first time.
- Leave one empty cradle. A new bottle always shows up; spare capacity keeps the system tidy.
- Print in a light color for a dark garage. Bottles stand out against it, and drips show up so you wipe them early.
- Face labels outward. It sounds fussy and saves a little time every single day.
- Pair the rack with a cord solution. The bottles’ bench-mates — chargers and leads — behave with the system in “3D Printed Cable and Cord Winders for a Tangle-Free Workshop (storage/organizing only).”
Common Mistakes to Avoid
- Sizing cradles to the bottle body. Bottles hang by the neck; a body-sized ring holds nothing.
- Mounting into drywall alone. A loaded rack on plasterboard anchors will creep and pull out. Find the stud or use proper masonry fixings.
- Crowding the row. Triggers overlap, bottles swing into each other, and the tidy system becomes a fiddly one.
- Printing in PLA for a hot garage. Summer heat in a closed garage can soften PLA under a constant hanging load. PETG is the safe default.
- Modifying bottles to fit. Never print adapters, caps, or sprayer parts to make a bottle work with the rack. If a bottle does not hang as made, store it elsewhere.
Care, Storage, and When to Choose an Alternative
Wipe the ledge and cradles when you notice drips — most cleaners rinse off PETG with warm water. Once a season, check the screws for snugness and look over the cradle arms for hairline cracks, especially on the module carrying your heaviest bottle.
A wire shelf basket or a commercial rail system does the same job if your printer is busy, and an over-door rack suits a rental where wall screws are off-limits. The printed rack wins when your bottles are an odd mix, your wall space is an awkward width, or you want the system to grow one module at a time at almost no cost.
FAQ
Will one rack design fit all my spray bottles?
Mostly, yes. Household sprayer necks are close in size, and a ring sized for the largest with a snap-in front fits nearly all of them. Slim mist bottles may rattle — give the end cradle a smaller ring, or stand those two on the ledge instead.
How much weight can the rack carry?
A solid PETG module with four to five walls and a two-row mount into a stud comfortably holds a full one-liter bottle per cradle. The mount is the deciding factor: screws into framing or sound masonry make it trustworthy; screws into board alone do not.
Can I print a replacement trigger or nozzle for a broken sprayer while I am at it?
No. The rack is storage only, for whole, unmodified bottles. Printed parts should never replace sprayer components or bottle seals — a failed seal leaks chemicals where you do not want them. Replace the bottle or buy the maker’s spare part.
Where should I avoid mounting the rack?
Keep it out of direct, all-day sun if you print in PLA, and away from anywhere bottles would hang over a heat source. A shaded garage or laundry wall at comfortable reaching height is ideal.
Conclusion
Spray bottles are only annoying because they have never been given a proper home. A printed rack — cradles sized to the neck, a fork under each sprayer head, a drip ledge, and an honest mount into solid wall — turns a tipping cluster into a tidy row you can read at a glance.
Measure your bottles, print a test cradle, and give the bench its space back.