Introduction
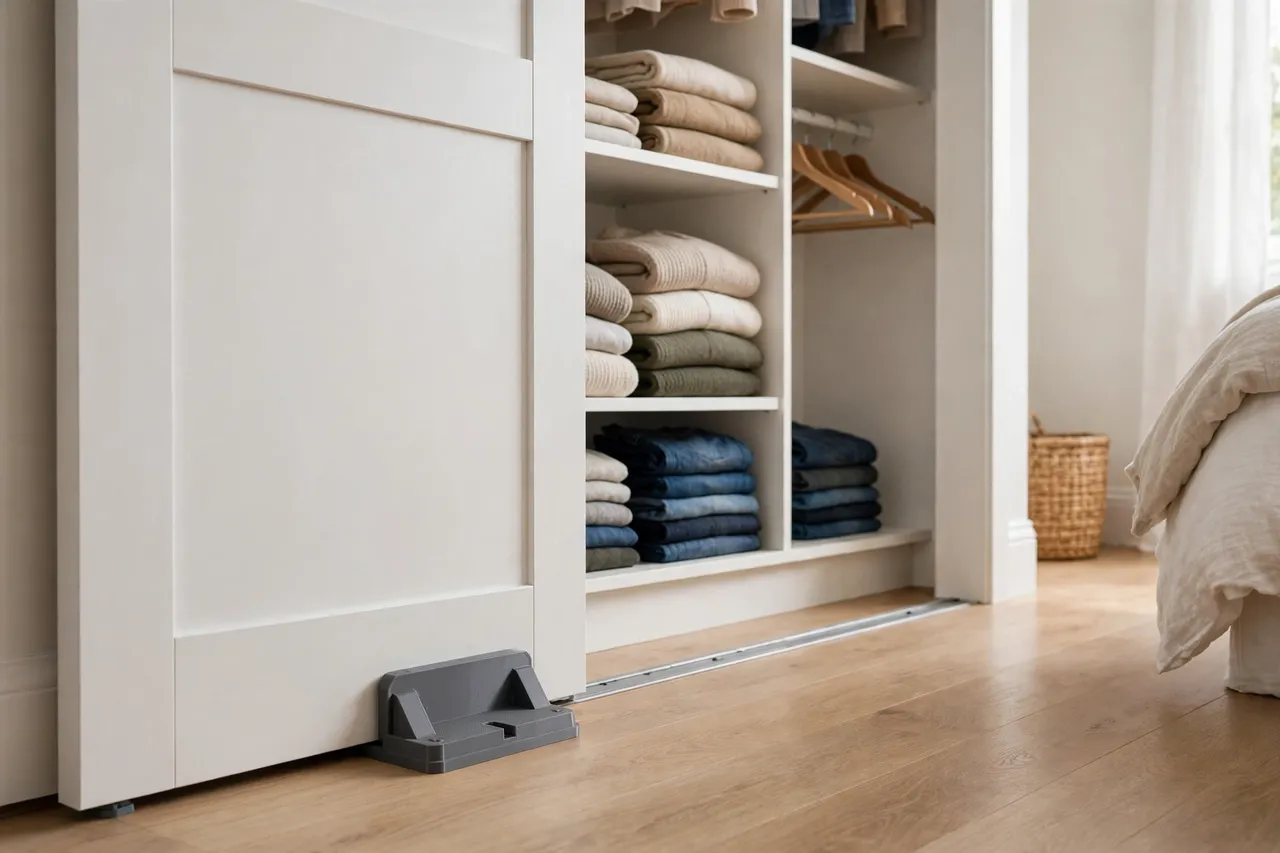
Bypass closet doors — the kind where one panel slides in front of the other — live or die by their bottom guides. When the guide bracket breaks or goes missing, the bottom of the door swings freely: it rattles when you walk past, bangs into the frame, scrapes the floor, and sometimes jumps clean off its track. The top rollers may be perfect, but without a guide at the bottom, the door never feels right.
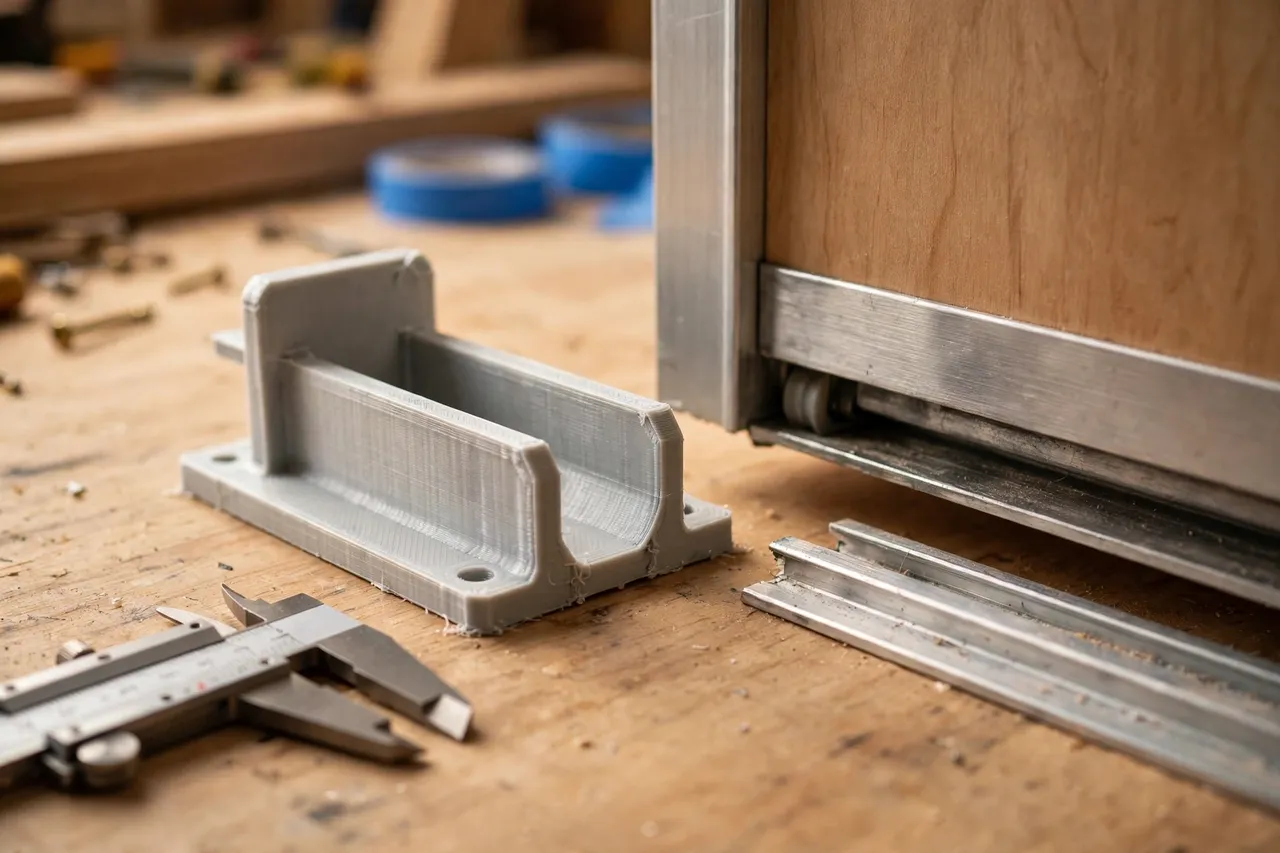
A 3D printed guide bracket is a small, light-duty part that restores that control. It does not hold the door up — the top track and rollers do that — it simply keeps the bottom of the door in line as it slides. That distinction matters: if your door is sagging because the top rollers have failed, a guide bracket will not save it, and you should replace the rollers first. But if the door hangs fine and just wanders at the bottom, a printed guide is exactly the right fix, and it can be sized to your door thickness rather than hunted down in a hardware aisle.
This guide covers the two common guide styles, measuring your door and track, printing a sturdy guide, and fitting it so the door slides quietly again.
What You Need
Guide brackets are small and quick to print, so spend your time on measuring. A guide that is a millimetre too narrow will bind; one that is too wide will let the door rattle just as before.
Materials and tools
- A home 3D printer with a build area of roughly 120 mm in at least one direction
- PETG for a guide that will be kicked, vacuumed around, and generally lived with; PLA is fine for a gentle-use closet
- Calipers or a ruler, a pencil, and a notepad
- A screwdriver set, short screws, a drill with a small pilot bit, and a spirit level
- A brush and vacuum for cleaning the floor track, plus fine sandpaper or a small file
PETG is the sensible default for a floor-level part. It tolerates knocks and cleaning better than PLA, and it will not go brittle as quickly in a warm room. If the guide sits on carpet rather than a hard floor, check how it will be fixed — a floor guide needs a solid surface to screw into, and carpet over concrete may need a different approach.
Suggested print settings
- Layer height: 0.20 mm for a good balance of speed and a smooth guide channel.
- Walls: 4 perimeters, so the channel walls resist the door pushing sideways.
- Infill: 40 to 50 percent, grid or gyroid, for a guide that feels solid underfoot.
- Top and bottom layers: 4 or more, for a flat base that sits true on the floor.
- Orientation: Print flat, base down, so the guide channel prints cleanly and the base stays flat.
- Supports: Usually none, if the channel is an open slot rather than an enclosed tunnel.
Print one guide first and slide the real door through it by hand before printing a full set. Bypass doors usually need one guide per door, sometimes a shared centre guide, so check your arrangement before assuming.
Design Considerations
There are two common arrangements, and designing for the wrong one is the most common mistake in this project. Look at your door before you model anything.
1. Floor guide versus door-mounted guide
A floor guide is screwed to the floor (or to a floor track) and the bottom of the door slides through its channel. A door-mounted guide is fixed to the bottom of one door and wraps around a floor track or a guide fin on the other door. Floor guides are more common and easier to print; door-mounted guides need more careful measurement because they move with the door. Identify which type you have by watching the bottom of the door as it slides and seeing which part stays still.
2. Size the channel to the door, not the track
For a floor guide, the channel width should match the door thickness plus 0.5 to 1.0 mm of clearance per side — enough to slide freely, tight enough to stop rattling. Measure the door thickness at the bottom, where paint and wear change it, not at the top. For a door-mounted guide, the channel must match the track or fin it wraps around, with the same small clearance. Measure both, and do not assume the two doors in a pair are the same thickness.
3. Keep the guide low and smooth
A guide that sticks up too far is a trip hazard and a vacuum-cleaner target. Keep the profile as low as the design allows, round the outer corners generously, and chamfer the channel entry so the door finds its way in easily when you refit it. A guide with sharp square corners at floor level will not survive long in a busy bedroom.
4. Fix it firmly, but removably
Screw the guide down rather than gluing it. Floors get cleaned, carpets get replaced, and a guide that can be unscrewed and refitted is far more useful than one glued down forever. Use screws appropriate to your floor — wood screws for timber, suitable plugs for concrete or tile — and do not overtighten into the printed base, which can crack or lift at the corners.
Step-by-Step: Printing the Guides
- Identify your guide type and measure the door thickness or track width it must channel.
- Check the floor. Note whether the guide screws into timber, concrete, or a track, and whether the floor is level at that spot.
- Model the guide: a flat base with an open channel, rounded corners, chamfered entry, and screw holes in the base.
- Print a single test guide and slide the door bottom through it by hand, or offer it up to the track.
- Refine the channel. Binding? Add 0.2 mm per side. Rattling? Reduce clearance slightly or add a thin felt strip inside the channel.
- Print the final set once the test slides smoothly without play.
- Clean up stringing, sand the channel smooth, and check the base sits flat without rocking.
A felt or thin rubber strip inside the channel is a worthwhile refinement: it damps rattle and protects the door’s bottom edge, and it can be replaced when it wears.
Step-by-Step: Fitting the Guides
- Clean the floor track and door bottom. Brush out grit that would otherwise grind inside the new guide.
- Position the guide where the original sat, or centred under the door’s travel if the original is missing. Mark the screw positions.
- Drill pilot holes (and plugs if needed for your floor type), keeping the drill square.
- Screw the guide down, checking it sits flat and does not rock. A rocking guide will work loose quickly.
- Refit or slide the door into the guide and run it through its full travel several times.
- Listen and feel. The door should slide without binding, rattling, or lifting out of the guide at either end of its travel.
- Adjust the position slightly if the door binds at one end — a millimetre of shift often cures it.
Tips for Better Results
- Print a spare guide. Floor-level parts get kicked and vacuumed; a spare makes the next replacement trivial.
- Add a felt strip. It is the cheapest upgrade to this project and makes a noticeable difference to noise.
- Match the floor colour. A guide in a colour close to the floor or track disappears; a bright contrast colour draws the eye to the floor.
- Keep the channel clean. A quick brush-out when you vacuum the room stops grit building up and wearing the channel wider.
Common Mistakes to Avoid
- Guessing the door thickness. Measure at the bottom, where the guide actually sits, not at a convenient spot higher up.
- Making the channel too tight. A guide that binds is worse than a slightly loose one, because it stresses the top rollers and makes the door hard to slide.
- Gluing instead of screwing. A glued guide is a problem the next time the floor needs work.
- Ignoring a sagging top track. The bottom guide cannot correct a door that hangs wrong from above.
- Printing too tall a profile. A tall guide is a trip hazard and will be kicked loose sooner rather than later.
Care, Storage, and When to Choose an Alternative
Brush out the channel when you clean the room, check the screws every few months, and replace the felt strip when it flattens. A printed guide should last a long time in normal use; if it cracks, printing a replacement takes under an hour.
Choose a manufactured metal guide when the door is heavy, when the guide is part of a locking or anti-jump system, or when the floor fixing must resist serious force — for example, a door that children swing on or that gets heavy daily use in a rental. Metal guides also suit situations where the guide must be very low-profile and very strong at the same time. For a normal home bypass closet door, a well-printed PETG guide is a sound, cheap repair.

FAQ
Why does my closet door rattle even with a guide fitted?
Usually the channel is too wide for the door, the guide has worked loose, or the top rollers are worn and letting the door move. Check the channel clearance first, then the screws, then the rollers.
Can I use a printed guide on a carpeted floor?
It depends on the fixing. A guide needs a firm base; screwing through carpet into the subfloor can work, but it may sit unevenly. In that case, a track-mounted or door-mounted guide design may suit better than a floor guide.
Do I need a guide on both doors of a bypass pair?
Usually yes, or a shared centre guide that serves both. Check how your original set was arranged before assuming one guide will control two doors.
My door still jumps the track. Is the guide the problem?
Not necessarily. Check the top track for bends, the rollers for wear, and whether the door hangs level. A bottom guide controls sideways movement; it cannot hold up a door whose top hardware has failed.
Conclusion
A rattling bypass door is one of those small household irritations that you notice every single day, and it often comes down to a missing piece of plastic at floor level. Measure the door at the bottom, print a low, smooth channel with just enough clearance, screw it down firmly, and the door should slide quietly and stay in line.
If the rest of the closet needs attention too, you may also enjoy Closet Rod Sockets and Flange Covers: 3D Print Replacement Closet Hardware That Fits and Sliding Door and Window Track Guides: 3D Print Replacement Guides and Stops, which cover the other small fittings that keep closet doors behaving. Keep a spare guide printed, keep the channel clean, and the closet will stop announcing itself every time it opens.