Introduction
Every home workshop has a 5-gallon bucket. It held paint, compound, or detergent once, and now it holds a jumbled pile of whatever you threw in last — screwdrivers under the hammer, the tape measure under everything. Buckets are sturdy, waterproof, and free, but as tool storage they are a deep, dark hole.
Fabric bucket organizers exist, but they are one-size-fits-none. The pockets are too narrow for your pliers, too deep for your bits, and the whole apron sags and spins around the bucket the moment you lift it by the handle.
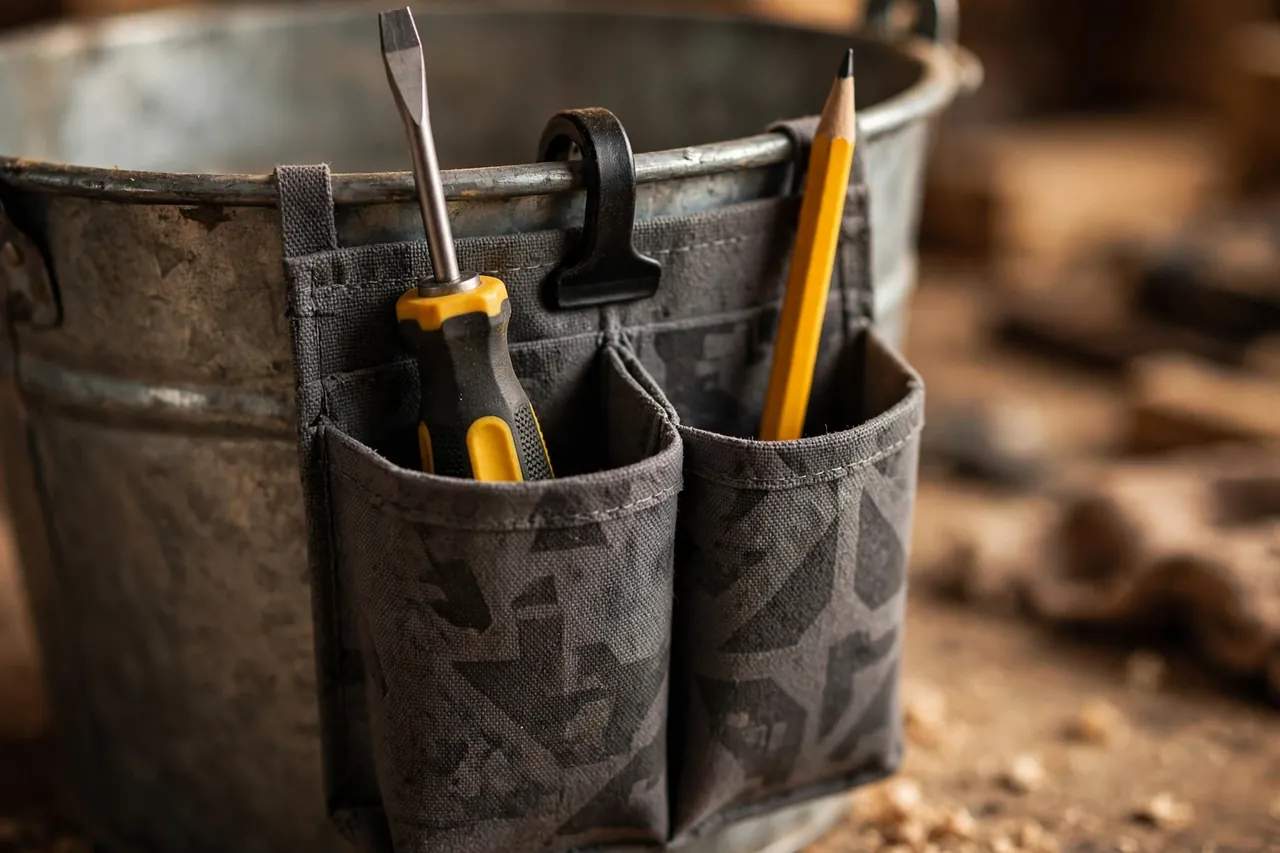
A 3D printed bucket caddy fixes that by being designed around your bucket and your tools. Instead of a floppy apron, you print rigid pocket modules and dividers that hook over the rim, lock together around the bucket, and hold each tool upright and visible. The bucket still does what buckets do best — carry weight — while the printed caddy does the organizing.
This guide covers measuring your bucket, designing modular pockets, printing them strong, and setting up a tote you will actually keep tidy. The caddy is an organizer only; the bucket itself carries the load, as it was made to do.
What You Need
The caddy prints as several modules rather than one huge ring, so it fits most home printers and lets you replace or remix a single pocket.
Materials and tools
- A home 3D printer with a build area of roughly 180 mm in at least one direction
- PETG filament for toughness and outdoor tolerance
- One clean, standard 5-gallon bucket with its handle
- The hand tools you actually carry, gathered for measuring
- Calipers or a tape measure, plus a marker for test marks
- Optional hook-and-loop strap or zip ties for extra rim security
- Sandpaper or a file for cleaning up rim hooks
PETG is the clear choice here. A tote gets knocked, dropped, left in sun, and occasionally rained on, and PETG takes all of that without going brittle. PLA modules will work for a gentle indoor test, but expect rim hooks in PLA to crack after a few hard knocks — print the keeper set in PETG.
Suggested print settings
- Layer height: 0.24 mm for speed on these chunky utility parts.
- Walls: 4 perimeters minimum — pocket walls and rim hooks take constant prying loads.
- Infill: 35 to 50 percent, gyroid, higher in the hook sections.
- Top and bottom layers: 4 or more for a solid pocket floor.
- Orientation: Print modules upright, rim hook at the top, so layer lines run around the pocket.
- Supports: Design hooks with a 45-degree underside to avoid supports entirely.
Print one pocket module first and live with it on the bucket for a day before printing the full set.
Design Considerations
You can model the modules in any basic CAD program. Each module is a pocket box with a rim hook on its back and linking tabs on its sides.
1. Measure the bucket, not the listing
Buckets vary more than you expect. Measure the outside diameter just below the rim, the rim bead height and thickness, and the taper of the wall. A standard bucket is roughly 300 mm across at the top and narrows toward the base, but brands differ by several millimeters.
Design the rim hook to match your bucket’s bead: a hook that drops over the bead and grips with 0.3 to 0.5 mm of clearance will stay put without stress-whitening. Too tight and it cracks going on; too loose and the module rattles and walks around the bucket.
2. Modular pockets beat one giant ring
A full ring will not fit most print beds, and one wrong pocket size ruins the whole print. Modules of about 90 to 120 mm of rim arc each solve both problems. Link them with simple tongue-and-groove side tabs or a shared rim clip, and you can mix deep pockets, shallow pockets, and flat tool slots around the bucket.
Plan the layout before modeling: heavy tools opposite the handle gap, small tools where you can see them, and one tall slot for a level or pry bar.
3. Pocket sizing from real tools
Measure the tools you carry, then add clearance. A pocket for pliers needs about 10 mm more width than the pliers’ widest point; a screwdriver slot needs less. Give pockets a slight outward tilt at the top so tools drop in without aiming, and add a drain hole in each pocket floor — totes live messy lives, and a pocket that holds rainwater or spilled finish helps nobody.
Keep pocket depth to about two-thirds of the tool length. Deeper pockets swallow tools; shallower ones let them tip out when the bucket swings.
4. Respect the handle and the lid
Leave a gap in the module ring where the bucket handle mounts, and check that the handle still swings up freely with modules fitted. If you use a snap-on bucket lid or a seat lid, test that the caddy does not block it. A caddy you have to remove for normal bucket jobs will end up living on a shelf instead.
Step-by-Step: Printing and Assembly
- Measure your bucket — top diameter, rim bead, and wall taper.
- Gather and measure your core tools and sketch a pocket layout for the full circle.
- Model one module with rim hook, pocket, drain hole, and side linking tabs.
- Print the test module and clip it on; load it with its intended tools.
- Carry the bucket around the workshop. If the module shifts, deepen the hook slightly.
- Print the remaining modules, varying pocket sizes to your layout.
- Clean up hooks and tabs so modules link without force.
- Clip the full set around the rim, link the tabs, and load the tote.
If a module will hold something heavy like a cordless drill holster-style, add a strap through printed slots around the bucket for insurance.
Step-by-Step: Using the Bucket Caddy as a Tool Tote
- Load heavy tools low and balanced, spreading weight evenly around the bucket.
- Put the tools you grab most in the pockets facing you when the handle is up.
- Use the bucket interior for bulky items: a drill, a small level, a roll of tape.
- Carry by the bucket handle, not by a pocket — the caddy organizes, the bucket carries.
- Set the bucket down flat before pulling tools, so nothing tips.
- Work from the tote rather than scattering tools; each tool returns to its pocket.
- At the end of the job, do a ten-second pocket check: every slot filled means nothing is left behind.
- Empty and rinse the bucket interior as needed; the printed modules wipe clean.
The pocket check alone is worth the print. Jobs end with a full kit instead of a screwdriver lost in a flower bed.
Tips for Better Results
- Color-code by trade. Orange modules for repair tools, charcoal for painting gear — grab the right ring at a glance.
- Add one shallow tray module for screws and small fittings so they stop migrating to the bucket bottom.
- Label pockets with a paint pen if other people use your tote; it keeps the system alive.
- Print a spare of the most-used module. Rim hooks are the wear item; a spare costs little.
- Keep one pocket empty. Every job produces one odd item that needs a temporary home.
You may also enjoy our related guide, “Workshop Small-Parts Organizer: 3D Printed Stackable Bins and Screw Sorters for Your Workbench,” for the bench-side half of the same organizing system.
Common Mistakes to Avoid
- Designing from nominal bucket size. A few millimeters of taper difference makes hooks useless. Measure your bucket.
- Making pockets too deep. Tools disappear and you are back to digging in a hole.
- Loading one side heavily. An unbalanced tote swings, spills, and strains its hooks.
- Printing hooks too thin. The rim hook is the hardest-working feature; give it solid walls.
- Blocking the handle. Test handle swing before printing the full set, not after.
Care, Storage, and When to Choose an Alternative
Hose the modules down when they get filthy, let them dry, and check hooks for cracks each season. Store the loaded tote off the floor on a low shelf if your garage floods or pests wander. Keep PETG out of extreme heat, like a sealed car in summer, where any plastic softens.
Be honest about the job size, too. For a full renovation kit, power tools and all, a manufactured rolling tool chest or a heavy-duty fabric tote with a steel frame carries more and rolls better. The printed caddy shines for the grab-and-go repair kit — the dozen tools that handle ninety percent of household jobs. It also pairs well with our related guide, “3D Printed Ladder Tool Tray: Keep Tools Up Top While You Work,” when the job moves from the ground to the top of a ladder.
FAQ
Will the caddy fit any 5-gallon bucket?
It fits the bucket you measured. Most standard buckets are close, but rim beads vary by brand, so a caddy tuned to one bucket may fit another loosely or not at all. The modular design helps: often only the hook depth needs adjusting and reprinting.
How much weight can the pockets hold?
Each pocket comfortably holds hand tools — drivers, pliers, wrenches, a tape. The bucket and its handle carry the total load, so keep the overall tote to a weight you can carry one-handed without strain, and strap any unusually heavy pocket item.
Can I leave the caddy outdoors?
PETG tolerates sun and rain well for seasons of use, though colors fade over time. Bring the tote in for winter if your climate is severe, and never leave tools in it outdoors — the caddy survives weather better than steel tools do.
What if my printer is too small for the modules?
Split a module into pocket and hook printed separately and joined with bolts, or shrink the arc per module and print more of them. The system is forgiving because the bucket, not the print, provides the structure.
Conclusion
A 5-gallon bucket is too useful to waste as a junk hole. With a ring of printed pocket modules sized to your bucket and your tools, it becomes a proper tote: everything visible, everything in its place, and a built-in check that nothing got left behind at the job.
Start with one test module, live with it for a day, then print the set. It is a weekend project that pays you back on every repair that follows.
For the small screws and fittings that always end up at the bottom of the bucket, you may also enjoy our related guide, “3D Printed Screw and Fastener Sorting Trays with Lids for Small Hardware,” which keeps them sorted back at the bench.