Introduction
Work at the top of a ladder has a tax, and it is collected one climb at a time. You get settled three steps up, reach for the screwdriver, and discover it is on the bench. Down you go. Back up, you find the screws are in your other pocket. Down again. By the fifth trip, the job has taken twice as long and your knees have filed a formal complaint.
The in-between moments are worse. Tools get balanced on rungs or parked on the top cap where they roll. Dropped tools chip floors and damage themselves.
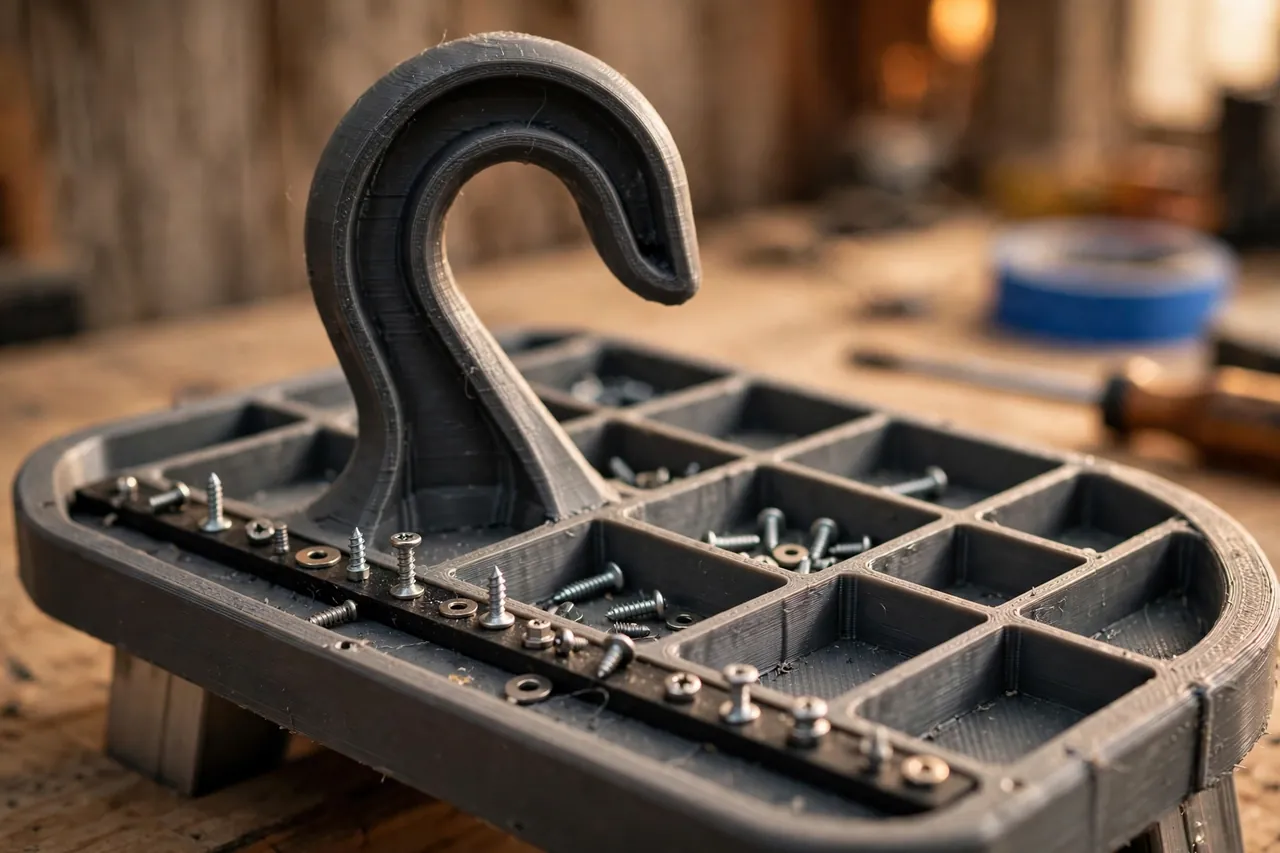
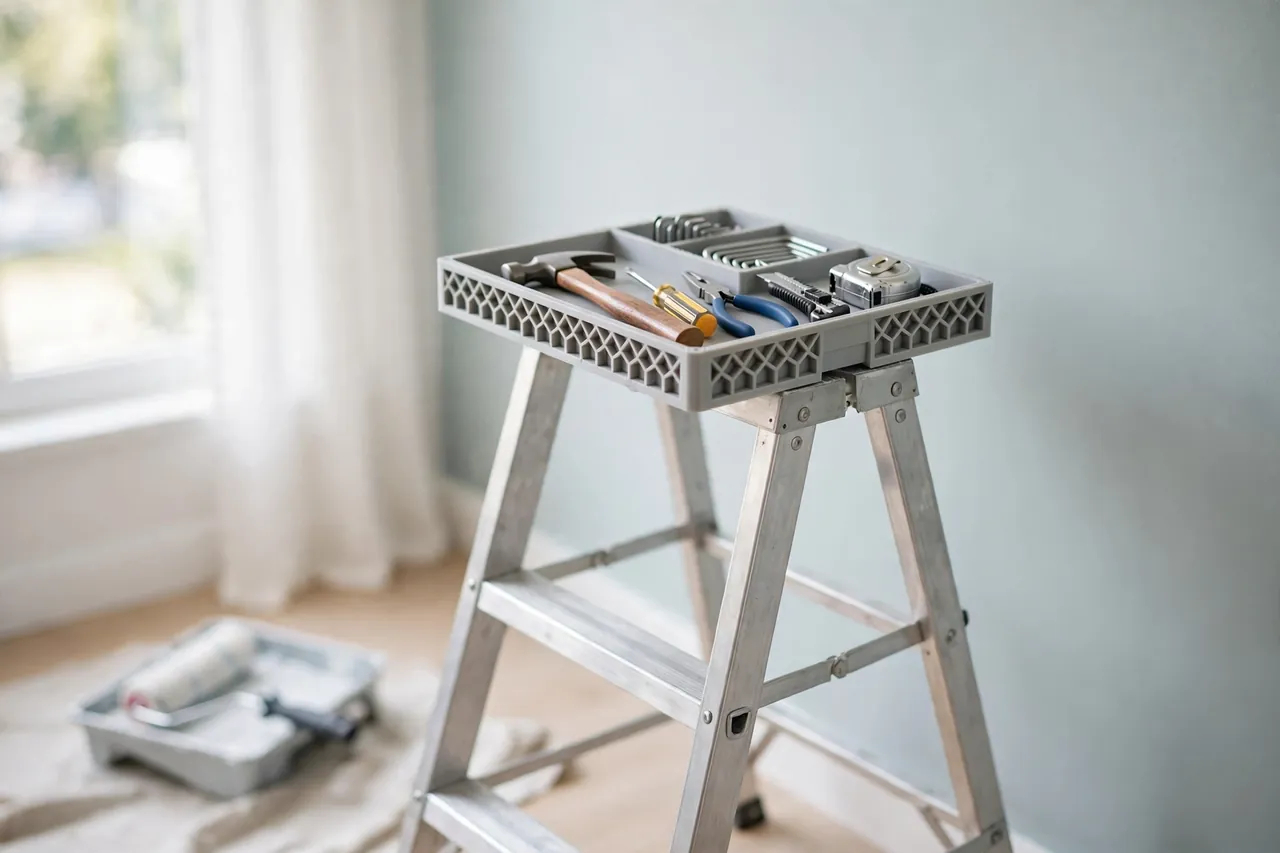
A 3D printed ladder tool tray ends the commuting: it hooks securely over the ladder’s top cap or pail shelf, and holds the light hand tools for the job — a driver or two, a pencil, a small wrench, a handful of screws — in divided compartments right where your hand already is. Load it on the ground, carry the ladder once, and work the whole job from the top.
This guide covers designing the tray to fit your ladder’s top, with a firm, honest boundary: the tray carries light hand tools only, hooks over the top cap or pail shelf as a holder, and is never a step, a platform, or a seat. Total load stays small — a few hand tools — and your ladder maker’s own guidance always outranks anything a printed accessory suggests.
What You Need
The tray is one generous print shaped around your ladder’s top cap. Measuring that cap — not a catalog photo — is the foundation of the whole project.
Materials and tools
- A home 3D printer with a build area of roughly 200 mm in at least one direction, or a design split into two clipped halves
- PETG filament for outdoor tolerance and knock resistance
- Your step ladder, measured at the top cap or pail shelf where the tray will hook
- Calipers and a tape measure for the cap’s width, depth, and thickness
- The light hand tools you actually use up a ladder, gathered for layout planning
- A small file or sandpaper for easing edges
- Optional small magnets for a screws-and-bits zone in one compartment
PETG is the firm recommendation: ladders work outdoors, in cold garages and warm sun, and get knocked about in storage. PLA trays go brittle-cheerful in a cold van and soften on a hot driveway; PETG takes both in stride.
Suggested print settings
- Layer height: 0.20 to 0.28 mm; the tray is a utility part where strength beats finish.
- Walls: 5 perimeters, especially through the hook, which carries the whole load.
- Infill: 40 to 50 percent, gyroid or grid, with extra density modeled under the hook if your slicer allows modifiers.
- Top and bottom layers: 5 or more on the tray floor and hook surfaces.
- Orientation: Print with the hook’s throat vertical and layer lines running around the hook, never forming a peel line across its bend.
- Supports: Design the hook as a smooth, printable curve so supports are unnecessary or minimal.
Print the hook section as a test piece first and fit it over the real ladder top before committing to the full tray — the hook’s fit is the entire project.
Design Considerations
A ladder tray lives or dies on three things: how honestly it hooks on, how little it holds, and how calmly tools sit in it.
1. The hook: shaped to your ladder’s top
Measure the top cap’s width, front-to-back depth, and thickness at the exact spot the tray will hang, then model the hook about 0.5 to 1 mm generous in each dimension — a slip fit that drops on fully and cannot rock. The hook should wrap the cap’s thickness completely, with its inner face bearing along the cap rather than touching at two points. If your ladder has a pail shelf instead, hook over the shelf’s outer edge the same way. A tray that tilts, rattles, or can be knocked upward off its seat fails the only test that matters; redesign the hook, not the user’s habits.
2. Compartments for light tools only
Lay out two or three shallow compartments around the tools you listed: a deep slot for a driver, a pencil groove, a small well for screws. Keep walls around 40 to 55 mm tall — high enough that tools stay during ladder moves, low enough to grab without looking. Size the whole tray modestly, roughly 250 to 300 mm long at most. That modesty is a safety feature, not a limitation: this tray is for light hand tools only, with a total load of a few tools, and a bigger tray only tempts bigger loads it must never carry.
3. Stability, drainage, and the small courtesies
A slight rearward tilt in the tray floor keeps tools resting against the back wall. Drainage slots shrug off rain and paint drips outdoors. A recessed magnetic strip in the screw well keeps screws from migrating when the ladder is carried. Round every outer corner.
Step-by-Step: Printing and Assembly
- Measure the ladder top — cap or pail shelf — at the tray’s exact hanging position, and photograph it with a ruler in frame.
- Gather the intended tools and lay out compartments around them on paper first.
- Model the hook to your measurements with a full wrap and a slip fit; model the tray floor and dividers onto it.
- Print a hook test section and fit it to the ladder: it should seat fully, resist a firm upward tug, and sit level.
- Adjust the hook by fractions of a millimeter until the fit is calm and complete; never force a tight hook on.
- Print the full tray in PETG at the stout settings above.
- Ease the edges, press in any magnets, and load the tray with the intended tools on the ground.
- Run the carry test: with the tray loaded, carry the folded ladder a few steps and re-erect it. Tools should finish where they started.
Step-by-Step: Using the Ladder Tool Tray
- Load the tray on the ground, before the ladder is positioned: the tools for this job, and only those.
- Hang the tray on the top cap or pail shelf and confirm the hook is fully seated with a downward press and a small wiggle check.
- Set the ladder properly — fully opened, locks engaged, on firm level ground, following the ladder maker’s own guidance for your model.
- Climb empty-handed where possible, or carry one tool; the tray’s whole purpose is that everything else is already waiting up top.
- Work from the tray, returning each tool to its compartment between uses rather than parking it on a rung or the cap.
- Keep the load light throughout. If a job grows to need a heavier tool, that tool makes its own trip — the tray never becomes a cargo shelf.
- Never stand, sit, or lean on the tray, and never use it as a step or platform under any circumstances. It is a holder, nothing more.
- Unload and remove the tray before folding or moving the ladder any distance, and store it hung beside the ladder.
Tips for Better Results
- Print the tray in a bright color so its presence at the top is obvious to anyone moving the ladder.
- Add a pencil groove. The single most-climbed-down-for item in home repair is a pencil; give it a home.
- Check the hook before every use. A cracked hook retires the tray on the spot; reprint rather than repair.
For a companion set of ladder-side holders, you may also enjoy our related guide, “Ladder Hook and Pail Holder Set: 3D Print Ladder Accessories That Keep Tools in Reach (holders only),” which covers hooks and pail holders in the same spirit.
Common Mistakes to Avoid
- Overloading the tray. A drill, a hammer, and a pry bar up top is exactly the cargo this tray must refuse. Light hand tools, a few at a time.
- Treating the tray as a step or platform. It hooks on as a holder only; no weight beyond its small tool load ever goes on it.
- A guessed hook fit. Ladders differ; a hook modeled from memory rocks, and a rocking tray spills. Measure your ladder’s top.
- Hanging the tray anywhere but the top cap or pail shelf — side rails and rungs are not mounting points and were never shaped for it.
- Leaving the tray loaded while the ladder is carried or stored, shedding tools along the way. Unload, then move.
Care, Storage, and When to Choose an Alternative
Wipe the tray clean, inspect the hook and walls for cracks after any fall, and store it hung next to the ladder. A tray that has taken a hard drop gets a careful inspection, and any doubt means a reprint.
Choose differently when the job changes: paint work with a full can wants the ladder’s own pail shelf and hook used as its maker intended, and genuinely two-handed, heavy-tool work belongs on a scaffold tower or from the ground with a longer tool, not on a ladder with a fuller tray. And always, the ladder manufacturer’s guidance for your specific model governs — accessories never extend what a ladder is for. Our related guide, “Magnetic Parts Dish Holder: 3D Print a Bench and Ladder Mount for Screws, Bolts and Bits,” covers the screw-keeping half of this problem on its own, and “3D Printed Bucket Caddy: Turn a 5-Gallon Bucket into a Tool Tote” handles the ground-level end of the same workflow.
FAQ
Will the tray fit my ladder?
It fits the ladder you measure. Top caps and pail shelves differ between brands and models, so the hook is modeled from your ladder’s dimensions and proved with a test section. That made-to-measure fit is the entire advantage of printing it.
How much can the tray hold?
A few light hand tools — a screwdriver or two, a pencil, a small wrench, a handful of screws. If you are asking whether a heavy tool is too much, it is.
Is it safe to leave tools in the tray while I reposition the ladder?
Unload and remove the tray before moving the ladder any real distance. The habit to build is unload, move, reload.
Can I print the tray in two halves to fit my smaller printer?
Yes — split it along a compartment wall, add tongue-and-groove or bolt bosses at the joint, and keep the hook in a single, unsplit piece. Never let a seam cross the hook.
Conclusion
The ladder tax — climb down, fetch, climb up, repeat — is not a law of nature. It is what happens when tools have no home at working height. A 3D printed ladder tool tray, hooked properly over the top cap and loaded lightly and honestly, gives them that home.
Measure your ladder, prove the hook, keep the load light, and respect the ladder maker’s guidance. The job becomes one climb, both hands, everything in reach.
That is the whole ambition.