Introduction
Crown molding has ended more confident DIY weekends than almost any other trim. The molding does not sit flat on the saw, it does not sit square against the fence, and the angles it needs are compound — a miter and a bevel at once — so the standard advice involves charts, upside-down-and-backwards positioning rituals, and a trail of expensive offcuts that are each wrong in a new and educational way.
The nested method cuts through all of that. Instead of lying the molding flat and dialing compound angles, you hold it on the saw exactly as it will sit on the wall — tilted at its spring angle, top edge down against the table, bottom edge up against the fence — and make a simple miter cut. The catch has always been holding it there, steady and repeatable, at precisely the right tilt. That is a jig’s job, and a 3D printed crown molding jig does it beautifully: a cradle modeled for your molding’s spring angle that registers against the saw fence and supports the molding along its length, cut after cut.
This guide covers spring angles, designing the cradle, printing it, and cutting corners that meet like they were grown together.
What You Need
Crown work rewards measuring before printing. Your molding’s size and spring angle define the whole jig.
Materials and tools
- A home 3D printer with a build area of about 200 mm — the jig prints in sections that join along the fence
- PETG filament for a bit of toughness; PLA is acceptable for a jig that lives in the shop
- A sample offcut of your actual crown molding, at least 300 mm long, to model and test against
- A digital angle finder or a protractor to confirm your molding’s spring angle
- A miter saw with a fence tall enough for your molding’s nested height
- A tape measure, pencil, and painter’s tape for labeling test cuts
- A coping saw for inside corners if you prefer coped joints — the jig serves both methods
- Fine sandpaper for easing cradle edges
Know your spring angle before you model. Most home-center crown is made to a 38-degree spring angle, with 45-degree material also common. Measure yours rather than assuming; the test methods below make it easy.
Suggested print settings
- Layer height: 0.24 to 0.28 mm — a shop jig, not a showpiece.
- Walls: 5 perimeters. The cradle faces must not flex under hand pressure.
- Infill: 40 percent gyroid or grid for a rigid body.
- Top and bottom layers: 5 or more.
- Orientation: Print sections upright as they will sit against the fence, so the cradle faces print true to the model.
- Supports: Avoid them on cradle faces; design slots and stops to print clean.
Design Considerations
1. Model the cradle to the spring angle
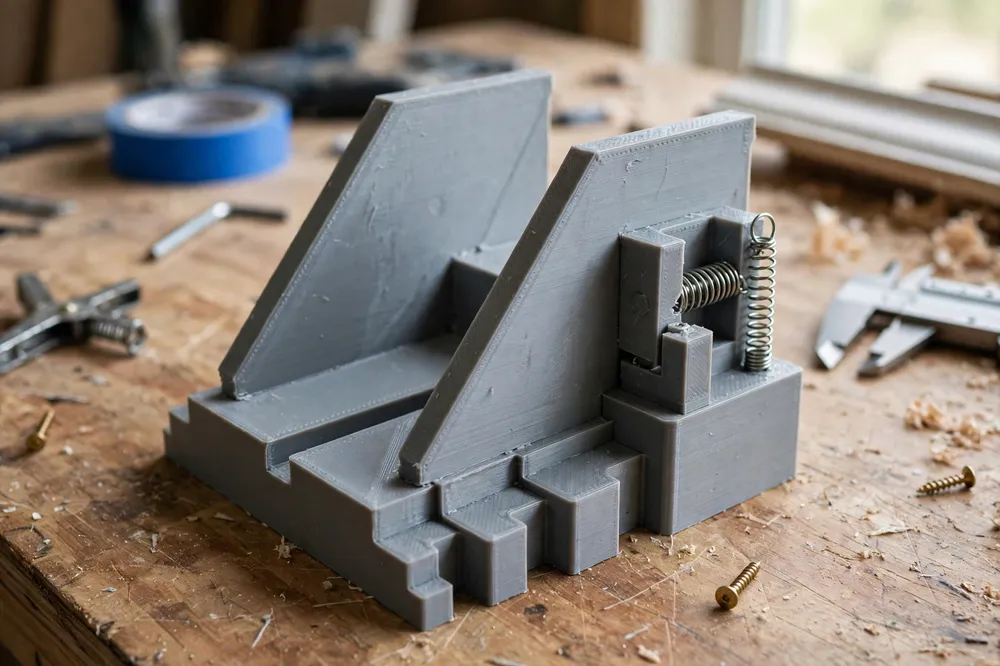
Crown molding installs at a spring angle — the tilt between the wall and the molding’s back. The jig’s cradle must present the molding to the saw at exactly that same tilt, with the molding’s ceiling edge resting on the saw table and its wall edge against the fence, just as it will live in the room. Model two angled faces meeting at the spring angle: a lower face that supports the molding’s bottom back edge and an upper stop that catches the top edge. Get the angle right and every cut is a plain miter — the saw only swings left or right, no bevel gymnastics, no charts.
2. Stops for repeatability
Freehand positioning is where crown cuts go to die. Add a positive stop: a step or lip in the cradle that the molding’s edge registers against every time, so cut number twelve sits exactly like cut number one. If you run two molding profiles, model a stepped cradle with two stop positions, or print a slim spacer insert that converts the jig between profiles.
3. Length support, in joinable sections
A jig that supports only 100 mm of molding lets the rest seesaw. Model the cradle in sections of 150 to 200 mm that butt together in a line along the fence — joined by a simple tongue, alignment pins, or just careful placement — giving you 400 to 600 mm of supported length for long, whippy pieces. A matching standalone cradle section, used away from the saw, supports the far end of very long moldings at the same angle so nothing sags mid-cut.
4. A sacrificial fence face and clearance
Give the jig a flat back that sits flush to the saw fence and a base that sits flat on the table, and keep every part of the jig clear of the blade’s path at full miter swing in both directions. A backer board of scrap, clamped behind test cuts, reduces tear-out on the molding’s visible face. Model a clamp notch so the jig can be locked to the fence rather than held by hope.
Step-by-Step: Printing and Test-Fitting
- Measure your molding: face width, and the spring angle — set the molding on a flat surface as it installs, and measure the angle between its back and the vertical with an angle finder; or check the manufacturer’s stated spring angle and verify with a test fit.
- Model the cradle at that angle with its stop, plus one support section.
- Print one section and test with your sample offcut: the molding should nest with both back edges in full contact, no rocking, no gaps of light.
- Make test cuts in scrap at 45 degrees both ways, hold the two pieces together as an inside corner and an outside corner, and inspect the joints against a bright background. Light leaking through a joint tells you exactly which assumption is off.
- Adjust once, in the model: a degree of cradle angle or a shim of tape on one face for testing, then reprint the final sections at full length set.
- Label the jig with the molding profile and spring angle it serves, in the model itself, so future-you grabs the right one.
Step-by-Step: Cutting Corners with the Jig
- Set up the jig line along the saw fence, clamped or registered firmly, with support sections under long stock.
- Fix the golden rule in your head: in the nested position, the molding sits upside down relative to the room — the edge that will touch the ceiling rests on the saw table. The piece to your left of the blade becomes… mark your first two test pieces “left of corner” and “right of corner” and keep them as physical references at the saw for the whole job.
- For an inside corner: swing the saw to 45 degrees, nest the molding, and cut. The mating piece is the mirror: same nest, saw swung the other way (or the molding fed from the other side, per your saw). Test-fit the pair on the bench before touching the wall.
- For an outside corner, the same nesting applies with the complementary swing; offcuts from inside-corner practice become outside-corner practice — waste nothing on learning.
- Cut long, sneak up: leave each piece a few millimeters long, test against the wall, and shave to fit. Crown forgives a second pass; it does not forgive a short piece.
- Consider coping inside corners for rooms whose walls are out of square — and most are. Miter one piece into the corner, cope the other to its profile with a coping saw. The jig still earns its keep by holding the mitered piece’s twin for the template cut and keeping all your miters consistent.
Our “3D Printed Miter Cutting Guide for Trim, Molding and Small Stock” covers flat-stock mitering for baseboards and picture frames; this jig is its specialized cousin for the one molding that refuses to lie flat.
Tips for Better Results
- Make a corner sample set from offcuts at the start: one perfect inside corner, one outside, labeled. Every later cut gets compared to them at the saw, not at the top of a ladder.
- Cut all pieces for one wall in one session, with the jig undisturbed, so any tiny setup bias is shared by both halves of every corner and cancels out.
- Support long moldings with the spare cradle section on a stand at table height. A sagging end changes the nest angle and quietly ruins the cut.
- Check wall squareness with your sample corners before cutting real stock. A corner at 92 degrees wants slightly different treatment than one at 90, and discovering that on the ground is free.
- Keep the cradle faces clean. One chip of dried glue on a cradle face tilts the molding and every cut after it.
Common Mistakes to Avoid
- Assuming the spring angle. Two moldings that look identical can spring at 38 or 45 degrees. A cradle modeled on the wrong angle produces corners that meet at the top and gape at the bottom — measure, then model.
- Cutting flat with compound charts when you own a nested jig. The whole point is that the jig holds the geometry; trust it and cut simple miters.
- Holding the molding by hand against the fence. Hand pressure varies, molding creeps, and cuts wander. The jig and its stop exist so your hands only steady, never position.
- Skipping bench test-fits. Every corner should meet on the bench before it meets the wall. Ladder-top fitting sessions are where moldings get forced and gaps get caulked.
- Forgetting which edge is up. In the nest, ceiling edge down. Mark the wall edge of every piece with a pencil arrow on the back before cutting and the confusion vanishes.
Care, Storage, and When to Choose an Alternative
Store the jig sections nested together on a shelf, faces protected from knocks, with the labeled sample corners rubber-banded to them — the whole kit for that molding profile in one grab. Check cradle faces for damage before each job.
Alternatives have their niches. Adjustable commercial crown stops work across profiles but cost more and reset between jobs. Coping every joint by hand needs no jig at all and suits one-room jobs in old, wavy houses. And flat-compound cutting remains the method for moldings too large to nest on your saw. For standard home crown — the 38 and 45 degree profiles in most rooms — a printed jig fitted to your molding turns the hardest trim job in the house into a sequence of identical, confident cuts. It pairs naturally with the right-angle clamping in “DIY Corner Clamp: 3D Print a Right-Angle Clamp for Frames, Drawers and Cabinet Repairs” when you pre-assemble crown returns and small trim frames on the bench.
FAQ
How do I find my molding’s spring angle?
Set an offcut on a flat surface in its installed orientation and measure between the back of the molding and vertical with a digital angle finder, or lay it against a wall corner sample. Most residential crown is 38 or 45 degrees. Verify by cutting two test miters in the jig and checking the joint — the joint never lies.
My walls are not square. Will the jig still help?
Yes. The jig guarantees the molding is held consistently; for out-of-square corners, cut test pieces, measure the actual corner angle, and either split the difference in your miter setting or cope the inside corners. Consistency is what lets small corrections work.
Can one jig serve two different crown profiles?
Only if they share a spring angle and the cradle’s stop can be repositioned — a spacer insert is the clean way. Different spring angles need different cradles; fortunately a second jig is a modest print, and labeling avoids mix-ups.
Is nested cutting safe on a small miter saw?
Nested cutting keeps the molding in a fixed cradle and your hands on the stock well away from the blade, which is exactly what you want. Confirm your saw’s fence height accommodates the nested molding and that the jig clears the blade path at full swing before the first cut.
Conclusion
Crown molding is not hard because the cuts are complex; it is hard because holding a tilted, springy molding at a precise angle, repeatedly, is more than hands can do. A printed jig holds it perfectly every time, reducing the famous compound-angle problem to a plain miter and a steady cradle.
Print the cradle, cut a pair of test corners, and hold them together against the light. When no light leaks through, you are ready to crown the room.