Introduction
Tape is one of those supplies you always need and can never find. Masking tape ends up in a kitchen drawer, painter’s tape rolls under the workbench, duct tape migrates to the garage, and electrical tape hides in a toolbox you have not opened since last year. When you finally need a strip, you spend longer hunting for the roll than using it — and often settle for the wrong tape because it was the one you could reach.
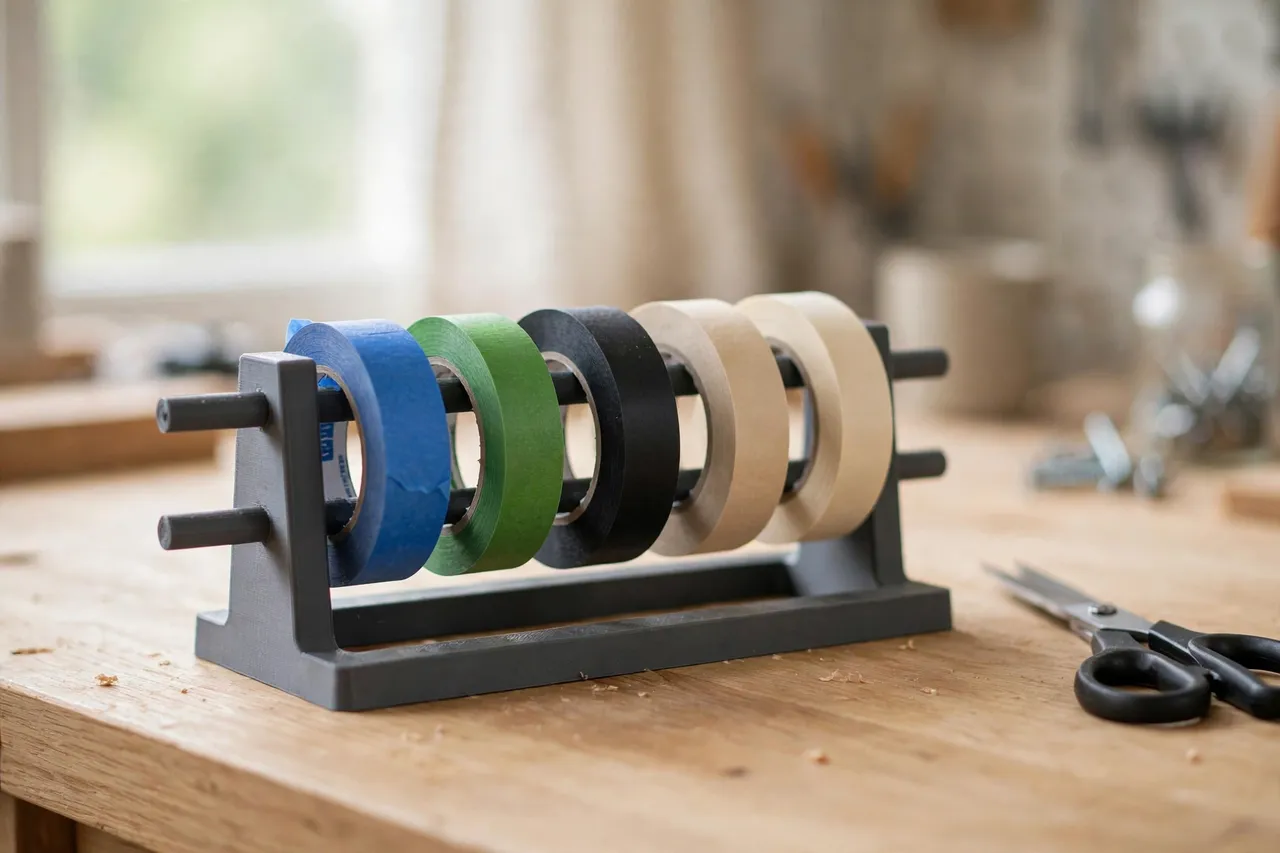
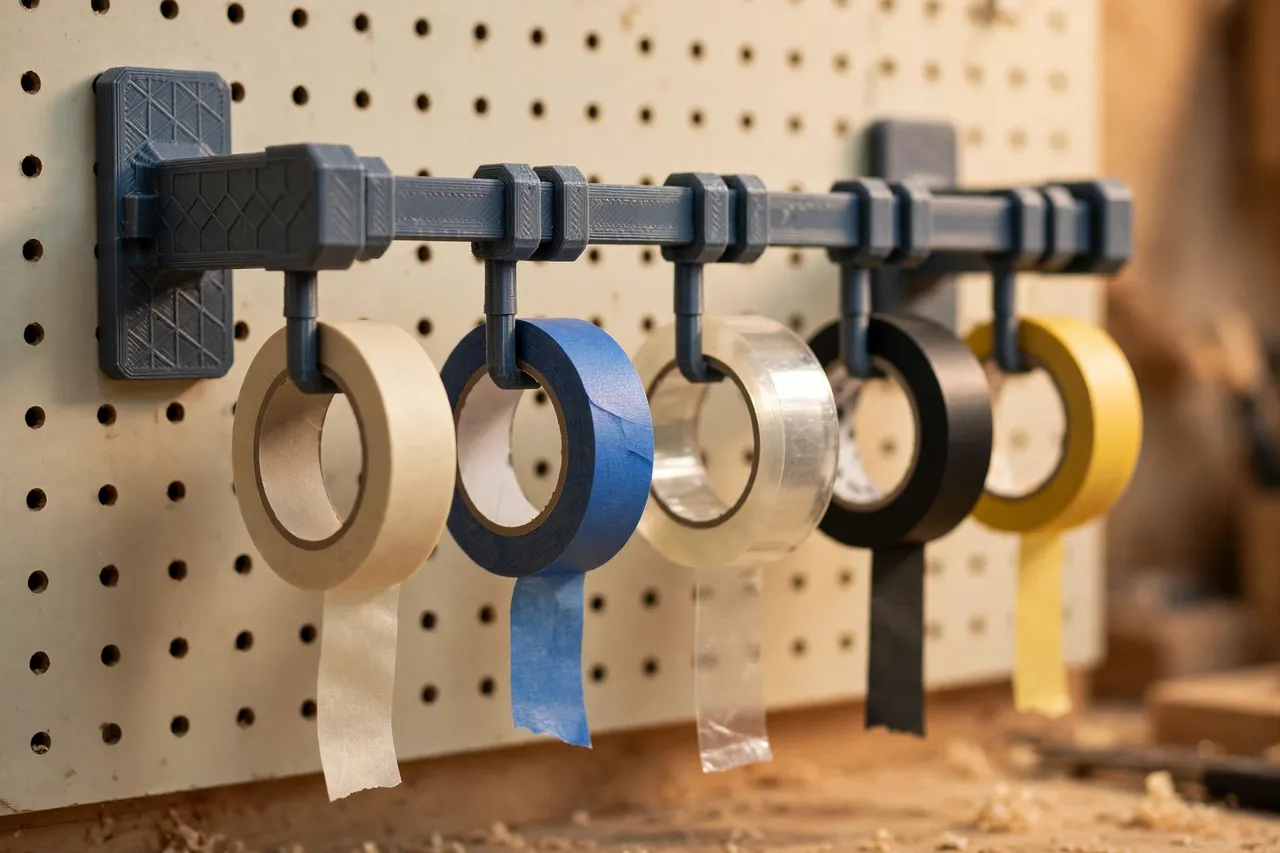
A 3D printed tape roll rack solves the problem by putting every roll in sight, on one set of pegs or in one row of cradles, where you can see the color, width, and type at a glance. Because you print it yourself, you can size it for the rolls you actually own, from slim electrical tape to fat duct tape rolls, instead of forcing them into a generic holder.
This guide covers a simple, light-duty rack for ordinary adhesive tape rolls used around the home and workshop. It is storage only: it does not cut tape under tension, hold heavy spools, or carry any load beyond a few rolls of tape. If you like the visible-storage idea, the same thinking applies to other round supplies, as in “3D Printed Wire Spool Holders: Hold Wire Spools at the Bench” and “3D Printed Chain and Rope Spool Holders: Spools That Unwind Cleanly.”
What You Need
This is a forgiving first organizer project. The rack itself is mostly pegs, a back plate, and a base — nothing that demands tight tolerances.
Materials and tools
- A home 3D printer with a build area of roughly 180 mm in at least one direction
- PLA filament for a bench or wall rack in a normal indoor workshop, or PETG for a warm garage
- Every tape roll you want to store, for measuring core size and roll width
- A tape measure or calipers and a pencil
- A wall screw and wall plug, or mounting tape, if you plan to hang the rack
- Sandpaper or a small file for cleanup, plus a short length of dowel if your design uses wooden pegs
Tape rolls are light, so PLA is fine for most racks. The exception is a wall rack in a hot garage, where PETG holds its shape better over a long summer.
Suggested print settings
- Layer height: 0.20 mm, or 0.24 mm for a faster print on chunky pegs.
- Walls: 3 to 4 perimeters, especially on pegs that get pulled sideways when you unwind tape.
- Infill: 25 to 40 percent, grid or gyroid.
- Top and bottom layers: 4 or more, for a flat back plate that sits flush on the wall.
- Orientation: Print the back plate flat, and print pegs upright or flat depending on your design.
- Supports: Avoid them by keeping pegs horizontal or gently tapered.
Print one peg and test it with your widest and narrowest rolls before printing the whole rack.
Design Considerations
Tape racks come in two main styles, and the right one depends on where you work.
1. Peg rack: rolls hang and unwind
In a peg rack, each roll hangs on a horizontal peg through its cardboard core. This is the best style for tape you unwind often, because you can pull a strip straight off the roll while it stays on the peg, then tear it. Pegs should be slightly smaller than the smallest core you own — most tape cores are around 75 mm inside, but slim electrical tape cores are smaller, so measure yours. A peg 80 to 100 mm long holds a roll securely without letting it slide off, and a slight upward tilt or a small end cap stops rolls from walking off when you pull.
2. Cradle rack: rolls sit in a row
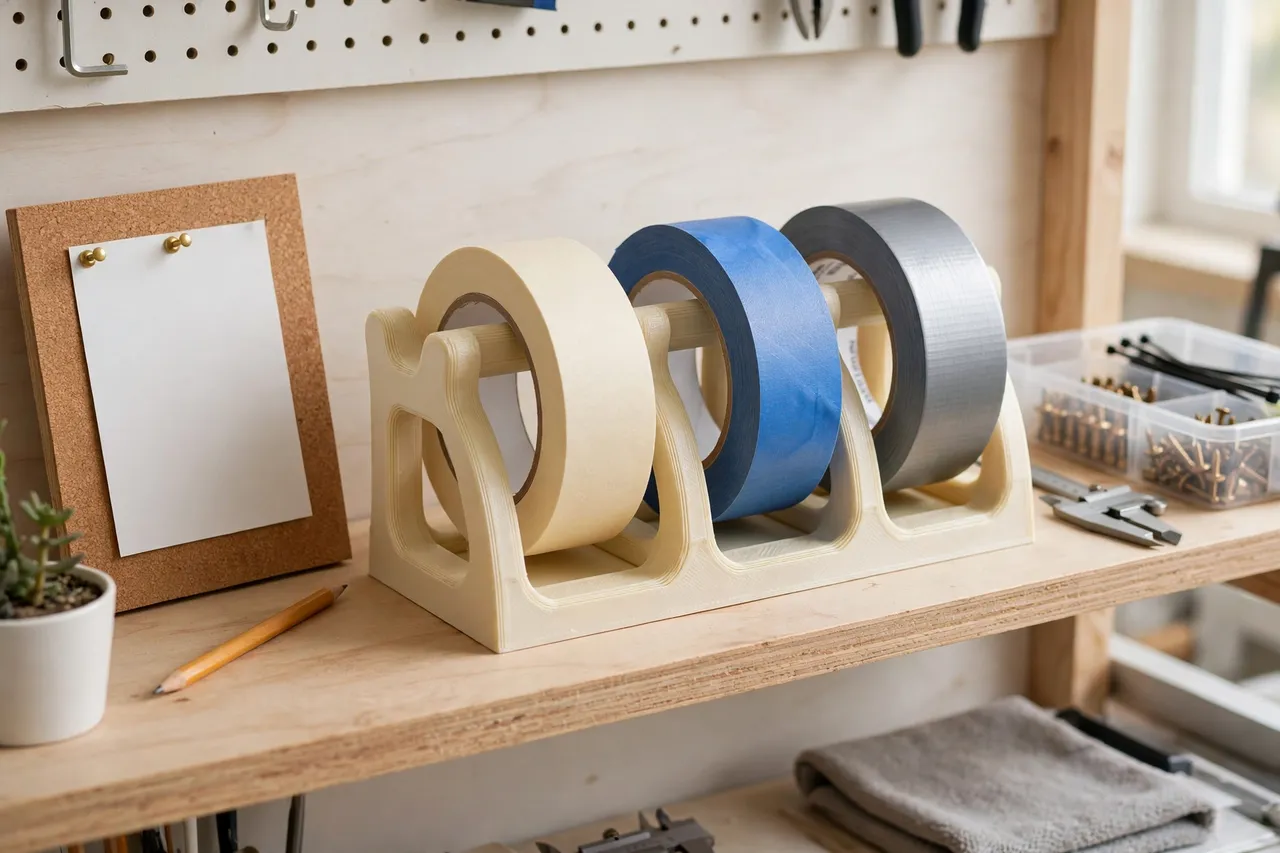
In a cradle rack, rolls sit upright in U-shaped slots like books on a shelf, or lie in a shallow trough. This suits tape you grab whole and carry to the job, and it works well on a bench or shelf where wall space is tight. Cradles need to be wider than the roll and deep enough that the roll cannot roll out when you bump the bench. For a shelf version, a low front lip is essential.
3. Sizing for different tape types
Do not make every peg identical. Masking tape and painter’s tape are usually similar widths, duct tape is wider and heavier, and electrical tape is narrow. Group rolls by width and give each group its own row or spacing: wider gaps for fat rolls, tighter spacing for slim ones. Leave one empty peg for the next roll you buy. If you own a very wide roll, like wide packing tape, give it a peg of its own at the end rather than squeezing it between others.
4. Wall or bench
A wall rack at eye level near your main bench is ideal for tape you reach for constantly. Fix it solidly with screws, not tape alone, if it will hold several full rolls. A bench rack suits a small collection or a shared workspace where wall space is spoken for. Either way, keep the rack where you actually tape things — by the bench or the painting area — not in a storage corner you never visit.
Step-by-Step: Printing and Assembly
- Gather every tape roll you own. Check drawers, toolboxes, and the painting shelf so the rack fits the real collection.
- Measure each roll: core inside diameter, roll outer diameter, and roll width. Note the widest and narrowest of each.
- Choose your style — peg rack for frequent unwinding, cradle rack for grab-and-go storage — and sketch the layout with rolls grouped by width.
- Model the rack: a back plate with mounting holes, pegs or cradles sized to your measurements, and a spare peg or slot.
- Print a test peg or cradle and check it against your smallest and largest rolls.
- Adjust if needed. A peg that is too fat will not fit a core; a cradle that is too shallow will drop rolls. Adjust by a millimeter or two and retest.
- Print the full rack and clean it up. Sand peg ends smooth so they do not snag tape or tear cardboard cores.
- Mount or place the rack and load it, heaviest rolls lowest if it hangs on a wall.
A test peg takes minutes and saves a full reprint. Do not skip it.
Step-by-Step: Using It
- Sort rolls by job when loading. Painting tapes together, repair tapes together, electrical tape on its own peg where it will not get confused with masking tape.
- Load with the loose end facing out and down. You want to grab the end and pull without spinning the whole rack around.
- Unwind from the peg when you can. Pull gently and steadily; yanking sideways bends pegs over time, especially printed ones.
- Tear or cut, then press the end back onto the roll. A loose end that dangles collects dust and sticks to the next roll. Pressing it flat keeps the rack tidy.
- Return rolls after the job. Tape left on a project table migrates back to the drawer within a week. The rack only works if rolls go home.
- Replace empty cores promptly. An empty core taking up a peg is a roll you cannot store. Bin it and the peg is free for the replacement.
Tips for Better Results
- Keep scissors or a tape knife beside the rack. Unwinding is only half the job; cutting cleanly without hunting for scissors is the other half.
- Label the pegs if you share the workshop. A small label under each peg stops family members from returning rolls to the wrong spot.
- Do not overload a peg. One roll per peg unwinds cleanly; two rolls stacked on one peg tangle and drag.
Common Mistakes to Avoid
- Sizing pegs from memory. Tape cores look standard until you try a slim roll that will not fit or a wide roll that wobbles. Measure them.
- Printing pegs too thin. A skinny peg flexes and snaps when you pull tape sideways. Give pegs real thickness and enough walls.
- Hanging the rack too high. If you have to stretch to reach tape, you will stop using the rack. Eye level near the bench is right.
- Mounting with tape alone. A loaded rack is heavier than it looks, and adhesive mounting strips fail slowly in warm rooms. Use screws for a wall rack.
- Letting rolls pile up. A rack with ten rolls you never use is clutter on display. Keep the working set on the rack and store spares elsewhere.
Care, Storage, and When to Choose an Alternative
Dust the rack occasionally and wipe any adhesive residue off the pegs before it builds up. Keep PLA racks out of direct heat, and check wall fixings once a year. If a peg breaks, reprint just that peg if your design allows, or print a fresh rack — it is a short, cheap job.
A manufactured tape dispenser is sometimes the better tool. If you cut the same tape all day, a weighted desktop dispenser with a serrated edge is faster than a peg rack. For a workshop where several tape types live side by side and get used a few times a week, a printed rack that shows everything at once is the more useful choice, and it pairs naturally with the bench storage in “3D Printed Pencil and Marker Holders for Benches: Marking Tools Always in Reach.”
FAQ
Will one rack fit masking, duct, and electrical tape together?
Yes, if you size groups separately. Slim electrical tape needs narrower pegs or spacing than fat duct tape rolls. Grouping by width in the design is what makes a mixed rack work.
Can I pull tape straight off the roll while it is on the peg?
Yes — that is the main advantage of a peg rack. Pull gently in line with the peg, not hard sideways, and the roll will spin freely and unwind cleanly.
Is PLA strong enough for a wall-mounted tape rack?
For ordinary tape rolls, yes, with 3 to 4 walls and sensible peg thickness. The wall fixings matter more: screw into a stud or use proper wall plugs rather than relying on adhesive strips.
What if I buy a new tape size later?
Leave a spare peg in the design and keep the model file. Adding a single peg row or printing a small extension rack is a quick job.
Conclusion
Tape should be the easiest supply in your workshop to find, not the hardest. A printed rack sized to your real rolls puts every type in sight, within reach, and ready to unwind — and it costs little more than an hour of printing. Measure your cores, print a test peg, and hang the rack where you work.
Once tape stops hiding, you will wonder what else on the bench deserves the same treatment.