Introduction
Small solar chargers live an awkward life indoors. Their makers picture them on a sunny windowsill, but windowsills are narrow, sloped, crowded with plants, and usually at the wrong angle. The charger slides down the glass, gets propped against a mug, ends up flat behind the curtain where it charges at a trickle — or falls off the sill entirely, once a week, regular as clockwork.
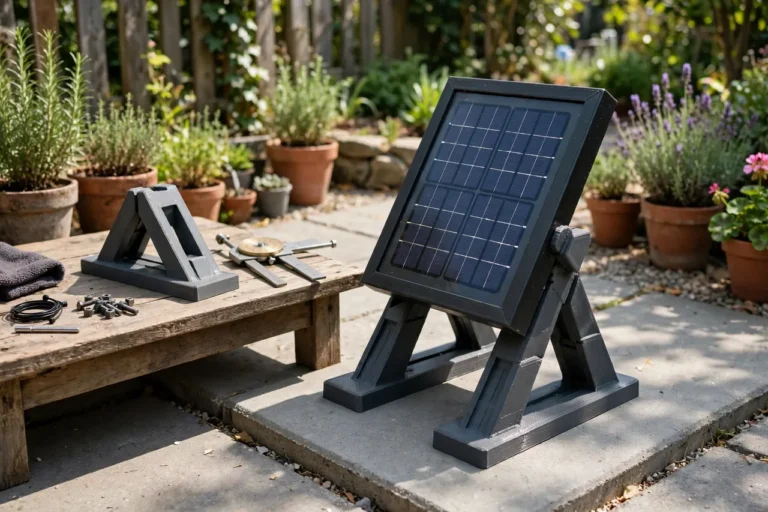
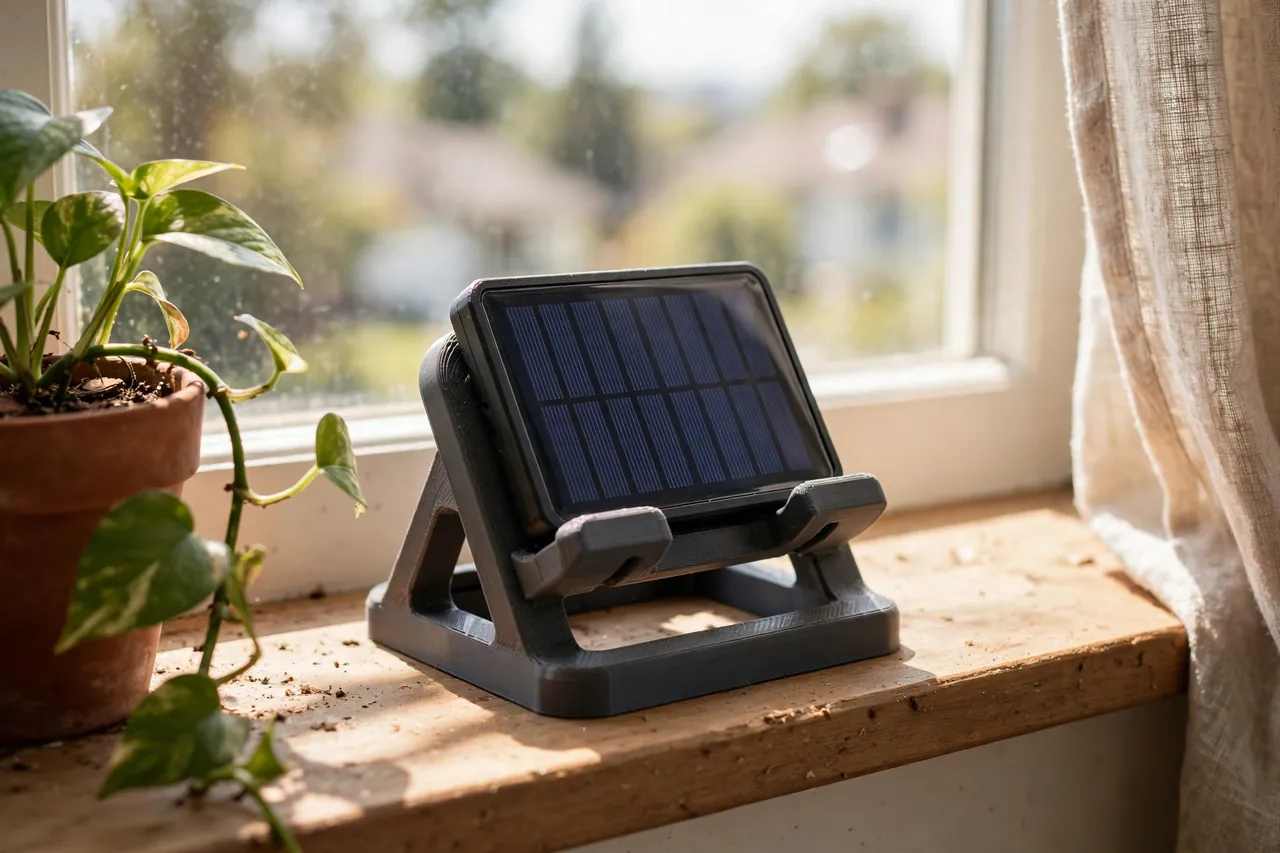
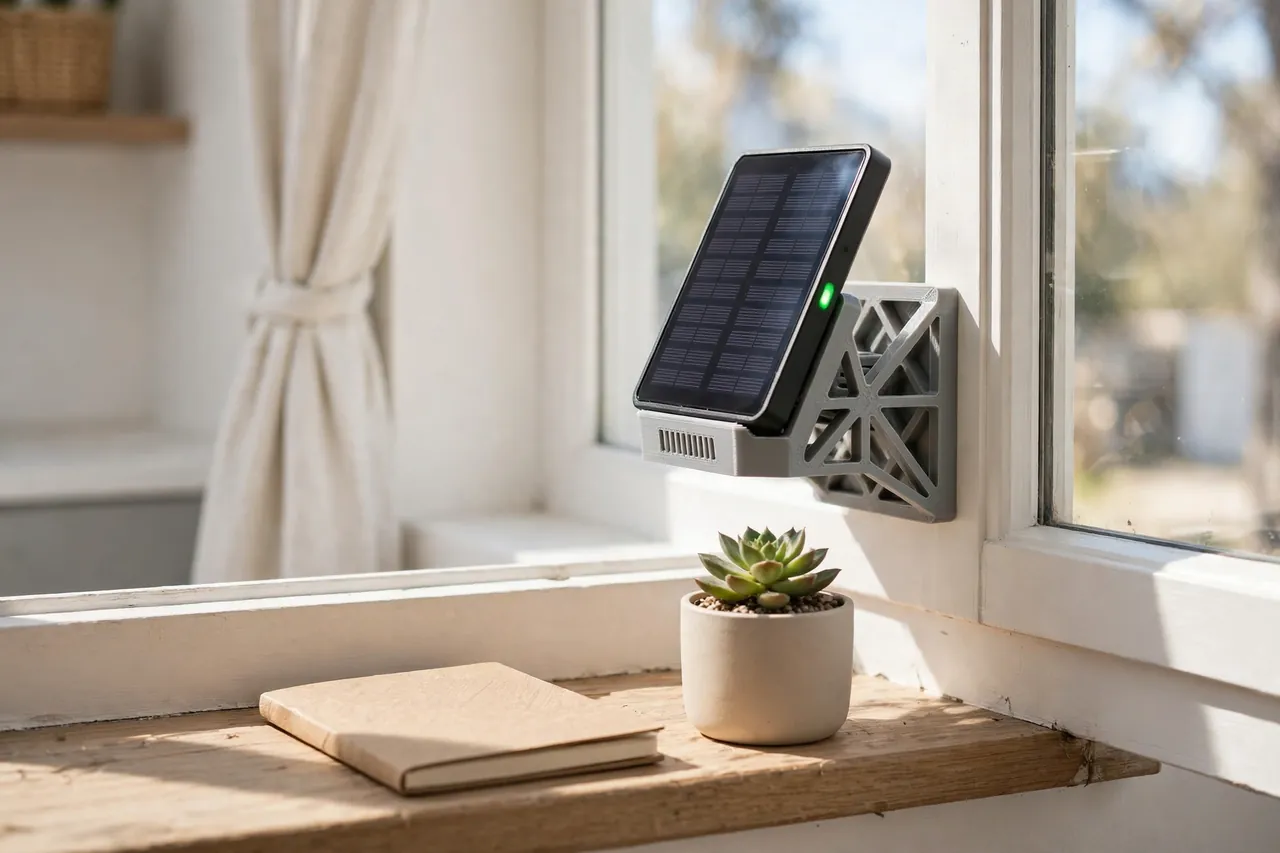
A 3D printed window ledge mount is simply that missing perch. It is a small cradle sized to your charger and your sill, holding the charger at a sensible tilt toward the light, with a lip that stops it sliding and a base that sits steady among the plant pots. Nothing more — and that is enough to turn a frustrating gadget into a quiet daily routine.
This guide covers designing, printing, and using the mount. Say it plainly, because it matters: the ledge mount is a passive perch and holder for a small, sealed charger. Nothing electrical is printed. The charger is never opened, modified, or connected to anything by the mount — it rests in the cradle as a complete product, and lifts out again complete, exactly as it arrived.
What You Need
This is one of the smallest, quickest prints in the solar series — an easy evening project.
Materials and tools
- A home 3D printer with a build area of roughly 120 mm in at least one direction
- PLA filament is fine indoors, or PETG if the sill gets very hot in direct sun
- The actual solar charger you plan to perch, measured carefully
- The windowsill itself — its depth, slope, and any trim or radiator below it
- A tape measure or calipers, and a phone or small level app for checking tilt
- Thin self-adhesive felt or rubber pads for the base and cradle contact points
- A soft cloth for cleaning the sill before the mount goes down
Indoors, PLA is a perfectly good choice: it prints crisply, comes in colours that suit a room, and will not be rained on. The one caution is a south-facing sill behind glass in high summer, where temperatures on dark surfaces climb surprisingly high; there, PETG or a light PLA colour keeps the cradle true.
Suggested print settings
- Layer height: 0.20 mm gives a clean cradle and a quick print.
- Walls: 3 to 4 perimeters — plenty for a light-duty indoor holder.
- Infill: 20 to 40 percent, grid or gyroid, in the base.
- Top and bottom layers: 4 or more, so the base sits flat and the cradle surface is smooth.
- Orientation: Print base-down, cradle up — exactly as it will sit on the sill.
- Supports: Design the tilt into the base profile so the cradle needs no supports.
Print one test mount first and perch the real charger in it on the real sill before printing a second for another window.
Design Considerations
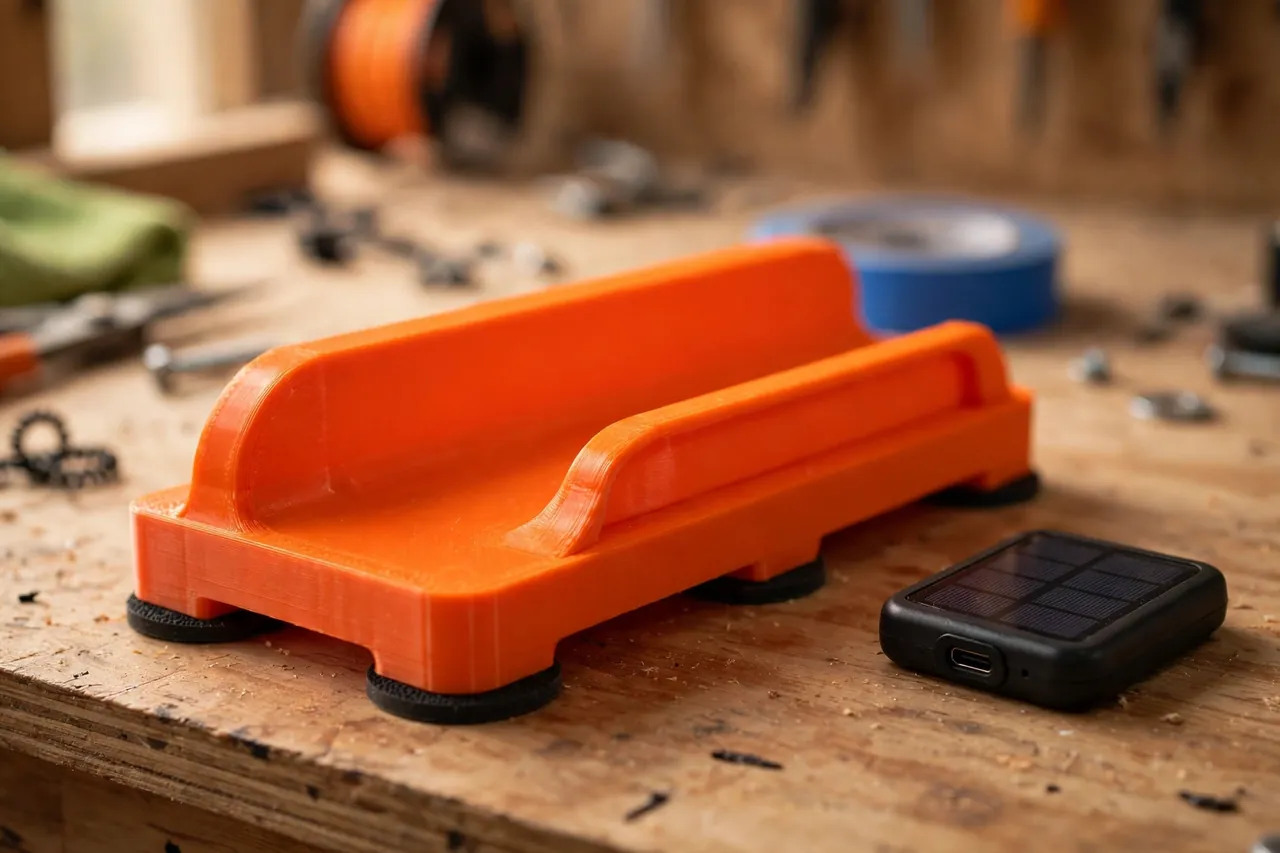
You can model this mount in any basic CAD program. It is a steady base with an angled cradle that fits one specific charger and one specific sill.
1. Measure the charger like a guest, not a component
Measure your charger’s length, width, and thickness, and note where its panel faces and where its own buttons, indicator, and its manufacturer’s charging port sit — the cradle must leave all of them clear and usable, because the charger stays a complete, working product sitting in a holder. Add about 0.5 mm of ease around the body so it drops in and lifts out without a wrestle. A shallow cradle with a low retaining lip at the bottom edge is better than a deep pocket: it holds against slides, shows the indicator, and never shades the panel’s edges.
2. Set the tilt for your window, not a textbook
The charger should face the glass squarely and tilt up toward the sky’s brightness. On a typical sill, a cradle angle around 20 to 35 degrees from horizontal is a good starting range, but your window decides: a tall window with sky visible from the sill wants less tilt; a deep-reveal window where the sill mostly sees the top of the sky wants more. Hold the charger by hand at a few angles on a bright day and watch its own charge indicator — the mount’s job is simply to hold the angle that works, all day, without sliding back.
3. Make the base suit the sill
Measure the sill’s usable depth and any slope. Many sills tilt slightly toward the room; design the base to sit flat on your sill, not on an idealised one, with a footprint wide enough to be steady when a curtain brushes past. Add shallow recesses underneath for felt or rubber pads: they stop the mount creeping on glossy paint, protect the sill finish, and quiet the small knocks of daily window life.
Step-by-Step: Printing and Assembly
- Measure the charger — body dimensions, panel face, and the parts that must stay clear.
- Measure the sill — usable depth, slope, and how much sky the charger can see from it.
- Model the base and cradle with your chosen tilt, a low retaining lip, and pad recesses underneath.
- Print one test mount and set it on the real sill; check it sits flat and does not rock.
- Perch the real charger in the test cradle and confirm it seats easily, with its panel fully exposed and its controls reachable.
- Watch a bright hour. Check the charge indicator behaves and the charger does not slowly slide or tip as the sill warms.
- Adjust once. Add a degree or two of tilt, deepen the lip slightly, or widen the base if the test suggested it.
- Print the keeper, fit the felt or rubber pads, and wipe the sill clean before final placement.
Step-by-Step: Using the Window Ledge Mount
- Choose the sunniest suitable sill, judging by where daylight actually lands for hours, not by where the charger looks nicest.
- Clean and dry the sill so the pads grip and the mount starts life perfectly placed.
- Set the mount down square to the glass, in the brightest stretch of the sill.
- Rest the charger in the cradle, panel facing the glass, retaining lip at its lower edge.
- Connect whatever the charger’s maker intends in the normal way if you are charging a device from it — the mount plays no part in any connection; it only holds the charger steady.
- Leave it undisturbed through the bright hours; a perch earns its keep by not being fiddled with.
- Lift the charger out whenever you need it — that is the routine: out in the evening, back on its perch in the morning.
Tips for Better Results
- Track the sun for a day before printing. An hour-by-hour note of which sill is bright, and when, beats any guess.
- Print the cradle in a light colour for hot sills — it reflects heat instead of soaking it up.
- Keep the panel clean. A weekly wipe of the charger’s own panel, as its maker advises, does more than any tilt fine-tuning.
- Use one mount per regular window if the charger migrates around the house; identical perches make the habit stick.
Common Mistakes to Avoid
- Designing a pocket that shades the panel edges. Even a small shadow across part of a small panel costs a large share of its output.
- Giving the mount a job beyond holding. No printed clips on ports, no printed cable strain reliefs, nothing that joins how the charger connects — the perch is passive, entirely.
- Fixing the mount permanently to the frame. Screws and strong adhesives damage windows and buy nothing a padded, well-shaped base does not.
- Choosing the prettiest sill over the sunniest. Chargers run on light, not on looks; follow the sun.
Care, Storage, and When to Choose an Alternative
Dust the mount with the sill, wash the pads or replace them when they stop gripping, and check the cradle each season for heat warp if your sill runs hot. Stored spares stack neatly in a drawer. A printed perch should last for years of indoor life.
Sometimes another answer is better. If no sill in your home gets real sun — deep north-facing windows, heavy shade — a charger is happier on an outside mount by a door, or simply accept that a plug-in charger does that job better in that house. For the common case of a small sealed charger and one good window, though, a printed ledge mount is the tidy, honest fix.
FAQ
Is anything electrical involved in this mount at all?
No — nothing. The mount is a passive perch: a shaped cradle and base that hold a small, sealed solar charger in the sunlight. The charger is never opened or modified, no printed part connects to it electrically, and every part of how it charges remains the manufacturer’s, untouched.
Will glass block too much sun for this to be worthwhile?
Window glass does reduce what a panel receives, and a charger behind glass will charge more slowly than the same charger outdoors in direct sun — that is the honest trade for the convenience of an indoor perch.
Can the mount hold the charger on a sloped or narrow sill?
Usually, yes — that is exactly what it is designed around. Model the base to your sill’s slope so it sits flat and steady, add pads for grip, and use a light front-edge lip on very narrow sills.
What charger sizes suit a ledge mount?
Small, self-contained chargers — the kind with a built-in panel roughly the size of a paperback or smaller — are the natural fit. They are light, sealed, and made to sit in sun.
Conclusion
A small solar charger does not need much — just a steady place in the light, at the right tilt, every day. A printed window ledge mount gives it exactly that: a passive perch fitted to your charger and your sill, with the charger itself sealed, standard, and free to lift away whenever you need it.
Print one for your sunniest sill and let the routine prove itself for a week. If you then want a sturdier home for larger charging jobs, you may also enjoy our related guide, “3D Printed Tilt Brackets for Small Solar Panels: Angle Panels Toward the Sun,” which takes the same angle-it-at-the-light thinking outdoors and up a size.
For the workshop end of solar life, our guide “Solar Work Light Mount: 3D Print a Holder for Your Sealed Solar Workshop Light” applies the same sealed-product, printed-holder rule, while “Solar Cable Organizer: 3D Print Spools and Clips to Tame Portable Solar Cables (organizing only)” keeps the leads that travel with portable solar gear tidy between uses.