If your screwdrivers live in a drawer, your pliers hide under a rag, and your wrenches end up in a different corner every week, a pegboard can fix all of that. The real upgrade comes when you stop relying on generic wire hooks and start making your own 3D printed pegboard tool holders, shaped for the exact tools you own and spaced exactly how you work.
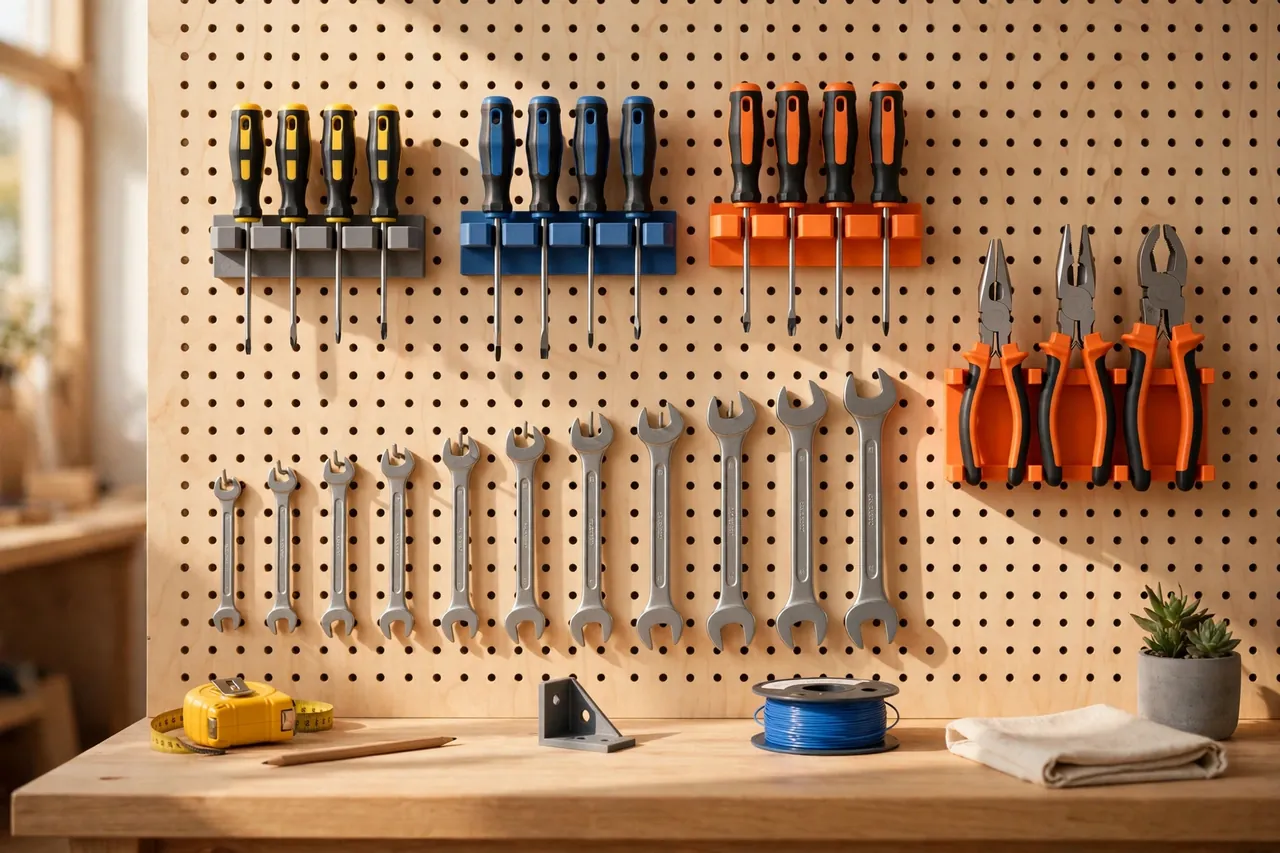
In this guide, you’ll build a complete matching set — a screwdriver rail, a pliers rack, a wrench rail, and simple hooks — with a layout that puts your most-used tools where your hand expects them.
Pegboard Basics: What You’re Building On
Most US pegboard follows one standard, and that consistency makes printable holders reliable.
Spacing and thickness
Standard pegboard has holes spaced 1 inch apart, center to center, in a grid both ways. That 1-inch grid is your design ruler — every holder registers to it.
Classic tempered hardboard is typically 1/4 inch thick: affordable and stiff. Plastic and metal panels vary more — some thicker, some with slots, a few with slightly different spacing. Thickness matters because a hook must pass through the hole (usually about 9/32 inch across), clear the back, and grip without wobbling. A hook sized for 1/4-inch hardboard feels loose on a thin panel, so measure your board before printing a full set.
How peg hooks hold
The top prong angles up into one hole, the body rests flat against the front, and a lower peg drops into the hole directly below — 1 inch down — to stop rotation. Tool weight levering down on the front pulls the top hook tighter against the back. Cheap wire hooks grip only one hole well, so they lift out as you pull a tool upward. Good 3D printed pegboard tool holders fix this with two holes, a flat back plate, and a locking feature.
Planning Your Layout
Printing first and planning later is how you end up with twelve holders and nowhere to put them. Twenty minutes of planning saves hours of reprinting.
Group tools by task
Lining tools up by category works for this core set, but also ask: which tools do you grab together? If a Phillips driver, needle-nose pliers, and a small adjustable wrench are your go-to trio, keep that cluster tight. For a typical 4-foot board:
- Center, at eye level: screwdriver rail — your most-reached-for tools
- Center-right: pliers rack, close to the screwdrivers
- One side: wrench rail, in size order
- Edges and lower rows: simple hooks for tape measures, squares, and extras
Eye level first, room to grow
The band between chest and eye height is prime real estate: visible at a glance, reachable without stretching. Heavier or rarely used tools go lower, where the board handles load best. Leave 20 to 30 percent empty on day one, so you can add a holder later without reshuffling. Sketch the plan on the 1-inch grid, or mock it up with painter’s tape and photograph it as your checklist.
What You Need
Materials: PLA is fine for light holders like screwdriver rails and small hooks — stiff and clean-printing. PETG is better for pliers racks, wrench rails, and heavier tools: tougher, flexes instead of snapping, and handles a warm garage better.
Printer settings, in general terms:
- Walls: 3 to 4 perimeters. Walls add far more strength to hooks and tabs than infill does.
- Infill: 25 to 40 percent, grid or gyroid. Aim near 40 percent for wrench and pliers holders.
- Layer height: 0.2 mm balances speed and strength; 0.28 mm suits a quick test hook.
- Orientation: Print so hooks don’t rely on layer lines in shear — usually on the back or side, so hooks build in continuous lines. If a test hook snaps, reorienting often fixes it.
- Supports: Minimize them by design. Small chamfers print cleaner than flat ledges.
Other supplies: mounted pegboard, ruler or calipers, painter’s tape, pencil, and the tools for test-fitting.
Design Considerations: Holders That Stay Put
You don’t need anyone else’s files. These original ideas can be modeled in any basic CAD tool.
Screwdriver rail
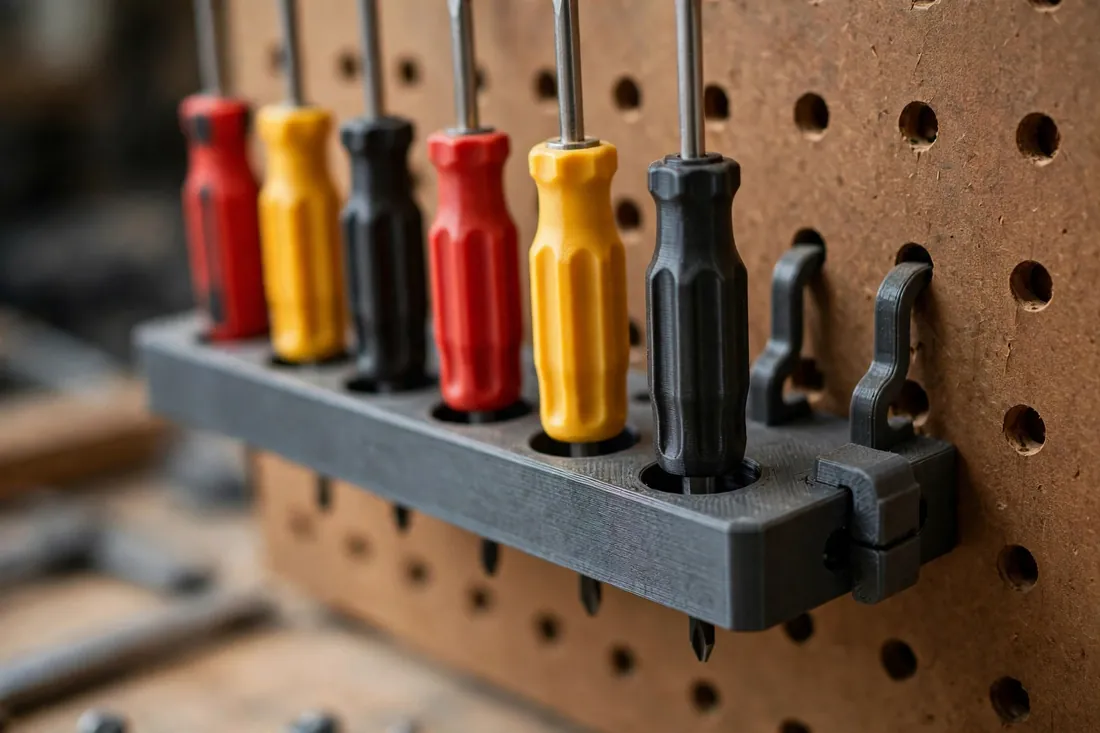
Picture a horizontal bar, about 1 1/2 inches tall and 1 inch deep, with vertical holes through its top face. Size each hole for a specific shaft — precision drivers need holes just over 1/8 inch, a chunky Phillips closer to 3/8 inch — with the handle resting on top. Add a shallow funnel at the top of each hole so a driver drops in without careful aiming.
Pliers rack
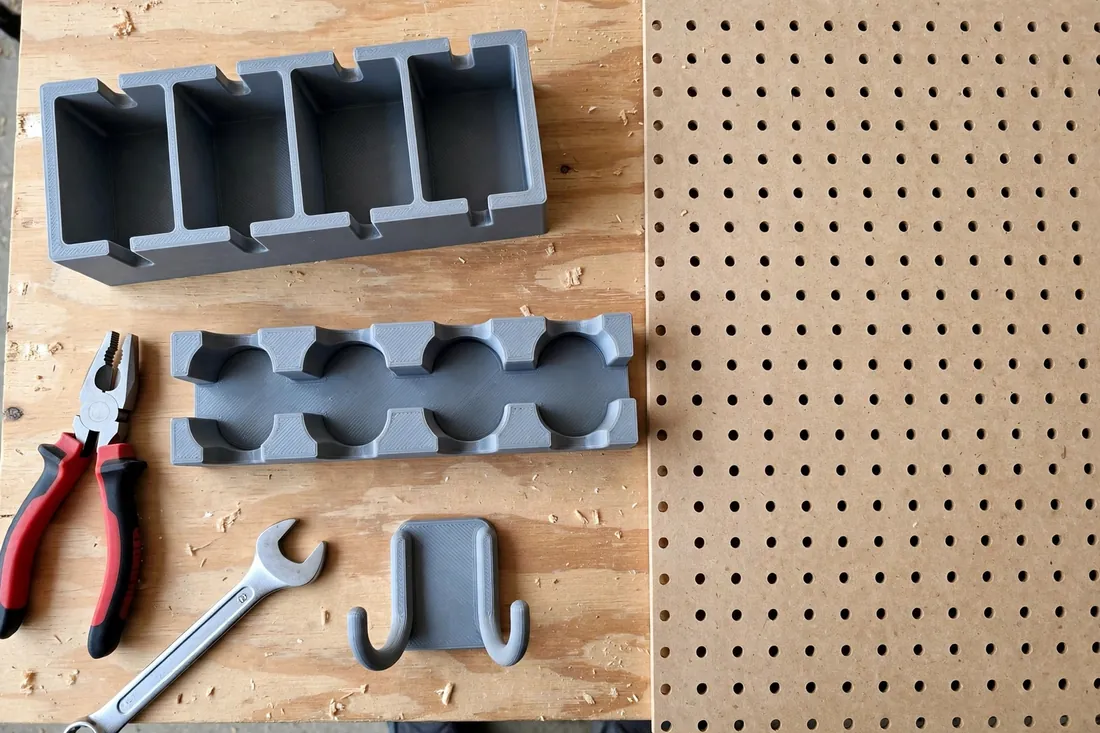
Pliers are awkward: wide handles, narrow noses, no two pairs alike. Use divided slots on a slightly angled shelf — each a U-shaped cradle for the nose and joint, with a divider wall between neighbors so pairs don’t tangle. Stand them nose-up or nose-down, and add a low front lip so nothing slides off.
Wrench rail
Use an open rail with individual cradles: a bar with shallow notches, each tilted about 30 degrees to cradle one wrench flat against the board. Wrenches overlap slightly, like shingles, so you can see the size order and lift any one out alone. Short on width? A vertical roll-style strip with loops holds a smaller set.
Hooks that lock into two holes
Give every holder the same back:
- Two pegs, always: an upper hook angling up behind the board, plus a lower peg 1 inch below it to stop rotation.
- A slight tilt: angle the face back a few degrees so tools lean toward the board instead of tipping forward.
- A locking tab: a small flexible tab on the lower peg that clicks past the hole and resists lifting.
- A flat, wide back plate: contact across 2 to 3 inches stops rocking and protects the board’s holes.
Keep loads modest: six screwdrivers at roughly 2 to 3 pounds total, a pliers rack at 3 to 4 pounds, a wrench rail at 4 to 5 pounds across both pegs. If a loaded holder flexes, split it in two.
Step-by-Step: Printing and Fitting
1. Print one test hook first. Print a small back plate with just your hook and locking tab geometry. This ten-minute print reveals the fit, because boards vary in hole diameter, thickness, and even exact spacing. It should seat with firm hand pressure, sit flat, and resist an upward pull. Too loose? Add a fraction of a millimeter to the peg. Too tight? Shave it down. Dial this in once, and the whole set inherits the fit.
2. Print the screwdriver rail. Seat your real screwdrivers and check that handles don’t collide and shafts don’t bind. Adjusting a hole size or two on a second print is normal — the advantage of making your own 3D printed pegboard tool holders.
3. Print the pliers rack and wrench rail in PETG if you have it. Load both fully, leave them overnight, and check for sag. A holder that droops by morning needs more wall thickness.
4. Print simple hooks last to fill the gaps — fast prints, and a good way to use up a spool end.
Step-by-Step: Setting Up the Full Set
- Clean the board. Wipe dust out of the holes — gritty holes make gritty fits.
- Mark your layout in pencil from your sketch or photo, starting at eye level.
- Install the screwdriver rail first, centered, and load it — your anchor piece.
- Add the pliers rack beside it, leaving one empty column of holes between holders so handles don’t clash.
- Hang the wrench rail and load wrenches in size order, smallest to largest.
- Fill in with simple hooks around the edges.
- Do the reach test. From your normal spot, can you grab and replace your top five tools without looking or stretching? If not, shuffle now, before habits form.
- Adjust after a week of real use. One holder will be in the wrong spot — moving it is a success, not a failure.
Tips for a Board You’ll Keep Tidy
- Outline your tools. Trace each silhouette with a paint pen. An empty outline shows what’s missing and where it goes back.
- Color-code by category. Screwdriver holders in one color, pliers in another, wrenches in a third — faster to find, and others will put things back correctly.
- Keep handles at a consistent height across a rail, so a missing tool is obvious.
- Print a spare hook set now, while your settings are dialed in.
Common Mistakes to Avoid
- Overloading a single-hook holder. A heavy tool on one peg rotates, sags, and pops out. Heavy or wide tools always get two pegs and a wide back plate.
- Ignoring board spacing differences. Assuming every board is exactly 1-inch spacing is the top cause of failed prints. Boards from different makers, especially plastic panels, differ just enough to ruin a set — hence the test hook, always.
- Making slots exactly tool-sized. Add roughly 1/16 inch of clearance, or you’ll fight every tool in and out.
- Printing hooks in a weak orientation, then blaming the material. A snapped hook is usually a layer-line problem. Reorient before switching filaments.
- Filling the board edge-to-edge on day one. No growth room means a messy bench within a month.
Care and Alternatives
Dust holders when you dust the board, and check tabs and pegs every few months for hairline cracks, especially PLA in a hot garage. A cracked holder is a quick reprint — swap it before it fails.
No printer? The same principles work with molded bins, a magnetic strip for wrenches, and wire hooks with locking clips. Short on space? A bench-top caddy beats an overstuffed board. And mount your board securely to studs or solid backing, so it can handle everything you hang on it.
Frequently Asked Questions
Will PLA be strong enough, or do I need PETG for everything?
PLA is stiff enough for screwdriver rails and light hooks. Choose PETG for pliers racks, wrench rails, and holders in a hot garage, since it flexes instead of cracking and tolerates heat better.
My pegboard isn’t standard 1-inch spacing. Can I still do this?
Yes — measure first and build your test hook to your board’s actual spacing and thickness. The method here — test hook, dial in the fit, then print the set — was designed for exactly that case.
How much weight can one printed holder carry?
Roughly 2 to 5 pounds per holder, always spread across two pegs. These are hand-tool holders, not shelving. For anything heavier, use a metal bracket fixed to wall framing instead.
How long does a full set take to print?
At 0.2 mm layers, expect 1 to 2 hours for a screwdriver rail, 2 to 3 hours for a pliers rack or wrench rail, and 20 to 40 minutes per simple hook — usually spread over two or three evenings.
Conclusion
A set of 3D printed pegboard tool holders turns a generic board into storage fitted to your tools and habits. Start with one test hook, nail the fit, then build outward: rail at eye level, pliers rack beside it, wrench rail in size order, simple hooks in the gaps. Keep loads sensible and leave room to grow.
For a deeper dive on the wrench and pliers side, the related article 3D Printed Wrench and Pliers Rail: Wall-Mounted Hand Tool Storage You Can Customize is a great next read, with more on rail angles, cradle sizing, and custom layouts.
Print the test hook tonight. By the weekend, your bench can finally stay clear.