Introduction
Every house has one: the crescent-shaped dent in the wall exactly behind a door, at exactly knob height. It starts as a paint chip the first time a door swings a little too enthusiastically, and each following knock pushes the plaster a little deeper, until the wall wears a permanent dimple that no amount of paint will hide.
The usual defenses are flawed. A door stop at the hinge or floor changes how the door opens, spring stops twang and eventually tear out, and the little foam pads sold for the job compress, yellow, and fall off — shortly before the next dent.
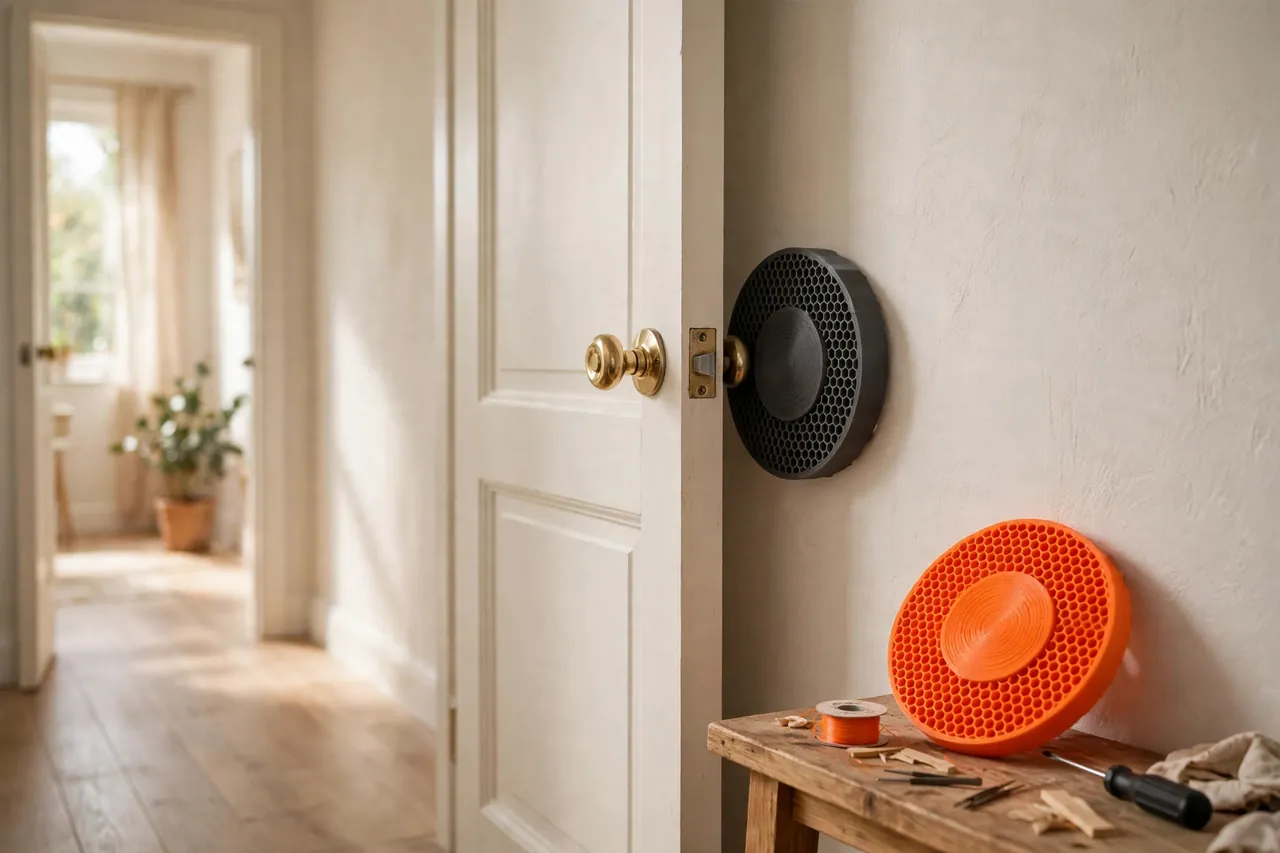
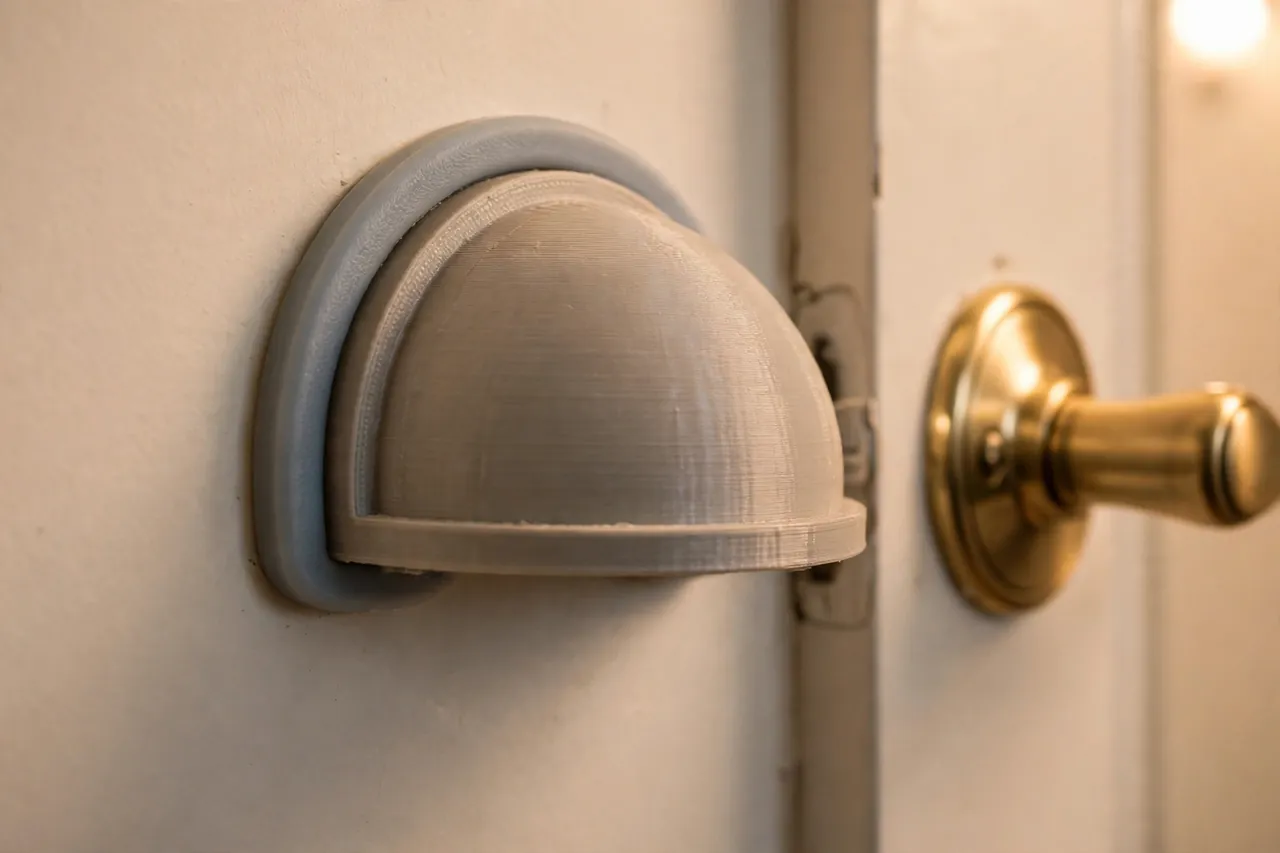
A printed wall guard meets the knob on its own ground. It is a shallow, sturdy disc or plate, printed to match your wall color or contrast with it deliberately, with a softly domed or cushioned face that meets the knob, spreads the impact over a wide area, and shrugs off knocks that would crater bare plaster. Sized generously and fixed firmly, it turns a wall’s weakest point into a designed detail.
This guide covers finding the exact impact point, designing a guard that absorbs knocks gracefully, and fitting a matched set through the house. The guard protects plaster from a swinging knob — a purely cosmetic, light-duty job — and it does not change the door’s hardware, stops, or security in any way.
What You Need
Each guard is a disc roughly 70 to 100 mm across and only a few millimeters thick — among the fastest prints in this whole series.
Materials and tools
- A home 3D printer with a build area of roughly 120 mm in at least one direction
- PLA filament matched to your wall color, or PETG for a hallway that takes real punishment
- Optional TPU filament for a thin soft contact ring or a fully flexible face layer
- Your door and its knob, to find and mark the true impact point
- A pencil, painter’s tape, and a tape measure
- A drill and small screws with wall plugs, or strong removable mounting pads if you prefer no holes
- Sandpaper, primer, and wall paint if you plan to paint guards to match
PLA is perfectly good here and paints to an invisible match. PETG adds knock resistance for the door that everyone flings. The elegant option is a two-material guard: a rigid PLA or PETG back plate with a thin TPU face ring where the knob lands, combining a firm spread of load with a soft first touch.
Suggested print settings
- Layer height: 0.20 mm; 0.16 mm on the visible face if the guard will be painted and scrutinized.
- Walls: At least 4 perimeters — the rim takes the repeated knocks and must not chip.
- Infill: 40 to 60 percent, gyroid. The guard must feel like a solid puck, not a drum skin.
- Top and bottom layers: 5 or more on the face, so sanding and painting leave no infill pattern.
- Orientation: Print face-down on the bed for the smoothest visible surface, back plate details up.
- Supports: A shallow dome or flat disc needs none.
Print one guard, fit it behind the worst door in the house, and let a week of family traffic judge it before printing the set.
Design Considerations
A guard looks trivial — a disc on a wall — but the details decide whether it protects for years or becomes the next thing that falls off.
1. Size it to spread the blow
The knob contacts the wall at a point, but the guard’s job is to spread that force across as much plaster as possible. A disc 70 to 100 mm across, with a gently domed or dished center where the knob lands, spreads impact over an area many times the knob’s own footprint. Go larger rather than smaller on doors that swing with enthusiasm; a bigger guard also forgives slight errors in finding the exact impact point.
2. A face that meets the knob kindly
A shallow dish cradles the knob and stops it skating sideways off the guard; a soft TPU ring or face pad at the contact zone kills the knock’s noise as well as its force. Keep the rim smooth and the profile low — about 6 to 10 mm proud of the wall — so the guard reads as a detail, not a doorknob’s dinner plate. Round the outer edge generously; a sharp printed rim chips paint off itself and looks cheap doing it.
3. Fixing that outlasts the knocks
Every knock tries to walk the guard off the wall, so fixing matters more than the print. Two small screws into plugs, set into recessed holes in the guard, will hold it for the life of the house; a screw at top and bottom also stops the guard rotating. Removable adhesive pads suit renters, but choose pads rated well above the guard’s weight and expect to renew them yearly — a guard that drops off silently is a dent appointment rescheduled.
4. Covering old damage gracefully
If the wall already wears the dent, let the guard’s size work for you: choose a diameter that covers the damaged crescent entirely, fill the dent roughly level first so the guard’s back sits flat, and your repair becomes a fitting.
Step-by-Step: Printing and Assembly
- Find the true impact point (next section shows how) and measure your knob’s diameter.
- Model the guard: disc 20 to 30 mm wider than the knob’s swing contact, shallow dish, rounded rim, two recessed screw holes.
- Print the test guard face-down, plus a TPU contact ring if your design uses one.
- Assemble the two parts — the ring should press or lightly glue into its recess so it cannot wander.
- Sand and prime the face if you are painting to match; do this before fitting, on the bench.
- Check the dish against the real knob by holding the guard to the wall and swinging the door gently onto it.
- Print the full set once the test guard has taken a week of knocks without a mark or a wobble.
Step-by-Step: Fitting the Wall Guards
- Mark the impact point precisely. Put a small piece of painter’s tape or a dab of chalk on the knob’s end, open the door gently until the knob kisses the wall, and the mark transfers to the exact spot.
- Hold the guard centered on the mark and check the door again — the knob should land in the dish’s center with the door at its natural full-open position.
- Mark the screw holes, drill, and plug the wall to suit its construction.
- Fill any old dent roughly level and let it set if the guard will cover it, so the back sits flat.
- Fix the guard snugly, firm enough not to rotate under a knock, without cracking the printed rim by overtightening.
- Test with a real swing — not a slam, but the honest enthusiastic open the door gets in daily life — and listen: a good guard turns a crack into a soft thud.
- Repeat for every door that opens against a wall, using the chalk trick each time; impact points are never where you would guess twice in a row.
If a door also slams at the latch side, you may also enjoy our related guide, “Cabinet Bumper Pads: 3D Print Soft TPU Bumpers to Quiet Slamming Doors and Drawers,” which uses the same soft-face thinking in miniature.
Tips for Better Results
- Use the chalk transfer, not a tape measure. Knob swing geometry fools measuring; the mark never lies.
- Match the wall, or commit to contrast. A guard painted exactly with the wall disappears; a deliberate charcoal or brass-tone set looks designed. Near-misses look like accidents.
Common Mistakes to Avoid
- Guessing the impact point. An off-center guard lets the knob land on its rim — or miss it — and the dent continues beside your protection.
- A guard barely bigger than the knob. It concentrates force at its own edge and can crack the plaster ring around itself.
- Adhesive-only fixing on a heavy-swing door. Pads creep under repeated impact; screws are the honest fixing for the family hallway.
- A deep, cup-like dish. It can catch the knob and strain the door’s hinges; the dish should be a shallow cradle, not a socket.
Care, Storage, and When to Choose an Alternative
Wipe the guards when you wipe the walls, check the busiest ones for screw snugness each year, and touch up paint as needed.
Know the guard’s place in the system, though: it protects the wall at the landing point, but it does not slow the door. If a door slams because of a draft or a sprung hinge, fix the cause as well — a guard plus a door that no longer flies is the complete cure. Where a wall is already badly damaged over a wide area, repair the plaster properly first rather than hiding a crater behind an oversized disc. For the everyday knob dent — started or merely threatened — the printed guard is the neat, permanent answer.
FAQ
Can a guard cover an existing dent completely?
Yes, if you choose a diameter that covers the damage, fill the dent roughly flat so the guard seats properly, and fix through sound plaster around it. The guard then becomes both the repair’s finish and its protection against recurrence.
Screws or adhesive pads — which is better?
Screws into plugs are the permanent, knock-proof answer and the right choice for busy doors. Quality removable pads work for renters and light interior doors, with the understanding that they are a yearly-maintenance fixing. Choose per door, not per house.
Will the knob still hit hard enough to damage the guard itself?
A solidly printed guard with generous walls and infill takes household knocks indefinitely; the soft face ring absorbs the sting. A truly violent slam can mark anything — but it will mark a replaceable guard instead of your wall, which is the arrangement you want.
What about lever handles?
Levers land with their end tip, so use the chalk trick to find that exact point, then fit the same guard there — a soft face suits the smaller contact patch.
Conclusion
The knob dent is one of home ownership’s certainties — unless a small printed disc is standing guard at the exact spot. Find the true impact point, print a guard that spreads the blow and meets the knob softly, fix it firmly, and that patch of wall is defended for good.
For the doors themselves, you may also enjoy our related guide, “Door Stops That Work: 3D Print Hinge-Pin and Floor Door Stops for Every Room,” and for furniture edges that take similar knocks, our related guide, “3D Printed Furniture Corner Protectors and Edge Guards for Tabletops (furniture protection, not child-safety),” completes a house-wide truce between hard things and painted surfaces.
Chalk one knob tonight, and print the first guard while the mark is still fresh.