Introduction
Every home has one door that announces itself. It swings a little too eagerly, the handle kisses the wall, and over months a small dent appears in the paint — followed, in time, by a crack in the plaster or a scuffed baseboard.
Most door stops fail at being fitted, not at being strong. The loose wedge that came with the house has vanished, the stick-on bumper peeled off last summer, and the one-size floor stop sits at the wrong height for your door’s gap.
That is a perfect brief for a printer. 3D printed door stops can be sized to your actual hinges, your gap under the door, and the exact spot where your door meets the wall. This guide covers three original designs: a hinge-pin stop with a soft bumper tip, a low-profile floor stop you can screw down or mount with adhesive, and a simple wedge stop as a bonus.
All three are about doors and walls only — protecting paint, plaster, baseboards, and door faces from everyday knocks.
What You Need
The three designs share most of the same kit. The hinge-pin stop works best as a two-material print: firm body, soft tip.
Materials and tools
- A home 3D printer; a standard single-extruder machine is fine
- PETG filament for the stop bodies — tougher than PLA for parts that get knocked
- TPU filament for the bumper tip and, ideally, for the wedge stop
- Calipers or a ruler for measuring your hinge pin and door gap
- A flat-head screwdriver for lifting a hinge pin
- For the floor stop: a short wood screw and drill, or strong adhesive mounting pads
- Felt pads for protecting door faces and baseboards
- Sandpaper, and a pencil for marking positions
If you only have PLA, print test pieces in it to check sizes. For daily use, PETG bodies with TPU contact points last longer and feel kinder to paintwork.
Suggested print settings
- Layer height: 0.20 mm for bodies; 0.24 mm is fine for the wedge.
- Walls: At least 4 perimeters on the hinge-pin stop — its ring and arm take repeated pushes.
- Infill: 40 to 60 percent for stop bodies; near-solid, 80 percent or more, for the wedge.
- TPU parts: Print slowly, around 25 to 35 mm/s, with 3 to 4 walls and 40 percent or higher infill for a firm-but-giving feel.
- Top and bottom layers: 4 or more, so mounting faces sit flat and adhesive pads grip evenly.
- Orientation: Hinge-pin ring flat on the bed, floor stop base-down, wedge on its base.
- Supports: None, if the shapes stay simple.
Print one test piece per design, fit it, live with it for a day, then batch-print the keepers.
Design Considerations
Each design answers a different situation, so think about which doors swing free, which need holding open, and which only need their travel limited.
1. The hinge-pin stop and its TPU bumper tip
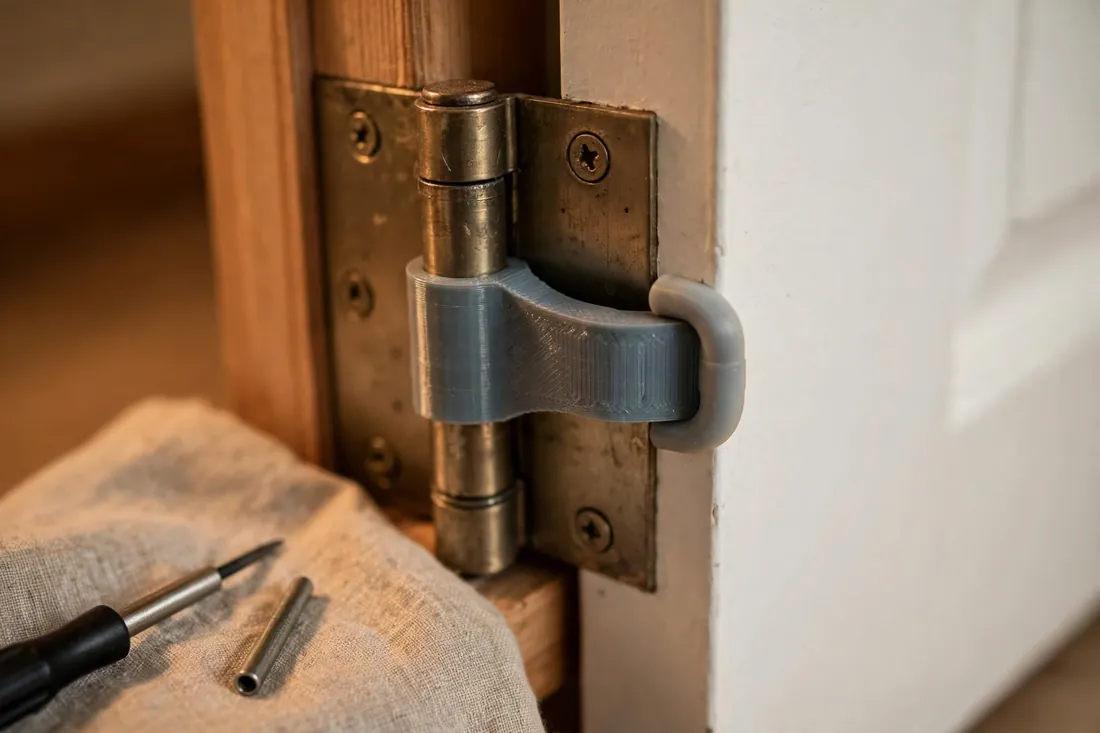
The simplest original design is a ring that drops over the existing hinge pin head, with a short arm extending from it. As the door opens, the arm’s end meets the door face or frame and limits travel.
The detail that makes it pleasant to live with is the bumper: a small TPU cap pressed over the end of the arm. The firm PETG arm does the positioning; the soft tip makes the contact. Size it generously — roughly 15 to 20 mm across, with a domed face.
2. Measuring the hinge pin and barrel
Fit starts with two measurements. First, the hinge pin diameter: lift the pin a short way with a screwdriver under its head and measure the shaft with calipers. Common interior pins are around 4 to 5 mm, but older hinges vary.
Second, measure the hinge barrel’s outside diameter. The ring must clear the barrel without rubbing through a full swing. Add about 0.4 to 0.6 mm of clearance to the ring’s inner hole, and test a full swing before printing a set.
3. The low-profile floor stop
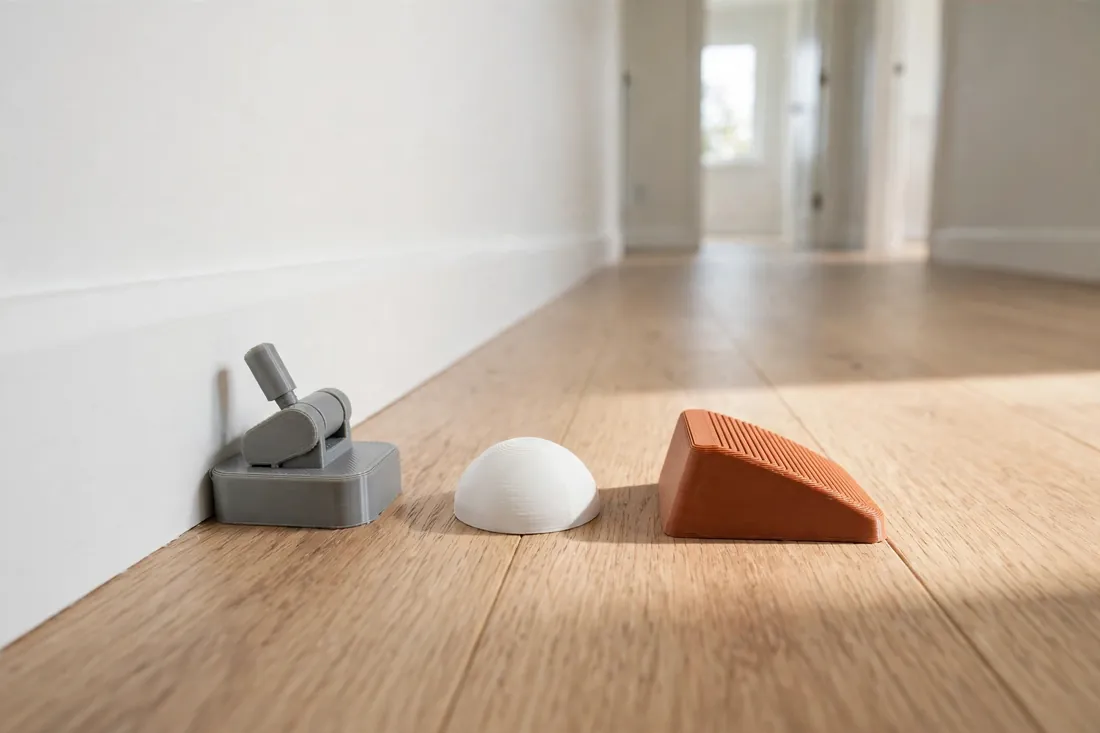
The floor stop is a small dome or rounded puck fixed to the floor where the door’s lower edge arrives. Low profile matters twice: tall enough to meet the door above its bottom bevel, yet low enough not to stub toes or catch a vacuum cleaner.
A height of roughly 20 to 30 mm suits most interior doors, but measure your door’s clearance. Model a wide base — 35 to 45 mm across — with a soft top: a TPU cap over a PETG dome, or a recess for a felt pad. A center hole lets you screw it down; a flat base suits adhesive pads on floors you would rather not drill.
4. The wedge stop as a bonus design
The wedge is the oldest door stop shape there is, and printing one takes minutes. Model a gentle slope, roughly 150 mm long and rising to just under your door’s floor gap, with a ribbed top so the door’s edge grips instead of skating over it. A small raised heel stops the wedge itself sliding, and TPU gives it natural grip.
Its great virtue is that it goes anywhere: no fitting, no fixing, and it holds a door open at any angle.
5. Protecting baseboards and door faces
Every contact point should be soft, rounded, or felt-faced. Check where your doors make contact today — many meet the baseboard before the wall, so a floor stop that meets the door slightly earlier protects the baseboard entirely. A hinge-pin bumper should meet the flat of the door or frame, never a sharp edge. Round every edge that could touch paintwork.
Step-by-Step: Printing and Assembly
- Measure each door: hinge pin and barrel diameters, the gap under the door, and where it meets the wall or baseboard.
- Model the hinge-pin stop with the ring clearance above, an arm length set for your opening angle, and a socket for the bumper.
- Print the body in PETG and the bumper in TPU. Press the bumper on; a drop of flexible glue is optional if the fit is loose.
- Model the floor stop at your measured height, with a wide base, a screw hole or flat adhesive base, and a soft top.
- Print the floor stop, fit its TPU cap or felt pad, and check the top is smooth and domed.
- Print the wedge in TPU at high infill, ribbed top up. Flex it by hand — firm with a grippy give, not spongy.
- Test-fit everything on one door first, checking clearances through a full swing.
- Batch the keepers once the test door feels right.
Step-by-Step: Fitting and Using Your Door Stops
- Fit the hinge-pin stop. Open the door partway, lift the top hinge pin a short distance, slip the ring into place, and reseat the pin fully.
- Swing the door slowly toward its limit and watch the bumper meet the door or frame. Contact should be soft and flat, well before the handle could reach the wall.
- Adjust the angle if needed. A longer arm or thicker bumper stops the door earlier; a shorter arm lets it open wider.
- Place the floor stop. Swing the door to the widest angle you want, hold the stop at the contact point, and mark its base outline on the floor.
- Fix the floor stop. For a screwed fitting, drill a pilot hole and drive the screw snug. For adhesive, clean the floor spot, apply the pad, press the stop down firmly, and leave it to set as the pad maker recommends.
- Check the meeting. Swing the door into the stop a few times, gently, then at normal speed. Contact should be quiet and centered.
- Use the wedge as needed. Slide it firmly under the door’s bottom edge, toe first, until it grips. Nudge it out with your foot to release.
- Repeat per door, noting that hinge sizes and floor gaps differ between older and newer rooms.
Tips for Better Results
- Fit one door completely first. Hinge size, floor gap, and swing vary by room.
- Give the bumper a generous dome. A larger, rounder TPU pad is quieter and gentler.
- Mark floor-stop positions with tape and live with the door for a day before screwing anything down.
- Print a spare wedge. Wedges wander off; a spare costs a few grams.
Common Mistakes to Avoid
- Guessing the hinge pin size. A ring modeled for the wrong pin or barrel will wobble or bind. Two minutes with calipers prevents both.
- Making the floor stop too tall. An over-tall stop meets the door on its beveled edge and can scrape; measure the edge height at the contact point.
- Hard plastic against paint. Skipping the TPU bumper or felt pad trades a wall dent for a door-face dent.
- Placing the floor stop in the walkway. Position it close to the wall where feet rarely land.
- Printing the wedge in rigid filament. A hard wedge on tile or laminate skates instead of gripping. TPU and a ribbed top keep it planted.
Care, Storage, and When to Choose an Alternative
Wipe the stops down when you clean the floors, check screwed stops for tightness occasionally, and inspect bumpers for flattening or splits — a TPU bumper is a two-minute reprint when it wears. A knocked-loose adhesive stop usually just needs a fresh pad.
Sometimes a bought stop is better. Very heavy solid-core or exterior doors carry real momentum, and a sturdy metal floor stop handles that battering better than a printed part. Use printed versions where they shine: interior doors, custom angles, awkward baseboards, and rooms where fit matters more than brute strength.
FAQ
Will a hinge-pin stop fit my hinges?
It will if it is sized to them. Measure your pin shaft and barrel diameter, model the ring with a small clearance, and test one stop through a full swing. Interior hinges cluster around a few common sizes, so one design often fits several doors.
Should I screw the floor stop down or use adhesive?
Screw it down for the most secure result on wood floors you are happy to drill. Choose adhesive pads on tile or finished floors you would rather not mark, or where you may reposition the stop later.
Why does my wedge stop slide on hard floors?
Usually because it is too hard, too smooth, or too shallow for the gap. Print it in TPU with a ribbed top and a heel lip, sized just under the gap beneath your door. On carpet, a longer, thinner wedge works better.
Can I print door stops in PLA instead of PETG and TPU?
For a test piece, PLA is fine for checking size. For everyday use, PETG bodies resist knocks and warm rooms better, and a TPU bumper or wedge gives the soft, grippy contact that protects paintwork.
Conclusion
A good door stop is almost invisible: the door opens, it stops softly at the right place, and the wall, baseboard, and door face stay unmarked. Printing your own gets you there by fit rather than luck — a hinge-pin stop matched to your hinge, a floor stop at exactly your door’s height, and a wedge in the drawer for everywhere else.
Start with the door that annoys you most, measure it properly, and print the stop it actually needs.
If that same door also droops or rubs its frame, you may also enjoy our related guide, “3D Printed Hinge Shims for Sagging Doors: A Simple Fix That Actually Works,” which tackles the hinge side of the problem and pairs neatly with the stops in this article.