Introduction
Garden trellises rarely come in the size you actually need. The store-bought panel is a little too wide for the raised bed, a little too short for the peas, and made from thin material that snaps the first time you lean on it or a storm pushes through. Buying another one for the next bed starts the compromise all over again.
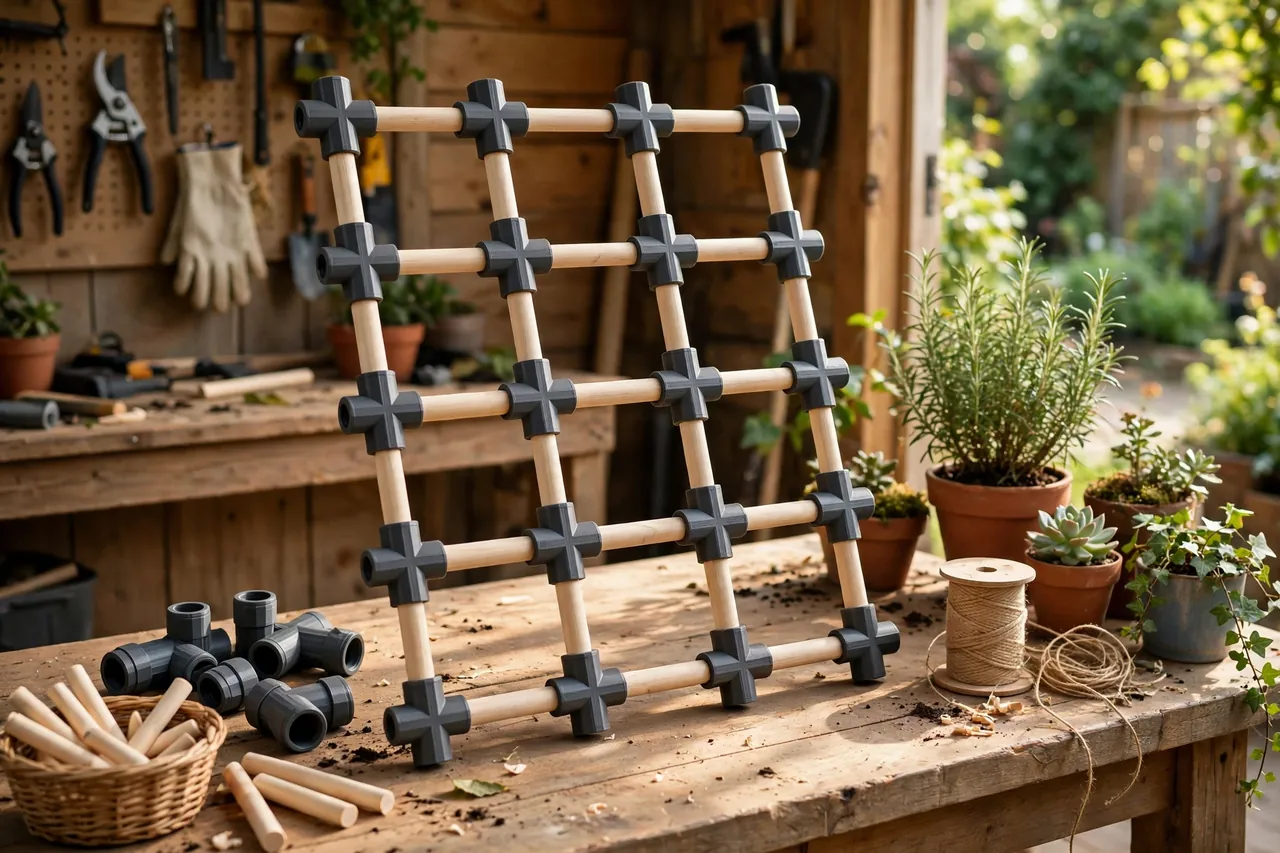
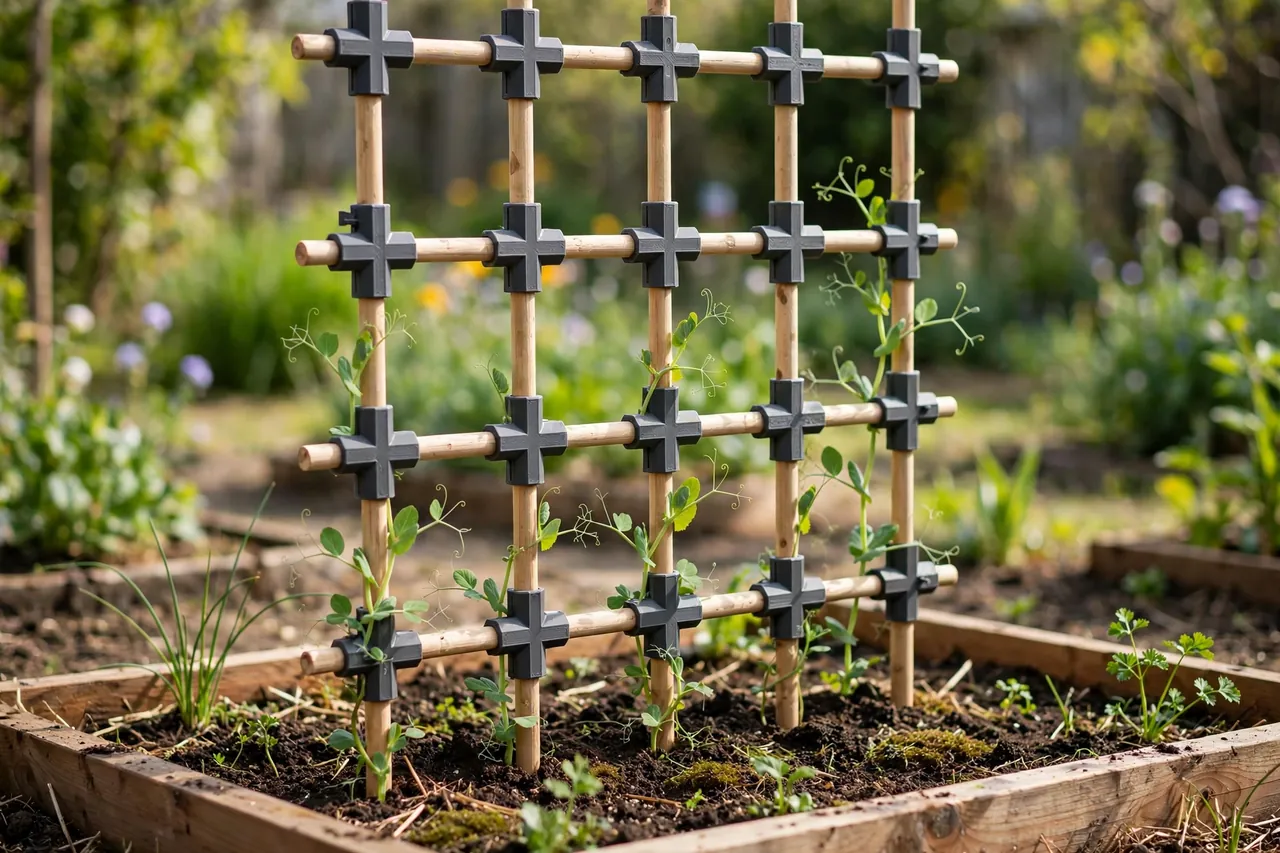
3D printed garden trellis connectors solve the joint problem. You print a small set of sockets — corners, tees, crosses, and straight joiners — sized exactly to the dowels you already have, then cut the wood to length and push the frame together. Need it taller next year, or wider for a second bed? Cut longer dowels and reuse the same connectors.
This guide covers designing, printing, and building with your own connectors for light-duty garden frames. Be honest about the job: these are supports for climbing plants, netting, and light covers, not structural frames for heavy loads, gates, or anything a person will lean or climb on.
What You Need
A connector set is made of small, quick prints, so you can build a whole frame’s worth in an afternoon of printing.
Materials and tools
- A home 3D printer with a build area of roughly 120 mm in at least one direction
- PETG filament for outdoor use — this matters here, as explained below
- The actual dowels or canes you plan to use, measured, not assumed
- A tape measure or calipers, and a fine saw or secateurs for cutting dowels
- Short wood screws or pins, optional, for locking joints on taller frames
- Sandpaper or a small file for cleaning up sockets
- Garden twine or soft plant ties for attaching plants to the finished frame
PETG is the right default outdoors. It shrugs off rain, handles warm sun far better than PLA, and flexes slightly instead of cracking when a frame is pushed into soil. PLA connectors printed for a test fit will soften and warp on a hot wall or in a sunny greenhouse, so treat PLA as a prototype material only for this project. ASA is even more sun-resistant if your printer handles it, but PETG is enough for most gardens.
Suggested print settings
- Layer height: 0.20 mm is plenty; these are working parts, not display pieces.
- Walls: At least 4 perimeters — the socket walls take all the push and twist.
- Infill: 40 to 60 percent, grid or gyroid, so the hub between sockets stays solid.
- Top and bottom layers: 4 or more for a closed, weather-shedding surface.
- Orientation: Print sockets pointing up where possible, so layer lines run around the socket, not across its weakest direction.
- Supports: Design sockets to print without supports; a slight chamfer at each opening helps.
Print one test connector first and push your real dowel into every socket before printing a full set.
Design Considerations
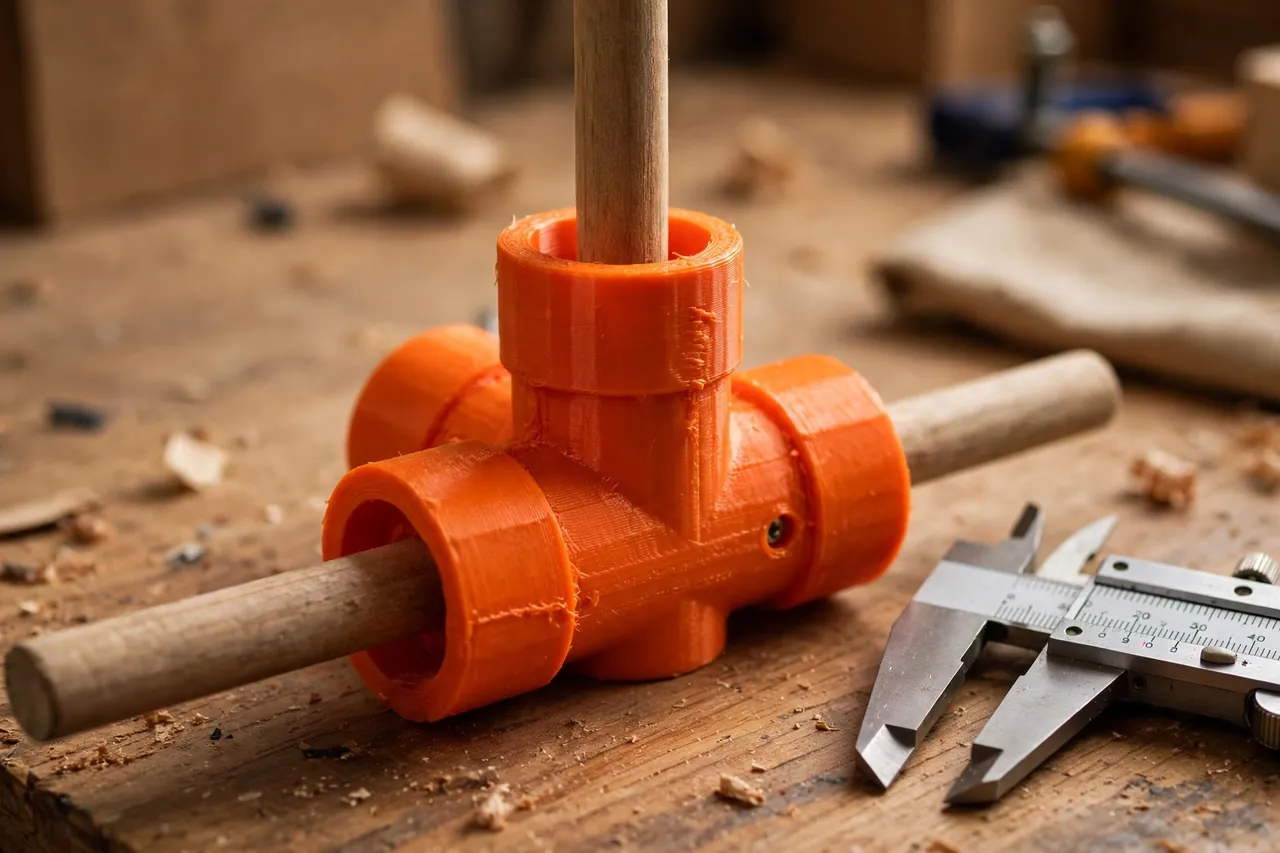
You can model these connectors in any basic CAD program. Each one is a small central hub with short tube sockets pointing in the directions the frame needs.
1. Size the sockets to your dowels
Dowels and canes are nominally sized and honestly variable. A pack of 10 mm dowels may measure anywhere from 9.4 to 10.3 mm, and bamboo tapers along its length. Measure several pieces with calipers and design for the largest. Aim for a slip fit with about 0.3 to 0.5 mm of clearance: the dowel should push in firmly by hand, hold by friction, and still come out when you want to resize the frame. Add a shallow internal rib or a slightly tapered socket if plain friction feels loose on your material.
2. Choose a useful connector family
Four shapes cover almost every rectangular frame:
- Corner: two sockets at 90 degrees, for frame corners.
- Tee: three sockets, for a crossbar meeting an upright.
- Cross: four sockets in one plane, for mid-panel junctions.
- Straight joiner: two sockets in line, for extending a short dowel.
Add a ground foot — a socket with a pointed spike or a flat base — if your frames will stand in soil rather than tie to a fence. Keep socket length around 25 to 35 mm: long enough to grip, short enough to print quickly and stay stiff.
3. Plan for water and movement
Outdoor joints live wet. A completely sealed socket traps water against the wood and speeds up rot, so add a small drain notch at the bottom of vertical sockets. Wood also swells when wet, which is another reason to avoid a press fit that is perfect when dry. If a joint must never slip — the top corners of a tall frame, for example — drill a small cross hole through socket and dowel and pin it with a short screw. That keeps the frame serviceable: remove the screw and the frame still comes apart.
Step-by-Step: Printing and Assembly
- Measure your dowels in several places and note the largest diameter.
- Model the connector family — corner, tee, cross, and joiner — with sockets sized to that measurement plus clearance.
- Print one corner connector and test every socket with a real dowel offcut.
- Adjust the fit. Too tight? Open the socket by 0.2 mm. Too loose? Close it slightly or add an internal rib, then reprint the test.
- Print the full set in PETG once the test fits, counting corners and tees from a quick sketch of your frame.
- Clean up each socket. Clear stringing and lightly sand any ridge at the opening so dowels slide in without shaving.
- Dry-assemble the frame flat on the ground before taking it to the bed, and check it is square by measuring both diagonals.
- Pin the critical joints with short screws if the frame is tall, leaving the rest friction-fit for easy resizing.
Step-by-Step: Using the Connectors to Build a Trellis
- Sketch the frame first — overall width, height, and how many crossbars the plants need.
- Cut all dowels to length from your sketch, and sand the cut ends lightly so they enter sockets smoothly.
- Lay the frame out flat on a lawn or patio, connectors at every junction, and push the horizontal pieces in first.
- Add the uprights, working from one side to the other and keeping each connector fully seated.
- Check square again with diagonal measurements, and tap joints home with the heel of your hand — never a hammer directly on a printed part.
- Carry the frame to the bed with two hands supporting it, rather than dragging it by one corner.
- Push or tie it into place. Press ground feet into the soil, or tie the frame to a fence or wall at two points for taller builds.
- Attach netting or string runs if your plants need finer support than the crossbars give them.
Tips for Better Results
- Print a spare corner and tee. Garden frames lose parts in the soil; a spare in the shed saves a reprint mid-season.
- Use one dowel type per frame. Mixing tapered bamboo and machined dowel in one set makes consistent socket fit impossible.
- Mark socket sizes with a paint pen if you print sets for two different dowel diameters.
- Build smaller panels and join them rather than one huge frame — smaller panels are stiffer, easier to carry, and easier to store.
Common Mistakes to Avoid
- Printing the full set in PLA for outdoor use. It will warp in strong sun. Prototype in PLA, keep in PETG.
- Designing from the packet size instead of measuring. Nominal dowel sizes lie; your calipers do not.
- Making sockets too short. A 12 mm socket looks neat and lets go in the first breeze. Give joints real grip length.
- Forcing a swollen dowel into a dry-fit socket. Sand the dowel end down instead of splitting the socket.
Care, Storage, and When to Choose an Alternative
At the end of the season, pull the frames apart, brush soil out of the sockets, and check each connector for cracks around the hub. Store them dry, out of a hot shed roof space if you can. PETG connectors handled this way should last several seasons, and any single damaged piece reprints in under an hour.
Sometimes the alternative is better. A permanent espalier against a wall, a support for a heavy mature vine, or any frame that must survive years unattended deserves galvanized steel or properly fixed timber. Printed connectors shine when you want custom sizes, seasonal frames you can reconfigure, and cheap repairs — and that describes most vegetable and flower beds very well.
FAQ
Will these connectors work with bamboo canes?
Yes, with a little care. Bamboo tapers and varies more than machined dowel, so measure each cane at the point where it will enter the socket, group similar sizes together, and expect to sand a fat end or pad a thin one with a wrap of tape.
How tall can I build a trellis this way?
A frame around 1.2 to 1.5 metres tall, tied to a fence or wall, is a comfortable limit for dowel-and-connector construction. Freestanding frames should stay lower and wider.
Can I leave the frames out all winter?
PETG itself handles cold and wet well. The weak points are water trapped in sockets and wooden dowels rotting at the joints. If frames stay out, drill the drain notches described above and accept a shorter life for the wood.
What if a connector cracks mid-season?
Swap in a spare and tie the joint with twine until you do. A cracked hub usually means the frame took a load it should not have — a leaning gardener, a fallen branch — rather than a printing fault.
Conclusion
A good trellis is mostly good joints, and good joints are exactly what a printer is for. With a small family of connectors sized to your own dowels, you can build frames that fit your beds precisely, resize them between seasons, and repair them one cheap piece at a time.
Start with one modest panel, learn how your dowels fit, and expand from there. If you enjoy organising the garden this way, you may also enjoy our related guide, “3D Printed Rain Gauge Holder and Garden Marker Set for a Tidy Yard,” which brings the same made-to-fit approach to the smaller jobs around the beds.
For keeping the tools behind those beds in order, our guide “Garden Tool Wall Rack: 3D Print Heavy Hooks for Shovels, Rakes and Brooms” pairs naturally with a tidy frame-building setup, and if your trellis stands beside pots rather than beds, “3D Printed Plant Pot Feet: Lift Pots for Drainage and Airflow” is a quick companion print that lifts planters clear of wet patios.