Introduction
A small solar panel lying flat is a panel working at half its promise. Flat suits a summer noon and little else: mornings, evenings, and the whole of winter send the sun in at a slant that a flat panel mostly reflects away. That is why portable panels ship with flimsy fold-out legs, and why so many of them end up propped against bricks, plant pots, and hope.
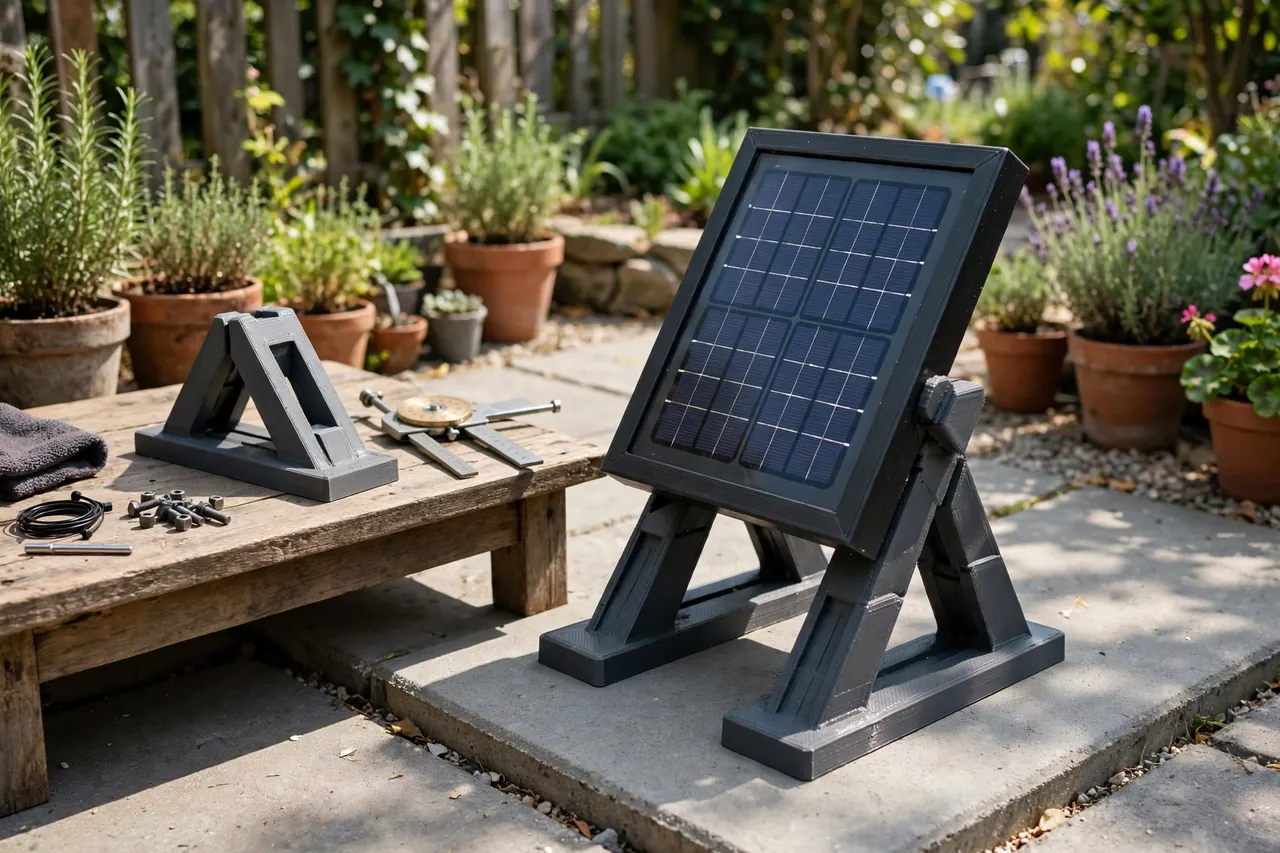
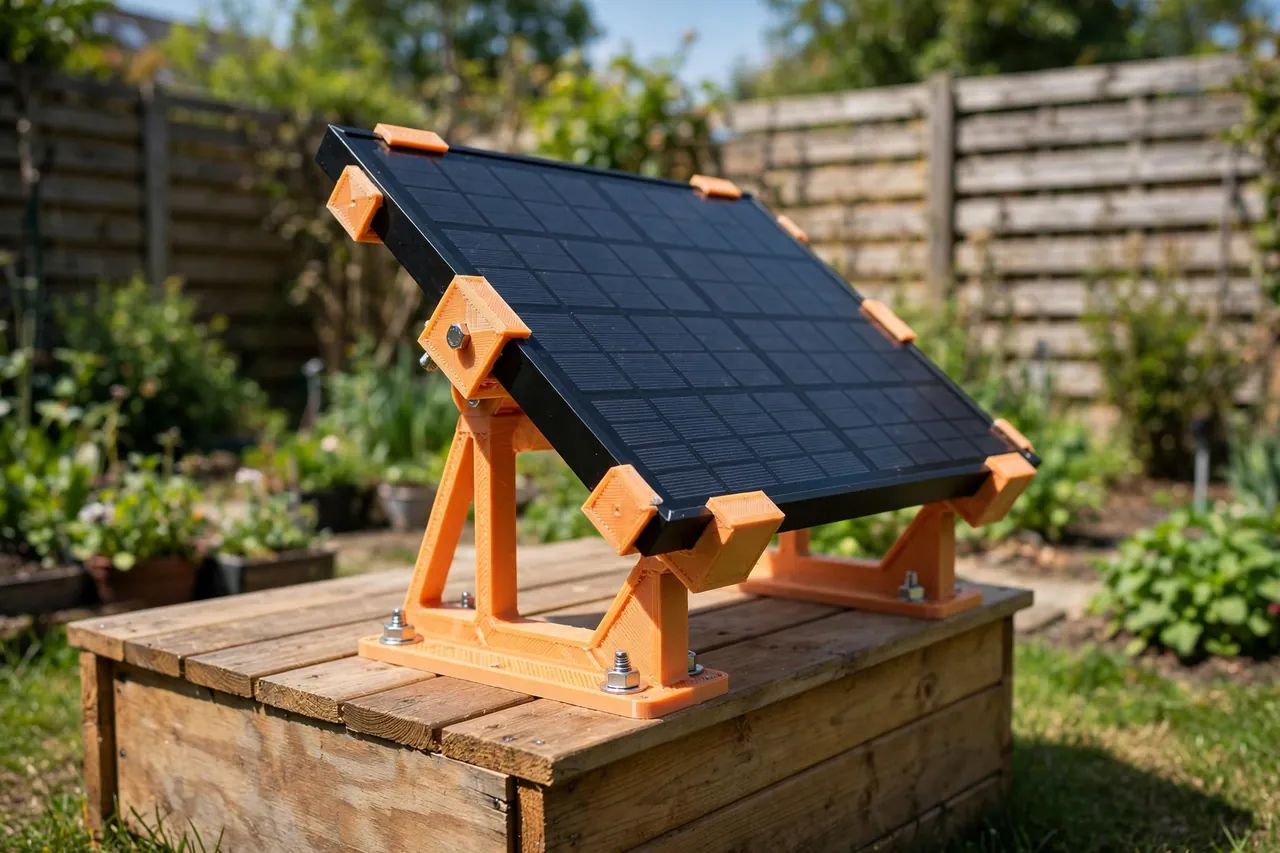
3D printed tilt brackets fill the gap at the right scale. You print a pair of sturdy brackets that grip your panel by its own frame, hinge to a chosen angle, and lock there through the season — with a few set angles so you can re-tilt for winter sun in minutes. The panel works harder every clear day, and it stays a standard, sealed product on a printed stand.
This guide covers designing, printing, and using tilt brackets for small panels. The boundary is clear and worth stating: the brackets hold the panel by its frame, at an angle — that is all they do. The panel’s own connectors, its cable, and any charge controller stay entirely the manufacturer’s, untouched and unmodified, and no printed part ever joins or alters any wiring.
What You Need
Tilt brackets are among the more substantial prints in this series, because they carry a panel outdoors through weather.
Materials and tools
- A home 3D printer with a build area of roughly 150 mm in at least one direction
- PETG filament for outdoor strength and sun tolerance
- The actual small solar panel, measured — frame width, frame depth, and overall size
- Stainless bolts, washers, and wing nuts for the hinge and angle locks, commonly M6
- A tape measure or calipers, and an angle gauge or phone app for setting tilt
- A flat, stable base to fix the brackets to — a ground board, a shed roof batten, or paving
- Sandpaper or a small file for easing the frame clamps and hinge
PETG is again the outdoor default: rain-proof, tough enough for a hinged bracket that gets adjusted seasonally, and far more tolerant of a hot panel baking above it than PLA, which can soften and creep under a sun-heated frame. Print the working pair in your keeper material from the start once the test fit proves out.
Suggested print settings
- Layer height: 0.20 mm balances clean hinge holes with reasonable print time.
- Walls: At least 5 perimeters on uprights and clamps — the bracket is mostly wall, by design.
- Infill: 50 to 70 percent, gyroid or grid, in the base and hinge cheeks.
- Top and bottom layers: 4 or more, for closed surfaces that shed weather.
- Orientation: Print uprights standing as they will work, so layer lines wrap the hinge and clamp loads.
- Supports: Favour notch and hinge shapes that print support-free; small supports in a clamp throat are acceptable.
Print one test bracket first and clamp it to your real panel frame before printing the working pair.
Design Considerations
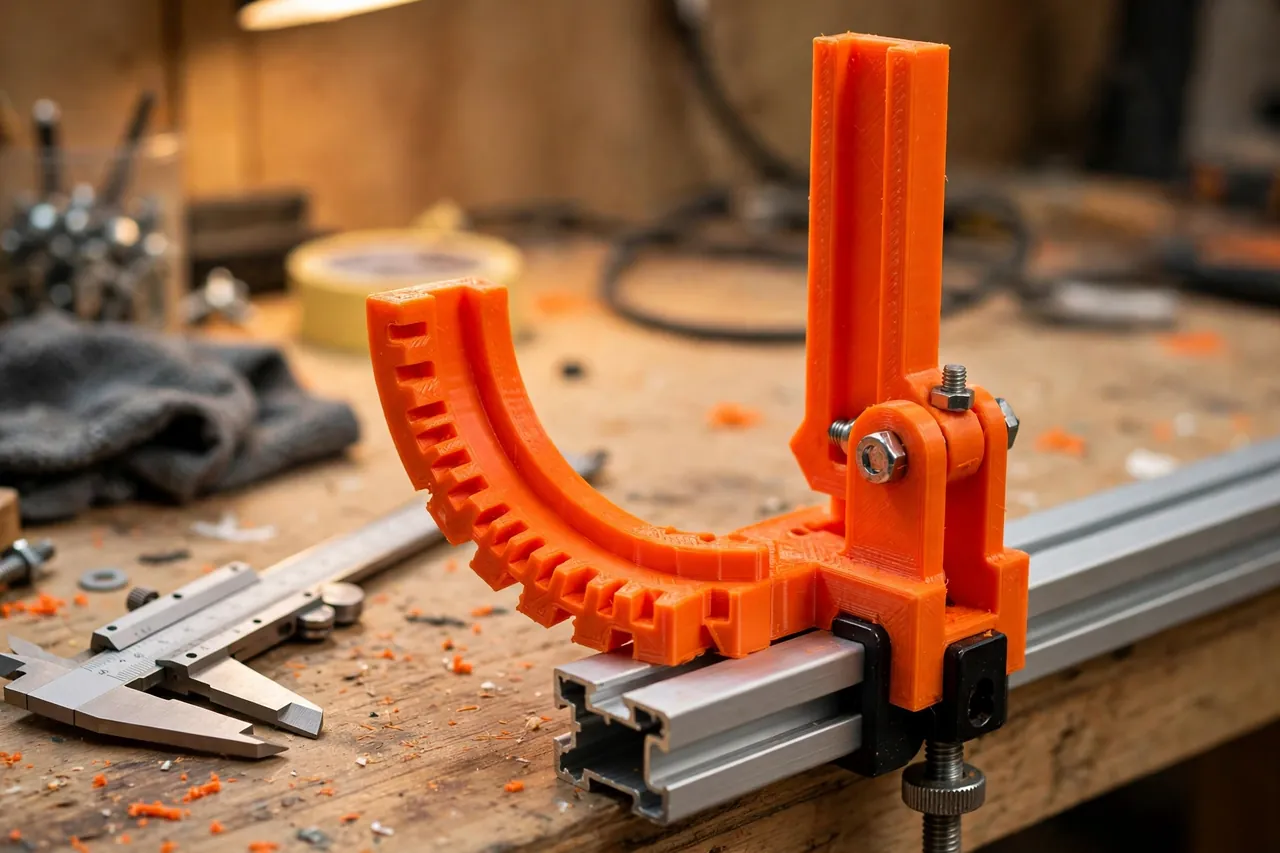
You can model these brackets in any basic CAD program. A bracket is a base, a hinged upright with set angles, and a clamp that grips the panel’s frame.
1. Grip the frame, only the frame
Measure your panel’s frame precisely: its outer width, the depth of the aluminium or plastic frame section, and any lip the maker provides. Design the clamp to close on the frame section alone, with about 0.3 to 0.5 mm of clearance before its bolt snugs it home, plus a soft jaw face or a strip of rubber if the frame finish matters to you. Never clamp the glass or laminate face, never drill the panel or its frame, and never open the panel’s junction housing — the panel is a sealed, finished product, and your bracket holds it the way a picture frame holds a picture: by the edges, from outside.
2. Offer a few honest angles
A small panel gains most of its benefit from two or three well-chosen tilts rather than infinite adjustment. Design the upright with locked positions around 20, 35, and 50 degrees from horizontal — a summer, a shoulder-season, and a winter setting for many gardens — using coarse notches or a toothed arc locked by the hinge bolt. Confirm your angles against your own latitude and the season using any solar angle guide; the exact best numbers vary by place, but a locked 35 is worth far more than a guessed flat.
3. Build a base that stays put
A tilted panel is a small sail, so the base matters as much as the hinge. Print a broad foot with holes for screwing to a ground board, batten, or other fixed base you provide, and keep the panel’s centre of weight inside the footprint at the steepest angle. On paving or a flat roof surface where fixings are not possible, design the feet to accept ballast — a paving slab resting across extended feet works well.
Step-by-Step: Printing and Assembly
- Measure the panel’s frame — section depth, width, and the panel’s overall dimensions and weight.
- Decide your tilt positions for the seasons, and note the angles on the design.
- Model the pair of brackets — broad bases, hinged uprights with angle notches, and frame clamps.
- Print one test bracket and clamp it to the real frame; it should grip firmly with the jaw bolt snugged, and release cleanly.
- Check the hinge and notches through every position, confirming the lock holds under a firm push.
- Adjust once. Ease a tight clamp by 0.2 mm, deepen a shallow notch, or widen a base that feels tippy.
- Print the working pair in PETG, plus any base extensions your fixing plan needs.
- Assemble both brackets with their stainless hardware and confirm the pair matches angle for angle.
Step-by-Step: Using the Tilt Brackets
- Fix the bracket bases to your board, batten, or ballasted base at the panel’s width, square and level with each other.
- Set both brackets to the same notch for the season’s angle before the panel goes on.
- Lift the panel into the clamps with a helper if it is awkward, supporting it by its frame only.
- Snug the clamp bolts evenly, a little at a time on each side, until the frame is held firmly without distortion.
- Confirm the panel’s own cable and connectors hang and route exactly as supplied, untrapped and unstrained by anything printed.
- Connect the system as its manufacturer instructs, using only the panel’s own connectors and controller — the brackets play no part in that step at all.
- Check the tilt against the midday sun over the next clear day, and note which notch performs best.
Tips for Better Results
- Set angles by the calendar. A note in the shed — spring to the middle notch, winter to the steep one — turns a good habit into an automatic one.
- Face the panel true. Brackets cannot fix a panel facing the wrong way; get the direction right first, then tune tilt.
- Keep a printed angle gauge with the brackets so seasonal changes are measured, not remembered.
- Check clamp bolts after the first storm. New assemblies settle; one snug-up after real weather is normal maintenance.
Common Mistakes to Avoid
- Clamping the panel’s face or drilling its frame. Grip the frame section only, from outside. The sealed panel is never pierced or pried.
- Printing brackets in PLA for outdoor duty. Heat under a working panel and summer sun will creep them out of angle within a season.
- Routing the cable through the bracket under tension. The manufacturer’s cable and connectors stay free and untouched; move brackets that crowd them.
- Choosing a single extreme angle. A very steep winter tilt on a light base invites the wind. Ballast or fix the base honestly for the steepest setting.
Care, Storage, and When to Choose an Alternative
Inspect brackets each season as you re-tilt: look for whitening or cracks around hinge holes, confirm notch edges are still crisp, and snug every bolt. Wash the panel’s surface as its maker advises. PETG brackets in normal garden duty last for years, and a worn single bracket reprints without disturbing its partner’s settings if you kept the file.
Sometimes metal is the honest answer. Large or heavy panels, exposed hilltop or coastal sites, and any permanent roof installation belong on rated metal frames fitted to the structure. Printed tilt brackets are for small panels, ground and garden duty, and owners who enjoy adjusting with the seasons — within that honest scope, they are excellent.
FAQ
Do the brackets touch the panel’s wiring or connectors in any way?
No, by design. The brackets grip the panel’s outer frame and nothing else. The panel’s own connectors, its cable, and any charge controller remain entirely the manufacturer’s — unopened, unmodified, and routed with their natural slack.
How much difference does tilting actually make?
A worthwhile one, especially outside high summer. A panel tilted toward the season’s sun can gather noticeably more over a day than the same panel flat — the gain is largest in winter, when flat panels suffer most.
Can one bracket design fit different small panels?
The hinge, notch, and base sections usually can; the clamp is the panel-specific part. Model the clamp to each panel’s frame section, keep the rest of the design constant, and label each printed set with the panel it serves.
Is it safe to leave a tilted panel out in storms?
A tilted panel on a properly fixed or ballasted base, clamped by its frame in locked brackets, rides out normal garden weather well.
Conclusion
Tilting is the cheapest output a small panel will ever gain, and printed brackets make it precise, lockable, and sized to the panel you actually own. The panel stays sealed and standard, held by its frame; its connectors and controller stay the manufacturer’s; the printed parts simply do the standing and the angling, season after season.
Prove the clamp on one bracket, set the pair to a mid angle, and watch a clear day’s charging before fine-tuning. If you want to check your angles with a dedicated tool first, you may also enjoy our related guide, “3D Printed Angle Gauge for Setting Solar Panel Tilt on Ground-Level Frames (measuring tool only),” which was made for exactly this job.
For a more portable take on the same idea, our guide “Portable Solar Panel Kickstand Legs: 3D Print Adjustable Legs for Ground-Level Panels” covers legs that travel with the panel, while “Solar Panel Corner Protectors: 3D Print Pads for Safe Panel Storage and Transport” looks after the panel’s corners whenever it comes down for storage or a storm.