Introduction
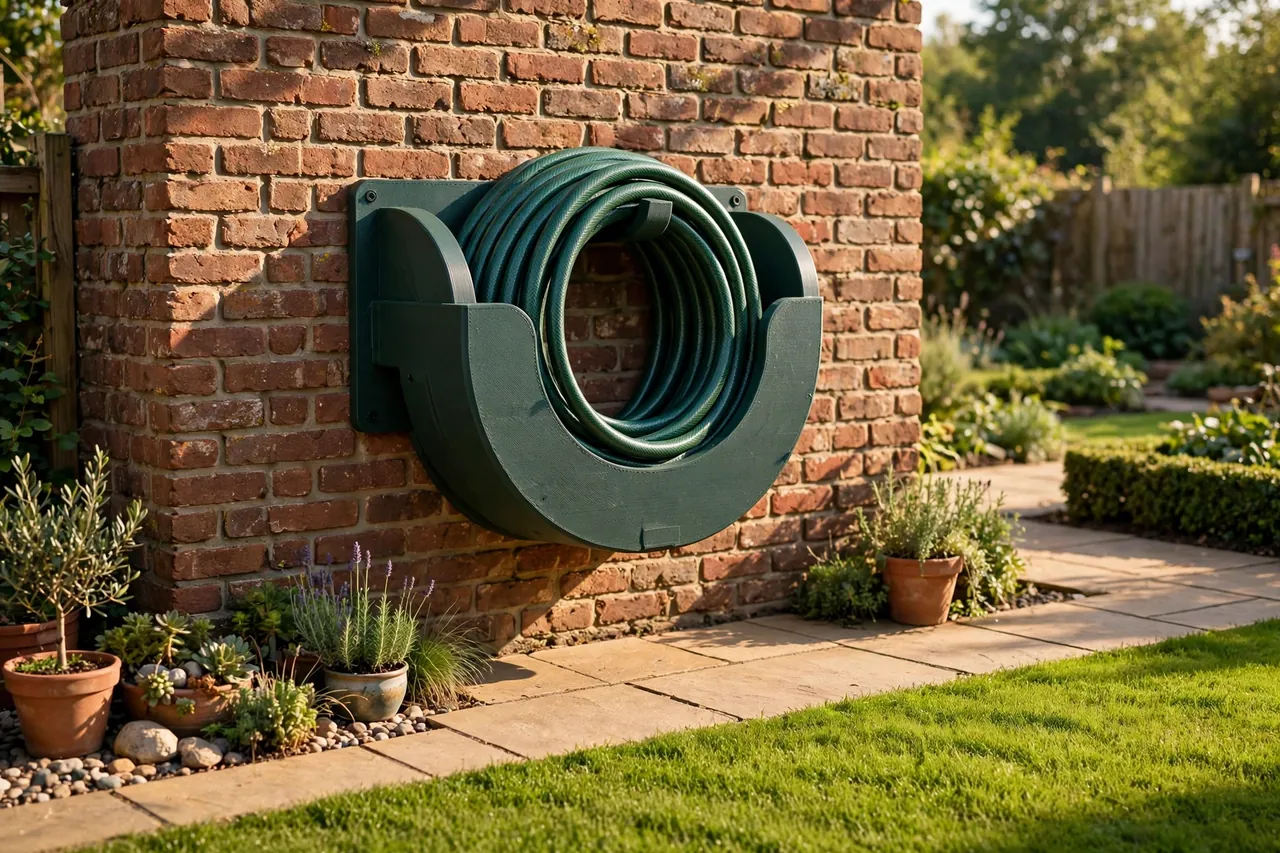
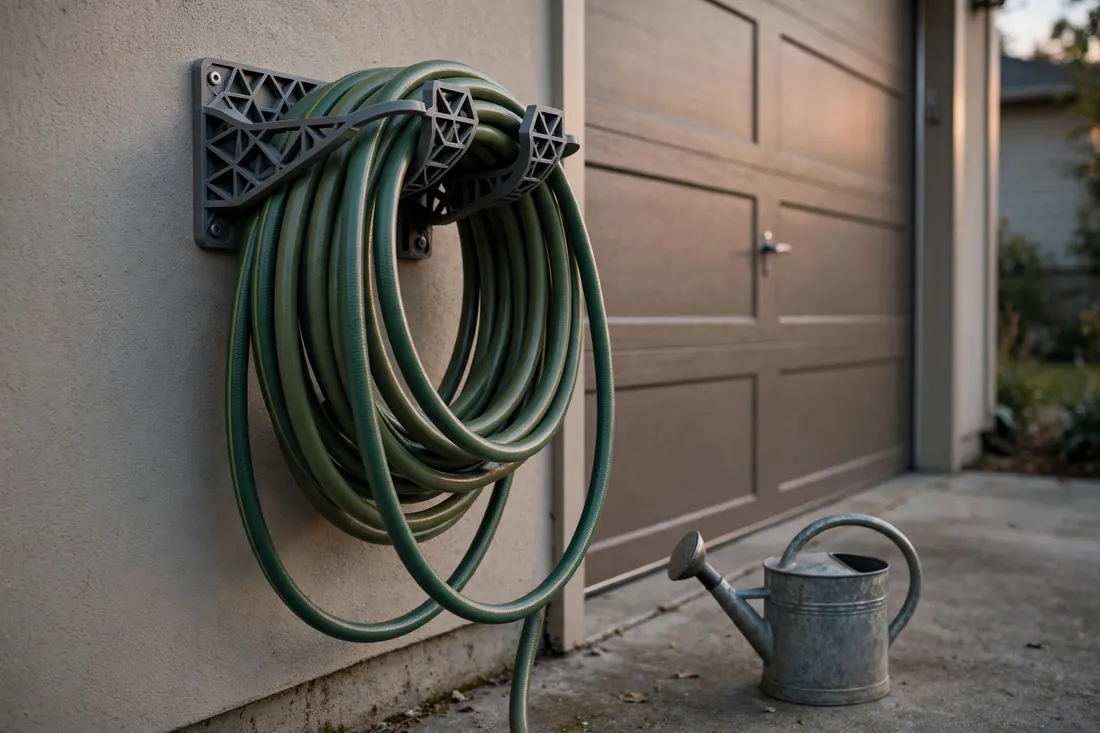
A garden hose has a talent for ending up where you do not want it: coiled across the path, kinked around the house corner, or in a tangled heap. A wall-mounted holder solves that simply. The hose rests in neat coils on a sturdy hanger, off the ground and ready to lift down in seconds. It is an ideal 3D printing project — an original design you can scale to your hose and wall.
One point needs to be stated clearly before anything else: this is a wall-mounted hanger only. The hose simply rests on it, the same way a coat rests on a hook. This design never connects to the hose or to the water supply at all. Printed parts must never be used as hose fittings, connectors, nozzles, splitters, or anything that carries water pressure — those jobs belong to properly rated, store-bought hardware, without exception. This holder does none of those jobs. It holds a resting hose, and nothing more.
This guide covers designing, printing, and mounting a heavy-duty holder that keeps the yard tidy.
What You Need
This is a bigger, stronger print than most desktop accessories. Plan for generous walls and mounting hardware that suits your wall.
Materials and tools
- A home 3D printer with a build area of roughly 180 mm or more in one direction
- ASA filament for the best outdoor life, or PETG as a very good second choice
- A tape measure, a pencil, and a level for marking the mounting position
- A stud finder if you are mounting on a framed or siding-covered wall
- A cordless drill, suitable drill bits, and a screwdriver or driver bit
- Proper screws for your wall: long wood screws for a stud, or masonry screws with matching wall plugs for brick or block
- A garden hose to measure — its diameter and total length decide the size of your holder
Skip PLA: a sunny wall can soften it, and this holder carries real weight outdoors. ASA handles sun best; PETG is close behind.
Suggested print settings
- Layer height: 0.24 to 0.28 mm keeps this large part’s print time sensible while staying strong.
- Walls: At least 5 to 6 perimeters. The saddle and mounting plate get their strength from walls.
- Infill: 40 to 60 percent, gyroid or grid. This is a load-bearing hanger, so do not skimp here.
- Top and bottom layers: 5 or more, especially on the mounting plate.
- Orientation: Print with the mounting plate flat on the bed and the saddle opening upward, so layer lines run along the load.
- Supports: A gently curved saddle should need few or none.
Design Considerations
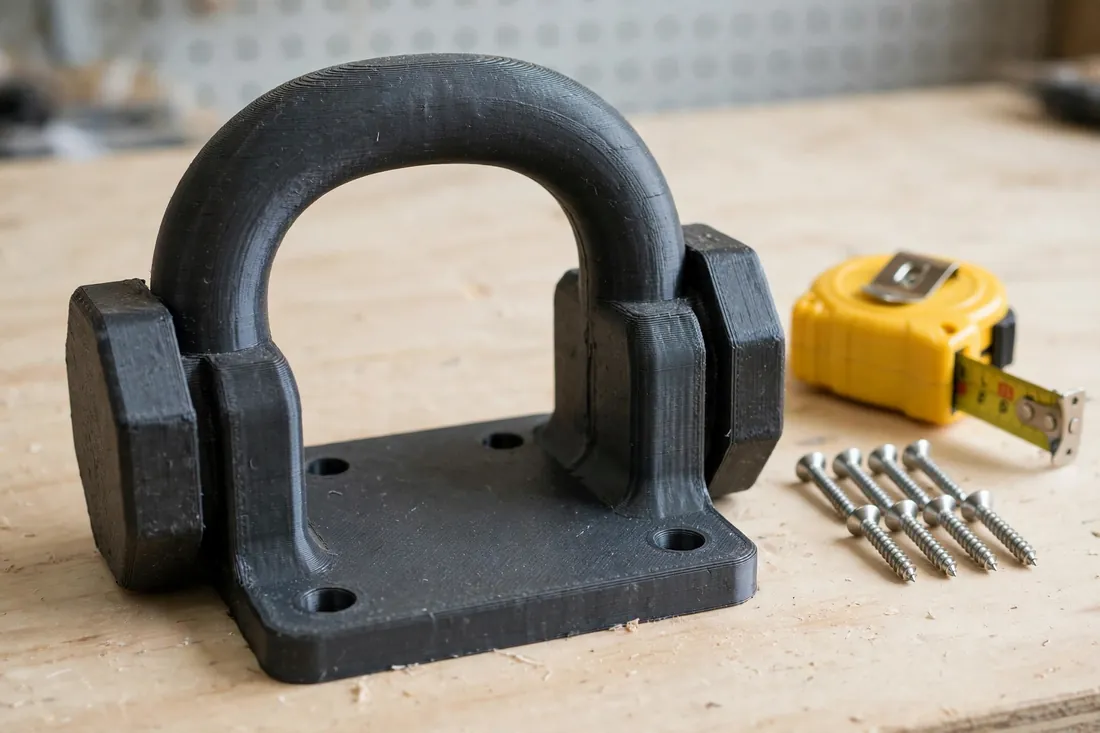
You can model this holder in any basic CAD program, including free browser-based tools. Think of it as three parts working together: a flat mounting plate, two strong side cheeks, and the wide curved saddle between them.
1. A wide saddle radius so the hose does not kink
The saddle is the curved surface the hose actually rests on, and its shape decides whether your hose stays healthy. A narrow or sharp support forces the hose into a tight bend, and tight bends become permanent kinks that choke off flow and weaken the hose wall over time.
Give the saddle a wide, generous radius — the curve of a large dinner plate, not a coffee mug. A saddle about 100 to 140 mm front to back, with a smooth continuous curve and no sharp transitions, lets the hose settle into broad, relaxed loops. Round every edge the hose touches.
2. A strong mounting plate and side cheeks
The mounting plate spreads the load against the wall. Make it generous — around 120 to 150 mm tall and 100 mm wide — with four screw holes near the corners, and 6 to 8 mm thick to stay flat and rigid.
The side cheeks connect plate to saddle and carry the weight of a full, wet hose — heavier than most people expect. Keep them thick, add smooth fillets where they meet the plate and saddle, and avoid cutouts in load paths. A small upturned lip at the front helps coils stay put without trapping them.
3. Scaling the design for hose length
A short 15-meter hose and a long 30-meter hose need very different holders. More hose means more coils, and more coils need a saddle that projects farther from the wall and cheeks spaced to hold a deeper stack.
Coil your hose on the ground in the loops you want to hang, measure the stack depth, and size the saddle projection to match with room to spare. For a typical 15 to 25-meter hose, about 180 to 220 mm of projection works well. Scale the saddle for a longer hose, not your screw pattern.
4. Outdoor materials and weather details
Outdoors, sunlight is the long-term enemy of plastic. ASA resists ultraviolet light best and is the first choice for a sunny wall. PETG also does well outside and resists moisture.
Add weather-friendly details: a slight slope on top surfaces so rain runs off, no pockets that trap water and dirt, and smooth surfaces that rinse clean.
Step-by-Step: Printing and Assembly
- Measure your hose. Note its diameter, coil it in natural loops, and measure the depth of the coiled stack.
- Measure your wall space and choose a height where the bottom loop clears the ground and you can lift the hose off comfortably.
- Model the holder: mounting plate, two thick cheeks, and the wide-radius saddle, sized from your measurements above.
- Slice it with strong settings — extra walls and 40 to 60 percent infill — and check for thin spots at the cheek joints.
- Print the holder in ASA or PETG, and let this long print cool fully.
- Clean it up. Remove any supports, lightly sand the saddle until it feels completely smooth, and clear the screw holes.
- Do a dry load test. Prop the holder securely, coil the hose on, and leave it loaded for a day. Look for flexing or layer separation; if it struggles, add walls and reprint.
- Check the saddle by hand. Smooth is kind to hoses; sand any rough ridges.
There is no other assembly. One solid print, properly mounted, is the whole project.
Step-by-Step: Mounting and Hanging Your Hose
- Choose the spot. Near the faucet is convenient, but the holder never connects to the faucet or hose ends — it is purely a place for the coiled hose to rest.
- Find solid fixing. On a framed wall, use a stud finder and plan to drive screws into a stud. On brick or block, mark solid masonry, avoiding mortar joints where you can.
- Hold the holder in place, level it, and mark all screw holes. Check clearance for the ground, paths, and doors.
- Drill pilot holes suited to your wall and screws — into the stud for timber framing, or to the depth your wall plugs need in masonry.
- Drive the screws through the mounting plate, snug and even, alternating corners so the plate pulls flat against the wall without twisting.
- Test the mount with a firm downward pull by hand. It should feel completely solid.
- Hang the hose in broad, even coils over the saddle, letting each loop settle naturally rather than forcing tight turns.
- Leave both hose ends loose, resting with the coils. Nothing attaches to the holder — just lift the coils off when you need the hose.
Tips for Better Results
- Hang the hose in big loops. Broad loops on a wide saddle mean fewer tangles and no new kinks.
- Mount it a little higher than feels necessary. A loaded hose sags, and the bottom loop hangs lower once wet and heavy.
- Use stainless or coated outdoor screws. Indoor screws rust quickly outside and can stain the wall.
- Rinse the holder. Grit between hose and saddle acts like sandpaper.
- Check the mount each spring. A quick tug catches loosening.
Common Mistakes to Avoid
- Making the saddle too narrow. A skinny holder saves filament and ruins hoses, kinking them at the sharp bend.
- Skimping on walls and infill. A full hose is heavy, and a flexing holder will creep and crack over a summer.
- Mounting into siding or render only. Screws need a stud or masonry fixing; surface layers will not hold a loaded hose.
- Using PLA for a sunny wall. Heat and sunlight are unkind to it, and this is the wrong project to learn that on.
- Treating the holder as anything more than a hanger. It must never be adapted into a fitting, connector, nozzle, splitter, or any part that carries water pressure. If a job involves pressurized water, use properly rated store-bought hardware — always.
Care, Storage, and When to Choose an Alternative
Care is minimal: rinse off dust now and then, check the screws each spring, and look over the saddle for cracks once a season. ASA and PETG holders shrug off rain and sun for years.
For winter storage, drain the hose fully, let it dry, coil it, and store it in a garage or shed out of freezing temperatures. The empty holder can stay on the wall — it has nothing to freeze or drain. Avoid leaving a water-filled hose hanging in freezing weather.
Sometimes a different solution suits better. Very long, heavy hoses may be happier on a wheeled reel cart. With no suitable wall, use a freestanding stand instead of a weak mount. A quality metal hanger is also a fair alternative if your printer is too small. For a typical home hose and a solid wall, though, a printed holder sized to your setup is hard to beat.
FAQ
How much weight can a 3D printed hose holder carry?
With generous walls, 40 to 60 percent infill, and ASA or PETG, a holder this size comfortably carries a typical home hose, including its weight when full of water. The mount matters as much as the print: screws into a stud or sound masonry make it trustworthy. Always do the loaded dry test first.
Can I connect the hose to the holder, or print fittings to go with it?
No. The holder is a hanger only. It never connects to the hose, faucet, or water supply, and printed parts must never be used as fittings, connectors, nozzles, splitters, or anything that carries water pressure. Use properly rated store-bought hardware for the water path.
What is the best filament for outdoor use?
ASA is the first choice for its ultraviolet and weather resistance. PETG is a close second and easier to print. Avoid PLA outdoors here, since heat on a sunny wall can soften it.
How big should I make the holder for my hose?
Start from your own hose. Coil it in broad loops, measure the stack depth, and give the saddle a little more projection than the stack needs. For most 15 to 25-meter hoses, about 180 to 220 mm with a wide, smooth saddle works well.
Conclusion
A tidy yard comes down to giving everyday things a proper home, and the hose is the worst offender when it lacks one. A heavy-duty printed holder — wide saddle, strong mount, weather-ready material — turns a tangled heap into neat coils you can lift down in seconds, as a simple hanger your hose just rests on.
Measure your hose, print it solid, and mount it into something real.
If you enjoy small printed upgrades outdoors, you may also enjoy our related guide, “3D Printed Rain Gauge Holder and Garden Marker Set for a Tidy Yard,” which pairs naturally with this holder.