Introduction
Wallpaper rewards patience and punishes shortcuts, and nowhere is that clearer than at the seams. You can hang a strip beautifully, step back pleased, and return an hour later to find the edges lifting, a seam grinning open, or a ridge of paste squeezing out where you pressed too hard with the wrong tool.
Most seam trouble comes from the tool, not the paper. Fingernails crease and tear. The edge of a smoother digs in and stretches wet paper. A hard, narrow roller concentrates force on a thin line and can split a seam or push paste out from under it, leaving a shiny track that shows forever.
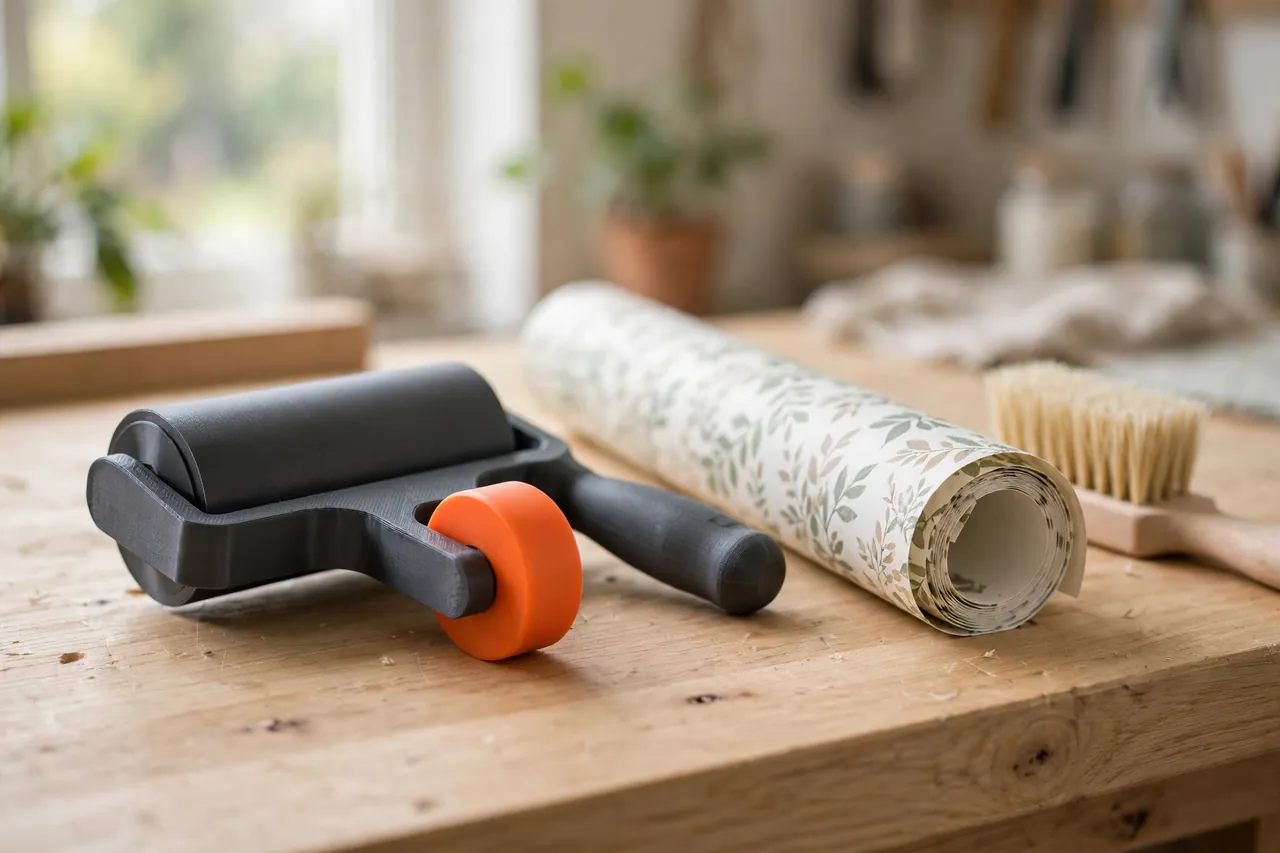
A 3D printed wallpaper seam roller lets you shape the tool to the job: a smooth wheel with a gently crowned, rounded profile that presses a seam down across its width instead of slicing along it. Add a comfortable fork handle and a simple axle, and you have the paperhanger’s quiet essential — printed to the width your paper and seams actually need.
This guide covers designing, printing, and using the roller for seams, edges, and borders. It is a light hand tool for pressing paper, nothing more: all of the real holding is done by the paste, exactly as it should be.
What You Need
The roller is three simple parts — a wheel, a forked handle, and an axle — and prints quickly on any home machine.
Materials and tools
- A home 3D printer with a build area of roughly 120 mm in at least one direction
- PETG filament for the wheel and handle; PLA is acceptable for light use
- A short steel rod, bolt, or screw about 4 to 5 mm thick for the axle, plus a nut if needed
- The wallpaper you are hanging, or an offcut, for profile testing
- Calipers or a ruler to size the wheel and axle
- Fine sandpaper, around 400 grit and finer, for smoothing the wheel’s rolling surface
- A screwdriver or wrench to suit your axle hardware
PETG is the better choice for the wheel: it resists the moisture in wallpaper paste, shrugs off repeated washing, and its slight flex is kind to wet paper. PLA works for a trial roller but can soften in a hot room and will not love being rinsed after every session.
Suggested print settings
- Layer height: 0.16 to 0.20 mm; finer layers on the wheel mean less sanding later.
- Walls: 4 perimeters on the wheel for a solid, true rolling surface.
- Infill: 40 to 60 percent on the wheel so it feels dense and rolls without flex; 25 percent is fine for the handle.
- Top and bottom layers: 4 or more, especially where the wheel meets the fork.
- Orientation: Print the wheel flat on its side so layer lines run around the rim evenly; print the handle flat as well.
- Supports: None if the fork is designed with flat, self-supporting arms.
Print a test wheel first and roll it across scrap paper before committing to a final set — roundness and surface finish matter more here than anywhere else.
Design Considerations
A seam roller looks trivial, which is exactly why the details decide whether it glides or gouges. Three choices do most of the work.
1. The wheel profile
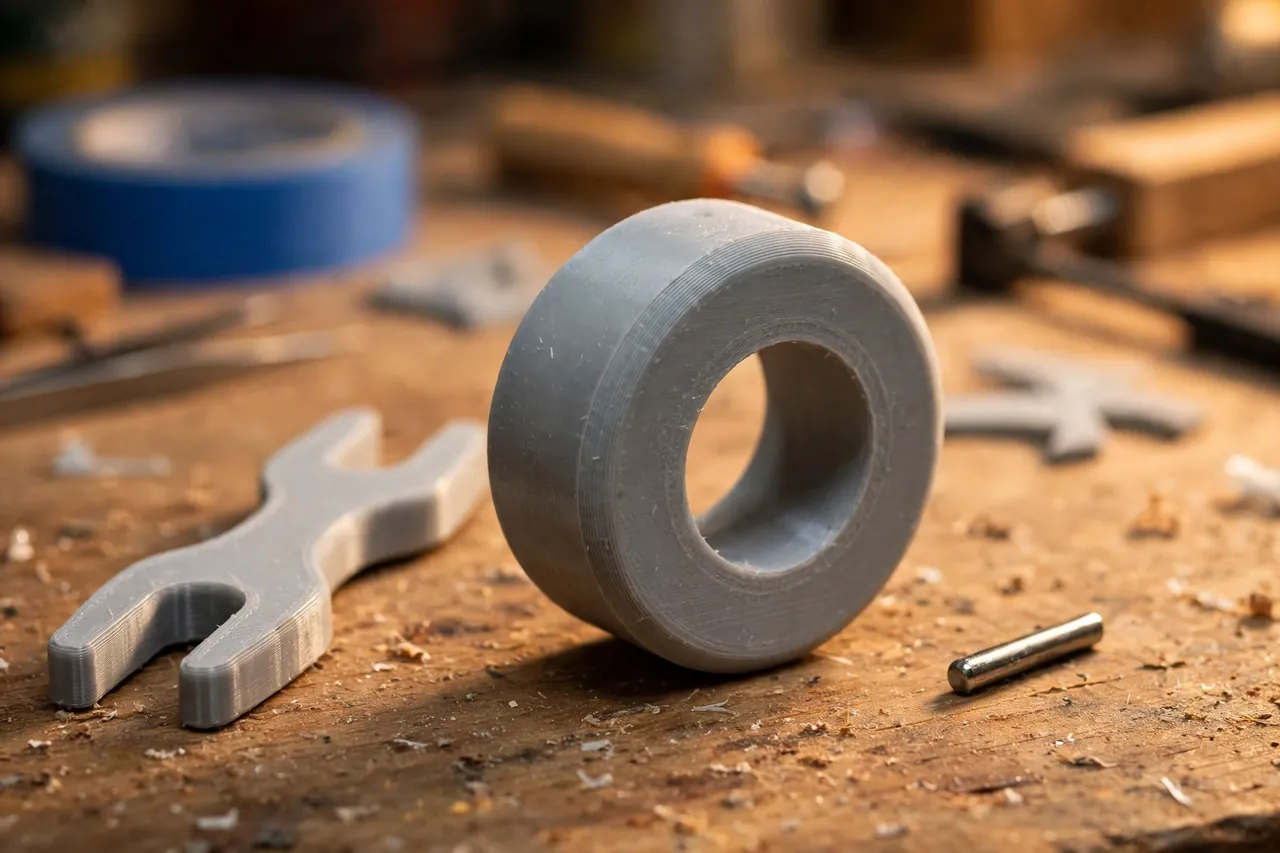
The profile is the whole tool. A flat-faced wheel concentrates pressure at its edges and can emboss two shiny lines into the paper. Instead, crown the face very gently and round the edges generously, with an edge radius of roughly 3 to 5 mm. The wheel then contacts the seam across a soft band, pressing the joint closed without cutting. A width of 30 to 45 mm suits most seams; a narrower 20 to 25 mm wheel is handy for borders, inside corners, and around trim.
2. The axle and fork clearance
Size the wheel’s center hole about 0.3 to 0.5 mm larger than your axle so it spins freely but does not wobble. Leave about 0.5 mm of side clearance between the wheel and each fork arm. A roller that binds will skid instead of rolling, and a skid drags wet paper sideways — the exact fault you are trying to avoid. A tiny recess for the axle head and nut keeps hardware from rubbing the wall or the paper’s face.
3. Handle shape and grip
The handle only needs to transmit gentle hand pressure, so comfort beats bulk. A palm-friendly grip about 100 to 120 mm long keeps your hand relaxed through a whole room. Angle the fork so the wheel trails naturally behind your hand as you pull the roller toward you. Round the fork tips so a bump never dents fresh paper.
Step-by-Step: Printing and Assembly
- Choose your wheel width based on the job: standard seams, or narrow work for borders and corners.
- Model the wheel with a crowned face, rounded edges, and a center hole sized to your axle with slip clearance.
- Model the fork handle with arms spaced for the wheel plus a little side play, and recesses for the axle hardware.
- Print the wheel on its side and check it rolls true on a flat surface with no visible wobble.
- Sand the rim lightly with fine paper, working around the circumference, until it feels uniformly smooth to a fingertip.
- Assemble the roller: wheel between the fork arms, axle through, hardware snugged so the wheel spins freely.
- Spin-test it. Flick the wheel; it should coast briefly and stop without a tight spot.
- Roll a test seam on a pasted offcut and inspect: even pressure, no skid marks, no paste forced out.
Step-by-Step: Using the Seam Roller on Wallpaper
- Hang and position the strip first, using your smoother to work from the center outward and expel air, as usual.
- Wait for the seam to settle. Rolling a swimming-wet seam invites stretched paper; a few minutes of tack makes the joint behave.
- Align the wheel on the seam with the joint centered under the crown of the wheel.
- Roll toward you in one steady pass, using light, even pressure — the weight of your relaxed hand is nearly enough.
- Lift, do not twist, at the end of the pass. Twisting a loaded wheel sideways can wrinkle or tear wet paper.
- Check the seam by fingertip. It should feel flat and closed, with no ridge of paste standing along it.
- Wipe any squeezed paste immediately with a barely damp sponge, before it dries into a shiny line.
- Roll edges and borders last, switching to the narrow wheel around outlets, trim, and inside corners.
- Re-check seams after an hour. Paper shrinks slightly as it dries; a gentle second pass on a lifting edge often saves it.
Tips for Better Results
- Less pressure, more passes. Two light passes close a seam better than one hard squeeze, and never force paste out.
- Keep the wheel scrupulously clean. A single dried paste lump on the rim embosses a repeating mark down the whole seam.
- Match the wheel to the paper. Delicate, textured, or foil papers get the widest, softest crown and the lightest touch — or no rolling at all on fragile faces.
- Roll seams on vinyl with a touch more confidence, but still stop at the first sign of paste appearing at the joint.
If wallpapering is part of a bigger painting and decorating push, you may also enjoy our related guide, “3D Printed Paint Brush and Roller Holders: Keep Your Painting Tools Ready Between Coats,” which keeps the rest of the kit tidy between sessions.
Common Mistakes to Avoid
- Rolling too hard. Crushed seams and shiny paste tracks come from force, not from the paper. Ease off.
- Rolling too soon. A freshly pasted, sliding seam will stretch and drift under the wheel. Let it take hold first.
- Using a sharp-edged wheel. Square edges slice and emboss; if your print came out that way, sand a real radius into it.
- Skipping the offcut test. Every paper behaves differently; thirty seconds on scrap tells you the pressure it wants.
- Letting paste dry on the wheel. Rinse or wipe the roller at the end of each session, not the start of the next one.
Care, Storage, and When to Choose an Alternative
Rinse paste from the wheel and fork with plain water, dry the axle area, and store the roller hanging or wheel-up in a drawer. PETG shrugs off this routine for years. Check the rim occasionally for nicks; a quick pass with fine sandpaper restores it, and a reprint of just the wheel is a half-hour job.
Know when to reach for a bought tool instead. Production paperhangers covering large commercial areas may prefer the weight and bearings of a machined roller, and some specialty papers — grasscloth, delicate silks, true metallics — should not be rolled at all, whatever the tool is made of. For ordinary vinyl and paper in home rooms, a well-printed roller does the same gentle work at a fraction of the cost. The technique transfers, too: our guide, “3D Printed Screen Spline Roller: Re-Screen a Window Like a Pro,” uses the same fork-and-wheel thinking for a completely different job.
FAQ
Can I print the wheel in PLA instead of PETG?
For a room or two, yes, especially if you keep it dry and rinse it promptly. PETG is simply the safer keeper: paste moisture, frequent washing, and warm rooms are all unkind to PLA over time.
Why does my seam show a shiny line after rolling?
That shine is paste squeezed onto the paper’s face, almost always from rolling too hard or too wet. Wipe it while fresh with a barely damp sponge. On the next seam, lighten the pressure and give the joint a few more minutes to set before rolling.
Should the wheel be hard or slightly soft?
Hard and smooth, with shape doing the kindness: the rounded, crowned profile spreads pressure so a firm wheel never cuts.
Can I use this roller on seams I am repairing rather than new paper?
Yes, and it is ideal for it. Lift the loose edge carefully, work a little paste beneath it, let it tack, then roll from the sound paper toward the edge. Small repairs are where a narrow printed wheel earns its keep.
Conclusion
Good seams are not a talent; they are the predictable result of a rounded wheel, light pressure, and decent timing. A 3D printed wallpaper seam roller gives you the first of those for pennies, sized to the paper you actually hang, and it turns the fiddliest part of papering into a calm, repeatable pass.
Print a standard wheel and a narrow one, keep them clean, and let the paste do the holding while the roller simply persuades.
For the finishing work that usually happens in the same session, our guide, “3D Printed Putty Knives and Spreaders: Flexible Blades for Filler and Spackle,” covers the printed blades that make wall prep before papering far less tedious.