Introduction
Patio door handles live a hard life. They are pulled sideways thousands of times, often with a plate in the other hand, and the thin cast or plastic pull eventually cracks at its fixings or snaps at the grip. After that, sliding the door becomes a fingernails-on-the-edge ritual that everyone in the house hates.
Replacing the whole handle set sounds simple until you measure it. Sliding doors use a bewildering range of fixing spacings, and the matching set for an older door may be discontinued, expensive, or only sold as a complete lock assembly you do not need. The door itself, its track, and its latch usually still work fine.
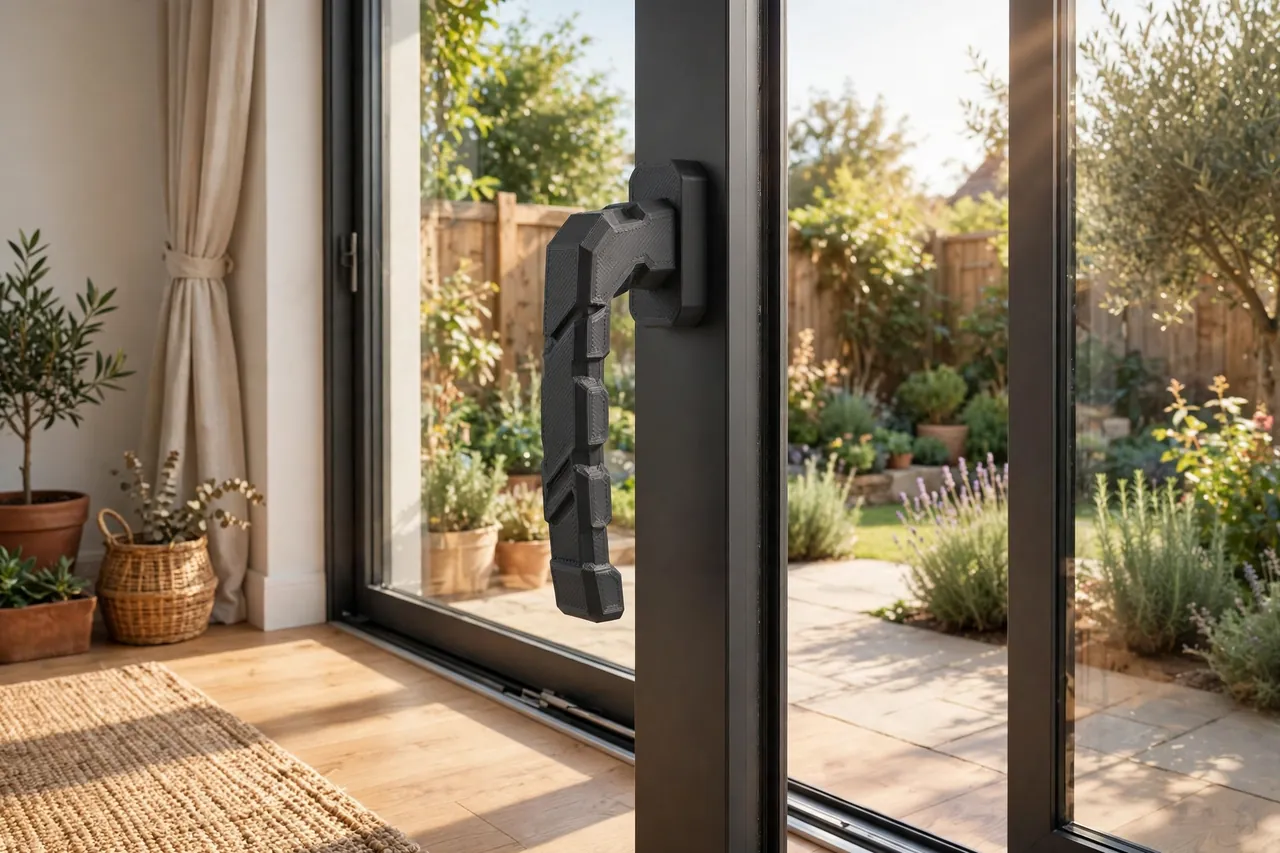
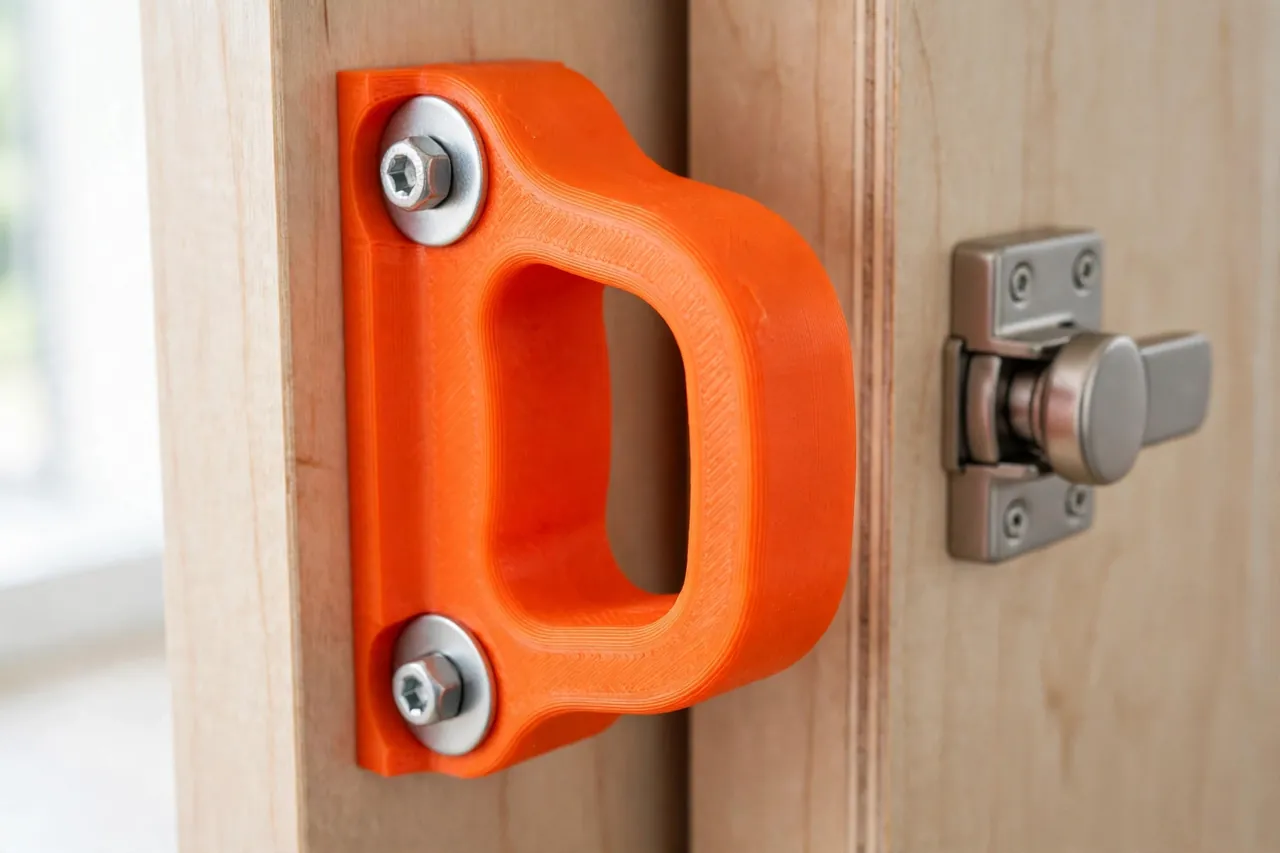
A 3D printed sliding door pull replaces the grip and only the grip. It is a pull handle only — it does not lock anything. You measure your door’s existing fixing holes, print a sturdy pull that bolts through them with proper hardware, and the door glides again on a handle shaped for a real hand.
This guide covers measuring the door, designing a pull that spreads its load, printing it at full honest strength, and fitting it alongside — never instead of — the door maker’s latch.
What You Need
The pull succeeds or fails on its fixings, so this project needs real bolts, not just plastic. Gather the hardware first and design around it.
Materials and tools
- A home 3D printer able to print a pull around 150 to 200 mm long, or a design split sensibly
- PETG filament for a strong, weather-tolerant pull — ASA is an option for very sunny doors if you print it already
- Two machine bolts of the correct thread and length for your door, with wide washers or a backing plate
- The door’s existing handle fixings or holes, measured — or the broken pull itself as a template
- Calipers and a tape measure for fixing spacing, stile width, and grip clearances
- A drill if new holes are genuinely needed, plus a screwdriver or hex key to suit your bolts
- A pencil and masking tape for marking, plus sandpaper for finishing
- Optional: thread-locking compound suitable for your bolts, used sparingly
PETG is the workhorse choice: tough under a sideways pull, unfazed by sun through glass, and forgiving to print in a long part. Avoid PLA here — a sun-baked patio door is exactly the warm spot where PLA softens and creeps under bolt pressure.
Suggested print settings
- Layer height: 0.20 mm for a good finish on a long, visible part.
- Walls: 6 perimeters or more. A door pull is a strength part within its honest job, and walls carry the pull.
- Infill: 60 to 80 percent gyroid, especially solid around the bolt bosses.
- Top and bottom layers: 5 or more for a smooth, hard-wearing grip surface.
- Orientation: Print the pull lying on its back so layer lines run along its length and around the grip, never across the fixing bosses.
- Supports: A pull with a flat back and a simple arched grip should need little or none.
Print a short test section around one bolt boss first, and confirm your bolt and washer sit correctly.
Design Considerations
A sliding door pull takes a peculiar load: a sideways drag, repeated daily, concentrated through two bolts into a narrow door stile. Design spreads that load and gives the hand a generous target.
1. Measure the door before the handle
Record the fixing hole spacing center-to-center, the hole diameter, the stile’s width and thickness where the pull mounts, and how far a grip can project before it fouls the fixed panel or the door frame as the door slides past. That last clearance is the one everyone forgets, and it decides your grip’s maximum depth. If your broken pull survives, measure it too — but trust the door’s holes over the broken part’s promises.
2. Give the hand a deep, honest grip
A pull you grab with a whole hand, not fingertips, transforms a heavy door’s feel. Aim for a grip opening at least 25 to 30 mm clear of the door face, a grip bar around 25 mm in comfortable diameter or equivalent rounded section, and a length your hand finds without looking — 120 mm or more of usable grip. Round every edge, and slightly flatten the grip’s inner face so the pull does not roll in the hand as the door starts to move.
3. Spread the bolt load like you mean it
Printed plastic fails at bolt holes when the load concentrates. Make each fixing boss wide — at least three times the bolt diameter across — with the hole surrounded by solid perimeters, and use wide washers or a printed or metal backing plate on the door’s other face so the pair of bolts clamp the stile rather than prying at two small points. Sleeve the bolt holes if your design allows, so tightening torque bears on the sleeve, not on creep-prone printed walls. Tighten firmly and evenly, then recheck after the first week of use.
4. Keep the pull and the lock in separate jobs
Be completely clear about the division of labor. This pull moves the door. It is a pull handle only — it does not lock anything, latch anything, or secure anything. For the door’s locking latch and security, use the door maker’s hardware, kept working and fitted as they specify. If your door’s original combined handle-and-lock unit failed in its locking half, replace that unit with the maker’s assembly; print a pull only when the latch itself is a separate, sound, manufacturer part that remains in place doing its own job.
Step-by-Step: Printing and Assembly
- Measure the door — fixing spacing, hole size, stile dimensions, and the sliding clearance past the frame and fixed panel.
- Choose your bolts and washers to suit the holes and stile thickness, with length to clamp through a backing plate.
- Model the pull — flat back plate, generous bosses around each hole, and a deep rounded grip within the clearance you measured.
- Print a boss test if needed and confirm the bolt, washer, and sleeve arrangement seats cleanly.
- Print the full pull in PETG with the settings above, lying on its back.
- Clean the bolt holes by hand to an easy sliding fit for the bolts — the clamp does the holding, not a threaded print.
- Finish the grip with a light sand so the hand meets smooth, rounded surfaces everywhere.
Step-by-Step: Using the Sliding Door Pull
- Remove the broken pull, keeping any sound original bolts, and clean the mounting face of the stile.
- Offer the new pull up to the holes and confirm alignment before any bolt is tightened.
- Fit bolts through the pull, the stile, and the backing plate or wide washers, starting both bolts loosely.
- Tighten evenly, alternating between bolts, until the pull sits flat and firm with no rocking — firm, not crushing.
- Slide the door through its full travel, checking the grip clears the frame and fixed panel everywhere, and that the manufacturer’s latch engages exactly as it did before.
- Test the pull as the household will use it — a one-handed sideways drag with the door at its heaviest, sticky-track worst. It should feel boringly solid.
- Recheck bolt tightness after a week, and again at the change of seasons, as printed parts settle into their clamp.
If the door itself runs roughly, fix that first or alongside — our related guide, “Sliding Door and Window Track Guides: 3D Print Replacement Guides and Stops,” covers the printed guides that keep the panel running true in its track.
Tips for Better Results
- Print a matching pull for both faces of the door if the original design had them.
- Match the door’s color or go deliberately contrast — both read as designed, not repaired.
- Make the grip slightly longer than the original if your fixing spacing allows it. Hands notice length most.
- Photograph the original fixing layout before removal, as your way back if anything surprises you.
Common Mistakes to Avoid
- Asking the pull to lock the door. It cannot and must not. Locking and security stay with the door maker’s hardware, always.
- Forgetting the sliding clearance. A deep, comfortable grip that strikes the frame halfway through the door’s travel is worse than the broken pull was.
- Tightening bolts into bare printed holes with no washers or backing. Concentrated clamp loads creep and crack bosses; spread them.
- Printing in PLA for a sun-facing door. Heat through glass softens it exactly where the bolts bear. PETG is the minimum here.
- Trusting the broken pull’s measurements over the door’s actual holes. Doors do not lie; cracked castings do.
Care, Storage, and When to Choose an Alternative
Wipe the pull down with the door cleaning and check bolt firmness seasonally. Re-tighten any movement promptly. If the grip cracks, replace the pull and check the track and rollers.
Choose the door maker’s hardware whenever the failure is bigger than a grip. A failed locking latch, any security function, a damaged stile, or a door under warranty all call for the manufacturer’s assembly. Within its honest job — a broken grip on a sound door — the printed pull is a lasting repair.
FAQ
Does this pull replace my door’s lock as well?
No — and it must not try. The pull only moves the door. The locking latch and all security functions remain the door maker’s hardware. If the lock itself has failed, replace it with the maker’s assembly.
How strong does the print need to be?
Stronger than most organizers: six or more walls, high gyroid infill, generous bolt bosses, and proper washers or a backing plate. Printed this way in PETG, a pull handles the daily sideways drag of a patio door comfortably.
My door is getting heavy to slide. Will a bigger pull help?
It will help your hand, but the heaviness is the door asking for attention — clean the track and check the rollers and guides first. A new pull on a struggling door just lets you force it harder.
Can I use the same approach for other door handles?
For simple pulls and grips, yes — the measure-the-fixings, spread-the-load method travels well. Our related guide, “Custom Drawer Pulls and Cabinet Knobs: 3D Print Matching Replacement Hardware for Old Furniture,” applies it at furniture scale, and “Door Stops That Work: 3D Print Hinge-Pin and Floor Door Stops for Every Room” rounds out the door hardware you can sensibly print.
Conclusion
A broken patio door pull makes a whole doorway feel broken, and the repair is smaller than it looks: a sturdy printed grip, bolted properly through the door’s own fixings, with the maker’s latch left entirely alone to do the locking.
Measure the door, spread the bolt load, and print it strong in PETG. The door will glide on a handle that fits your hand exactly.